DIY pencil case
Stocks of soap and washing powder, cans of canned goods, various household trivia - but are there any items in the apartment that are needed, but constantly interfere if you do not find a permanent place for them? Not every house has a niche or mezzanine that can be adapted for such purposes. There is always a way out. A do-it-yourself pencil-case can be made in the kitchen, in the bathroom, and in the corridor. The subtleties of this work, we now discuss.
to contents ↑What is a pencil case?
The pencil case was originally called a long box for pens and pencils, which was used by all students. Then this name was picked up by furniture manufacturers. In shape this product resembles a school box, only a very large one and standing upright.
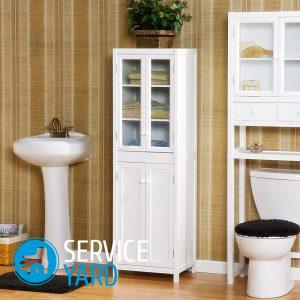
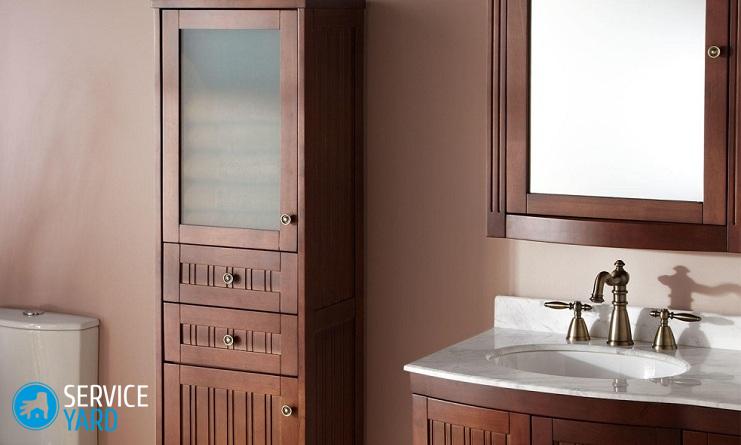
Pencil case in the bathroom with your own hands is done in the same way as in the kitchen. A narrow tall cabinet with many shelves. Sizes can be any.
to contents ↑Important! The advantage of homemade furniture lies in the fact that you can choose the most unnecessary corner and make a cabinet that fits exactly there. But among factory products, even modular, nothing of the kind may not be found.
What to make a cupboard in the bathroom?
There is some difference between products intended for the kitchen and bathroom. The kitchen, of course, also refers to rooms with high humidity and temperature changes, but in the bathroom it is much more noticeable, especially humidity. Therefore, to make a pencil case in the bathroom with your own hands will have to be from materials that meet certain requirements:
- well tolerate water;
- easy to clean;
- not inclined to change shape from high temperatures;
- Do not collapse from exposure to detergents.
As a rule, such tall long cabinets are made of the following materials:
- a tree;
- Chipboard and chipboard;
- MDF;
- Plywood.
Wood
Arrays are used to make a cabinet-case in the bathroom or in the kitchen with their own hands is relatively rare. The reason is simple - there is a lot of work with them, and quite specific and requiring serious skills.
You can use any breed, but it hardly makes sense to make a similar object out of anything too expensive. Of course, an oak or beech case looks luxurious, but it will cost much more than if you make it from chipboard.
Important! Even the cheapest material can now be processed in such a way that it externally will not differ from the expensive one. You can even paint it under ebony, and in a hardware store you can easily find paint, soil or stain, which contain substances that prevent the appearance of the fungus. That is why many people prefer to manufacture a pencil case in the bathroom chipboard.

Advantages of particle board
This material is gaining popularity for a number of reasons. It is made from wood chips, compressed in a special way, with the addition of binders, which are usually used formaldehydes. Its surface is covered:
- wood veneer;
- laminate flooring.
In the second case, the result is a material that is commonly called chipboard, that is, a laminated particleboard. Very high-quality products are obtained from multilayer plywood, but this material will cost more.
Which brand to choose?
If you go to a hardware store, you will see a wide variety of chipboard and chipboard there.And inevitably the question will arise, which is better to choose in order to make a cabinet-case with your own hands, as well as other cabinet furniture. Experienced craftsmen advise grade PA. It has a number of advantages over others:
- strength;
- moisture resistance;
- resistance to mold;
- environmental friendliness;
- relatively low price;
- ease of care;
- inability to burn.
The advantages are due to the fact that it is a chipboard with a laminated coating, which makes it invulnerable to mold. The thickness is different. The best option is 18-20 mm.
to contents ↑Important! It is also important that the assortment of material of this grade is very large, so it will not be difficult to choose plates for furniture that is already in your kitchen or bathroom, as well as for decoration. The composition of the chipboard grade P-A includes a flame retardant, which prevents fire.
Let's talk about tools for assembling cabinet furniture
You first started making a pencil case in the bathroom or in the kitchen with your own hands and you don’t have any tools yet? It's okay, you can easily get them if you know what you need. For the manufacture of cabinet furniture will be very useful:
- jigsaw;
- a circular saw;
- electric drill;
- a screwdriver with a set of bits;
- Sander;
- sandpaper;
- Screwdriver Set;
- ruler;
- roulette;
- joiner's square;
- edging tape;
- wood glue;
- accessories - hinges for doors and handles, as well as fastenings for shelves;
- wood screws;
to contents ↑Important! Typically, the jigsaw is designed to cut sawboards up to 70 mm thick. This is enough for the eyes - in the most serious case, the thickness of the plate will be no more than 38 mm. Long rectangular parts are best sawed with a circular saw.
We plan work
To make a cabinet-case with your own hands, it is better to develop drawings and diagrams yourself, at least in order to understand how many details you need. On the sites dedicated to carpentry, you will find quite a lot of similar projects. But if suddenly there is nothing there that would be suitable specifically for your kitchen, you will have to solve this problem yourself:
- Decide on the size of the pencil case - measure the length and width of the angle in which your cabinet will stand.
- Measure the height - the pencil case should be the same as the rest of the cabinet furniture, if you already have it.
You will need to cut such parts for the manufacture of a cabinet-case with your own hands:
- 2 side walls;
- bottom;
- a roof;
- back wall;
- 4-6 shelves;
- overlays for edges of shelves;
- strips for fastening shelves;
- protective bar;
- racks and crossbars for the front frame;
- 4 doors.
Making a cabinet diagram
All the details of the do-it-yourself bath case, except for the back wall, which can be made of plywood, are made of chipboard. And this means - the stove will need to be cut. Regardless of whether you are going to do it yourself or order in the store, you need a scheme:
- Choose a scale.
- Draw the outline of the slab to scale.
- Draw the largest details of the bath case - on the diagram they can be located close to each other, without any gaps.
- In the empty spaces, place smaller parts.
- Put on the drawing all sizes.
to contents ↑Important! It is better to arrange cabinet parts so that the contours of some are a continuation of the contours of others - it will be easier to saw.
Where to collect a pencil case in the bathroom?
For any carpentry work you need some kind of workshop. In this case, the kitchen itself is most suitable - it is more convenient to assemble a do-it-yourself pencil case for the bathroom on the floor.
Important! The bathroom is less comfortable, even if it is spacious enough. There they will certainly disturb you. The structure is placed in an upright position when it remains only to fix the shelves and doors, and the frame is already ready and the back wall is bolted.
In the workshop should be:
- purely;
- dry;
- relatively free.
Drawing
If you did not find a suitable pencil case drawing, do it yourself.Indicate on it the dimensions of the parts, as well as the location of the accessories - hinges, shelf holders and everything else. Even if you are going to make a small cabinet-case yourself, drawing up a drawing will help you understand how the parts will be located and where you need to make additional cuts:
- Transfer the layout to the chipboard and cut strictly to size.
- Wipe the parts (dust will inevitably accumulate on them).
- Degrease them with alcohol (this can be done during assembly).
Getting started
To begin with, do-it-yourself sawn-off parts for the cabinet-case must be processed:
- Inspect them for chips and splintering.
- Grind all dubious places.
- If necessary, ruin (although this is not required when working with chipboard).
Assembling the frame
There are not so many parts of a home-made pencil case. You need to start with the body, but with what exactly? Oddly enough, with the layout of the side panels:
- Mark out loops.
- Using a hand mill, make grooves to fit the loops.
- Attach the roof and the bottom - this is done with wood glue and finish nails (sold at the furniture hardware store). If a fixed shelf is provided, put one as well.
Important! Do not forget to check the corners - a metal joiner square serves for this.
Nail the back wall
After the frame is assembled, the time comes to attach the back panel of the pencil case for the bathroom - from plywood, chipboard, and sometimes even from fiberboard (although this option is not very good for the kitchen or bathroom). For work you need:
- PVA glue or carpentry;
- galvanized nails;
- ruler;
- pencil.
Important! To keep the back wall of the pencil case with your own hands better, it must be put on glue. Then you need to fix it with carnations, after marking up the places where you will drive them (if you are not already taking up furniture for the first time, this can not be done). Cloves are driven in at a distance of about 7-10 mm from the edge (so that they fall into the end of the sidewall), at a distance of about 5 cm from each other.

Put the closet
The main element of your pencil case is ready. The following work can be done when the cabinet is in place. But before you put it in an upright position, decide what your product will stand on:
- on the legs;
- on special panels.
The legs for the cabinet-case with your own hands need to be screwed and adjusted in height so that the structure does not stagger:
- Lift the cabinet
- Put it in the right angle.
- Check stability.
- Check the angles between the elements.
- Mark the places of the shelves.
Important! When marking the shelves of the pencil case, no distortions should be allowed in the bathroom - all distances must be carefully checked.
We put fasteners
For the brackets for the shelves, prepare the holder - a metal profile. Sawing must begin from the upper end. After all the elements are ready, they are inserted into the grooves that you have already cut on the sidewalls. The holders are fixed with nails. Then, the supports for the shelves are installed so that the design of the home-made pencil case is more reliable and convenient.
Front frame and shelves
After the elements of the holder and supports took their place, you can proceed with the manufacture of the front frame of the pencil case into the bathroom with your own hands:
- Saw the frame racks according to your drawing.
- Attach them to the body with the help of finishing nails (you can also put them on glue).
- Cut the bars - their length is equal to the distance between the racks.
- Fasten them with butt nails with uprights.
- Fix the structure with finishing nails.
Important! Shelves should be shorter than the opening by about 3 mm, do not forget to take into account the thickness of the edge tape.

Finish
The last element in creating a do-it-yourself pencil-case is doors and accessories. But before you put them, you need to put in order what is already ready. Sand all surfaces with sandpaper:
- Cut out solid panels for the doors - they should be 1 cm longer than the opening on each side.
- Mark the hinges on the doors and sides.
- Check all angles and distances.
- Fix the hinges with screws first on the doors, then on the uprights.
What to finish?
In any hardware store you will find several types of self-adhesive film. Choose one that harmonizes with the rest of the furniture so that your new do-it-yourself pencil case changes. This is the easiest and most reliable way to finish your product:
- After all the surfaces are glued, screw the handles.
- Check how smoothly the doors open and close.
- Check for slack and distortions, as well as the reliability of the fasteners.
to contents ↑Important! If the cabinet is tall, it is better to attach it to the wall, and for the structure under the ceiling, make one of the shelves bearing.
Stock footage
In short, the manufacture of a do-it-yourself pencil case is a laborious, but interesting and affordable job. If there is an angle that could not be used otherwise, a narrow pencil case will be very useful. You can make an angular structure, even without one side wall.
 (No ratings yet)