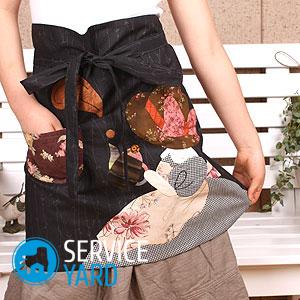
DIY apron for a child

Many of you are faced with a situation where a child urgently needs an apron for duty at school or at work lessons, or just to surprise a little helper. In small cities or towns, buying it is sometimes very difficult, and sometimes impossible. Naturally, you can order in the studio to sew an apron for you there, but for this you will need time, and if the question is also the price, then a more appropriate option is to sew a children's apron with your own hands. Given the fact that not everyone has a sewing machine, the following recommendations will be very useful for many of you and will help you quickly and easily make an original and bright gift for your beloved child. Everything that will be necessary for work, you may well find at home. Therefore, the costs will be minimal.
to contents ↑For sewing you will need such materials:
- A piece of fabric for the base of the product.
- Fabric for the wrong side.
- Paper.
- Pencil or crayon.
- Centimeter or long ruler.
- Scissors.
- Needles.
- Threads.
- Fabric for applique.
- Carbon paper.
- Pins
- Thread floss black.
- Satin ribbon.
Child measurement
Measure the distance between the armpits (mark 1) and then the waist circumference (mark 2), as well as the distance from the clavicle to the waist line (mark 3).
to contents ↑Important! If you want the apron to be tied at the back, then measure the circumference of the entire waist. But if you want to tie a beautiful bow on the back, then it is better to leave a free zone, for this, take about 7 cm from your measurement.
Creating a pattern:
- To get started, take a piece of paper, its size should be such that fits the width of our apron (label 2).
- Then fold the sheet in half. The bend line will be the center line from which we will continue to work.
- Then, at the top of this line, measure the height of the chest part of the product that you need (mark 3) and draw a line.
- Next, from the bottom of mark 3, draw a horizontal line that will go perpendicular to the one you drew before (mark 3).
Important! Check with a square ruler perpendicular.
- Now we measure the mark 2 on the perpendicular line - this will be the width of the apron.
- From the center, measure to the right half of mark 2 and in the same way to the left.
- The next step is to measure the width of the chest section - for this, find the center of the chest zone.
- From this point, measure half of the mark 1 both to the right and to the left. And now draw the rounded outlines of the apron according to your marks. At the same time, make the hem line a little slanting to the sides. Length is up to you.
to contents ↑Important! Do not try to draw the same lines both on the right and on the left, it is very difficult. All the same, in the end, we will leave one half of the pattern, which will turn out better.
Cut out the details of a children's apron with your own hands:
- Fold the fabric in half. And then overlay the pattern along the contour of the bend and secure with pins.
- Circle the pattern with a pencil or crayon and cut along the contour.
- Repeat the same procedure on the inside of the apron.
- After that, cut out the ties or cut the satin ribbon of the length you want.
to contents ↑Important! The width and length of the ties is done at your discretion.Consider the fact that the width of the tie will be folded in half and about 1 cm will go to the seam if you decide to sew them yourself.
Sewing an apron:
- Fold the parts of the apron facing each other.
- Next, along the waist line, insert satin ribbons or made your own ties and fix with pins.
- Now just use the machine or carefully sew these halves with your hands.
Important! Do not flash the top of your product.
- After that, twist the creation and sew a satin ribbon at the top of your apron.
Production of application:
- First you need to make a template for the application. To do this, print any picture you like in A4 format (for example, a bear). Use a carbon paper and transfer the bear’s pattern to the fabric.
- Then cut out your applique. Separately cut out the ears, sew them on the wrong side and twist.
- Next, embroider the eyes, nose and mouth on your applique using thread floss.
- Take the finished muzzle to the apron, substituting the ears.
- Now with the help of decorative stitches sew the applique on the apron made by yourself.
Done!
to contents ↑Stock footage
In such a simple way and at little cost, we sewed a children's apron with our own hands. Please your child with this work!
- How to choose a vacuum cleaner taking into account the characteristics of the house and coatings?
- What to look for when choosing a water delivery
- How to quickly create comfort at home - tips for housewives
- How to choose the perfect TV - useful tips
- What to look for when choosing blinds
- What should be running shoes?
- What useful things can you buy in a hardware store
- Iphone 11 pro max review
- Than iPhone is better than Android smartphones


