

DIY shelving
How to assemble a rack with your own hands - many are thinking. Task number one for those who equip their homes and want to have not only a beautiful, but also the most functional interior - where it is compact to place a large number of things. Especially in a small apartment, because bulky cabinets visually make the space even smaller.
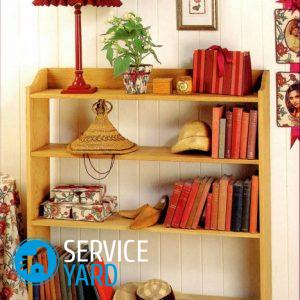
An ordinary bookcase can really be a real lifesaver. He has long migrated from garages, balconies and utility rooms to apartments, has become not only convenient, but also a very stylish piece of furniture. You can go the simple way - to buy ready-made goods, the choice in furniture stores is wide enough. And you can put on an individual and make a rack with your own hands. He is able to become a real decoration of the interior, especially if you connect your imagination and show creativity.
to contents ↑The main types of structures:
- Stationary rack. Consists of shelves, crossbars and side racks. As a rule, for stability, the structure is attached to the wall or floor with self-tapping screws.
- Mobile shelving. Option for people who like to do a permutation. They imply the presence of wheels and are, rather, a decorative interior item, since they do not imply a large load.
- The rotating rack will be very functional in the kitchen. Suitable for storing small items. For example, spices, souvenirs, small flower pots.
- A hinged rack is an option to save space. Instead of classic wooden side racks, you can use a thick rope with knots. Find for the interior in a marine style. Children will especially appreciate it.
Materials
So, before you take up the tools, it is worth determining for what purposes the rack will be used and where it will be installed:
- Of course, for damp and unheated rooms it is worth choosing metal.
- Wood is perfect for dry ones - the material is not only strong and durable, but also environmentally friendly. This is a very important point if the structure is installed in a residential building.
Important! To assemble a wooden display rack with your own hands for the house, it is best to choose a board from oak, mahogany or pine. Reliable, beautiful, "forever."
- It is not recommended to use boards pressed from wood chips. This material is not too durable.
Important! Before starting the assembly, the wood must also be treated with an antiseptic and allowed to dry for several days. It is important that the moisture content of the board does not exceed 10-15%.
In addition to wooden boards, other materials may be needed.
to contents ↑Materials and tools:
- self-tapping screws;
- hammer;
- nails
- metal corners;
- wooden blocks for longitudinal fastening of shelves at the base;
- glue and varnish for wood;
- vibration grinder;
- jigsaw;
- pencil and tape measure;
- holders for shelves.
It all depends on the selected project.
Further, in order to visualize how to make a rack, we draw a drawing. It can be a wall construction, you can fit it under the stairs leading to the second floor, or zoning the space, dividing the room in half.
to contents ↑The main recommendations in the design development:
- The width of the future interior item should correspond to the width of the wall where it will be installed.
Important! A small nuance - do not count on the size close to it. It is better to leave 5-10 centimeters for ease of installation.
- The length of the shelves should not exceed 1-1.5 m, if the load is supposed to be light, and not more than 90 cm, if heavy things will be stored on them. Such parameters will help to avoid deformation and sagging.
- The optimal depth of the shelves is 50 cm. If you make more of them, getting things out will be inconvenient.
- Height can be selected according to your own desire. But most often the distance between the shelves is 30-60 cm.
to contents ↑Important! The functionality of home shelving is quite large. But most often because of the convenience and accessibility of the content, they are used in children's rooms for toys and in workrooms for storing books.
Important points when designing a bookcase
Let's figure out how to make a bookcase with your own hands from the boards. There are subtleties here:
- Optimally, if the depth of the shelves does not exceed 30 cm. Keeping books in several rows is not only inconvenient, but also harmful for them.
- Books are quite heavy, so this is exactly the case when the design must be very reliable.
- Books during storage are quite moody. In closets behind closed doors they do not belong. The book should “breathe”. Librarians and second-hand booksmen know this like no one else.
- For a bookcase, it is recommended to make a back wall to avoid paper contact with the wall.
- If a do-it-yourself shelving unit is made for a home library, it is usually not hidden from prying eyes. Therefore, it is worth considering not only the strength and durability of the structure, but also the corresponding design of the future interior item.
The rest can be guided by general advice on the design, assembly and installation of shelving. When the project is ready and the structural elements are selected, we proceed to the next stage - assembly.
to contents ↑How to make a do-it-yourself bookcase made of wood?
- Better to start by installing the bottom shelf. She is a solid foundation. For him, as a rule, they select a thick board, which should include a 3 cm long self-tapping screw. Also, with the help of self-tapping screws, the rear wall of the rack is attached to it. If it is not provided, immediately grasp the side walls.
- On the sidewalls, you need to make markings for future shelves in advance and stick along the marking longitudinal wooden bars, which will subsequently hold the shelves. This is one of the options for fastening shelves.
Important! You can do without wooden bars by attaching the shelves directly to the sides on the outside with self-tapping screws. But in this case, too, it is better to further strengthen the shelves with the help of metal corners.
- If you chose the first option, it, by the way, is considered simpler, then you need to screw the side walls to the base shelf.
Important! When assembling a wooden shelving with your own hands, be sure to use the building level to avoid distortions.
- When the base of the structure is ready, attach a cover to it from above. It will not allow dust to accumulate on the top shelf.
- Now you can place the shelves in their places. Strengthen them further with screws.
The design is ready.
to contents ↑Important! If the wooden boards are not processed in advance, you can stick melamine film on all surfaces with an iron. And you can leave the tree in its original form, sanded it and varnished. There is a lot of room for imagination.
Stock footage
As you have seen, making a rack with your own hands is a very simple task. Follow the recommendations from this article, and you will succeed in the best possible way!
- How to choose a vacuum cleaner taking into account the characteristics of the house and coatings?
- What to look for when choosing a water delivery
- How to quickly create comfort at home - tips for housewives
- How to choose the perfect TV - useful tips
- What to look for when choosing blinds
- What should be running shoes?
- What useful things can you buy in a hardware store
- Iphone 11 pro max review
- Than iPhone is better than Android smartphones
 (No ratings yet)