

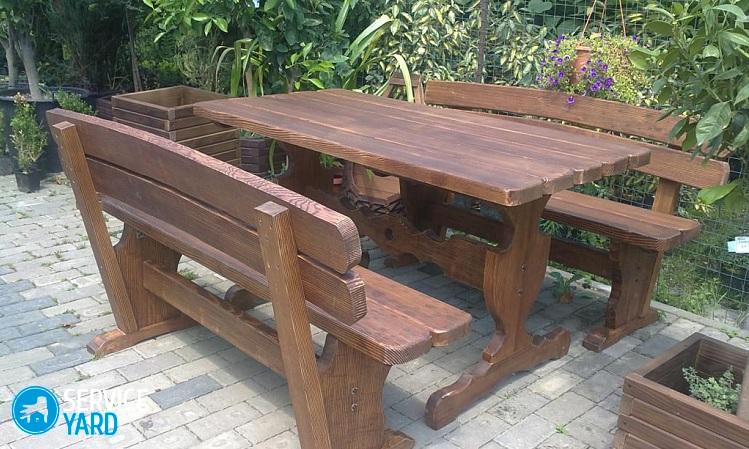
DIY wooden gazebo table
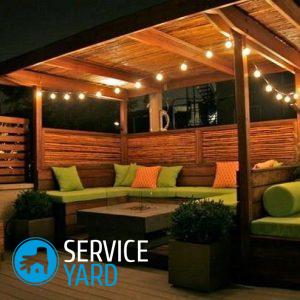
Having in possession of your summer cottage, I want to equip it with the greatest comfort. Many consider it a gazebo as a place for gathering guests or a quiet tea party. Well, a table for a gazebo made of wood with your own hands will perfectly fulfill its intended purpose, and it will perfectly fit into this space. This article will discuss how to make such a table with your own hands.
to contents ↑Is it worth it to make garden furniture with your own hands?
To do any thing on your own means not only saving money on the purchase of the finished product, but also enjoying the result. In addition, this approach will make it possible to design furniture according to the area of the building, thereby solving the issue of equipping the gazebo with maximum efficiency.
The countertop can be absolutely any shape - round, oval, square, octagonal, most importantly - so that you have enough strength and skill for this. Those who are familiar with carpentry, may well miss lectures on the purpose of tools and safety rules in the process of working with them.
to contents ↑Types of tables for gazebos
According to the shape of the countertops, the tables in the gazebo are divided into three main types:
- Round.
- Square.
- Polygonal.
Important! The most convenient and popular are round tables. Their proper shape makes such products an ideal option for any type of gazebo.
In the process of manufacturing the table, several different materials can be used - wood, plastic, metal, as well as their combinations. Each of the options has its pros and cons:
- Tables made of metal are durable, but quite expensive and get too hot in hot weather.
- Plastic products are relatively inexpensive, but will not last as long.
- Wood is considered the most affordable material for making furniture in the gazebo. Wood is easy to process, environmentally friendly, and also at an affordable price. A wooden table can be purchased at any of the specialized points, but furniture made, of course, with one's own hand will be a special pride of the owner.
to contents ↑Important! Combinations of seats or tabletops made of wood with brick bases look interesting, especially if the same materials were used to build the gazebo.
Wood for garden furniture
When choosing a material in order to make a table in the gazebo with your own hands, special attention should be paid to its quality:
- Parts made of wood should not have defects that were caused by insects or fungi.
- The most even sawn timber will make it possible to assemble quickly and easily. In addition, this will reduce material consumption - there will be no large scraps.
Needles
Softwoods have a natural softness, they are easily processed and have an aesthetically attractive appearance. However, the resins emitted by this type of wood can spoil both the festive tablecloth and the clothes of people sitting at the table.
Hardwood
Wooden benches and hardwood tables are the most profitable option. The table will come out of them durable and strong.The most preferred material is that obtained from ash, birch, larch, cherry or pear.
to contents ↑Important! Remember that over time, wood is able to change its original shade.
Preliminary preparation
Before you start making a table for a gazebo out of wood with your own hands, you need to carefully consider several points:
- The size of the table must necessarily match the design of the gazebo. If there is not much space in your gazebo, then it is better to opt for the classic version - the countertop, which is fixed on a sturdy stand. If there is enough space, then you can set the table on two supports.
- It is desirable that the shape of the countertop is in harmony with the configuration of the gazebo. For example, round or polygonal tables are considered a good option for hexagonal buildings.
- The optimal height of the table is considered to be approximately 80 cm. But here it is better to focus on the average growth of family members.
- It is better to immediately think about whether the table will be stationary or portable, as well as determine the number of legs.
- The arrangement and dimensions of furniture should not interfere with movement indoors.
to contents ↑Important! Portable furniture is a great option for small gazebos. If necessary, it can be removed or moved to another place.
Instruments
In order to make furniture for a gazebo of wood with your own hands, you will need the following set of tools:
- Chisel.
- Hacksaw.
- Hammer.
- Ax.
- Roulette.
- Electrophoresis.
- Sandpaper.
Having basic skills in carpentry, you can easily make a table of any shape, however, you need to take into account some of the nuances of the installation process:
- Fasteners must be made of stainless materials.
- Over time, nails can become loose, so assembly is best done using anodized wood screws.
- In order to extend the life of wooden parts, they should be treated with a special antiseptic.
- If the work to be done is new for the master, then it is advisable to pre-train on unnecessary details.
Portable wooden table
The portable board table is a steady, strong, easy and reliable design. It is necessary that the dimensions of the countertops correspond to the dimensions of the arbor itself.
Countertop:
- Mark the length of the boards.
- Cut the material.
- Lock the boards.
- Using self-tapping screws, install several guide rails on the back of the structure.
Legs:
- The lower part of the table is made of the same material as the countertop.
- The number of supports will depend on the shape and size of the table.
- The legs of the structure must be stable.
- During the installation of supports it is necessary to take into account the floor level. The slope of the surface should be compensated for by the different lengths of the legs.
to contents ↑Important! Each of the elements of the future table should be well polished, and also treated with an antiseptic. And at the end of assembly, the product should be coated with two layers of varnish.
Bar table
To make a table from a bar with your own hands, you will need 3-5 bars. A reliable and sturdy table will turn out only from well-matched straight bars.
Legs:
- Measure out 4 pieces of timber, two of which are 0.5-1 m wide, two are slightly smaller.
- A long beam will be the base of the legs, and the one that is slightly shorter will lie on top.
- Fit the material to each other, connect with wood glue or self-tapping screws. For greater reliability, the bottom side can be fixed with rails.
- Cut another beam of the same length as the countertop.
- Lay it across the assembled structure.
- Further, the collection goes the same as in paragraphs 1-3, only first lay the beam shorter, and then - more authentic.
- Fasten the parts with wood glue.
- Lay down and fix the thick wide boards from above.
Important! In order for the wood to clutch more tightly, it is desirable that the table stand for several days under heavy oppression (for example, you can put a couple of bags of mortar on top).
- At the end, all sharp corners should be treated, and the surface should be sanded with a sandpaper.
to contents ↑Important! Do not forget about sunscreens: parquet varnish and water-repellent compounds that can extend the life of the table.
Foundation table
A table for a gazebo made of wood with your own hands will become much more reliable if you install it on a foundation.
Assembly steps:
- Make legs and countertops, but do not connect them yet.
- Dig as many recesses in the ground as there are legs planned for the table.
- Install the racks.
- Check the verticality of the legs.
- Fill the recesses with concrete.
- Wait until the solution has completely dried and fix the countertop.
- Cover the resulting structure with several layers of varnish.
Round table
Do-it-yourself round table in the gazebo is one of the most popular solutions. If your arbor is not of the largest size, then you can install a round table on it on one leg.
Leg:
- In order to make a support, you should take a bar with a cross section of at least 10 by 10 cm.
- Drill a hole in the bottom of the future leg.
- Clean the recess from dust.
- Coat it with epoxy glue.
- Insert a pin made of metal or wood into the hole - with it, the table will stay on the floor.
- Drill a recess in the floor.
- Make four sawn spacers and fix them on the support using screws or glue.
Countertop:
- Take a grooved board and assemble a square or rectangular shield from it.
- Drive one small nail into the middle of the structure.
- Build a homemade compass. To do this, take a long thread, tie one end to a nail, and the other to a pencil. Pull the thread, draw a circle on the countertop.
- Trim the workpiece.
- Nail 3-5 crossbars to the underside of the structure.
- Connect the tabletop and the support.
- Fix the structure to the floor.
Stump table
A table in the gazebo with your own hands can also be made from a stump. It will be a very original, in addition, environmentally friendly design, which will surely appeal to all lovers of something unusual.
Assembly steps:
- To work, you need a wide stump. If in your country house there is nothing suitable, then such material can be found in the nearest forest.
- Dry the workpiece.
- Using a chisel and chisel, remove the bark from the stump.
- Flatten the surface.
- Sand it with sandpaper.
- Clean from dust and cracks.
- Coat the structure with wood paint or varnish.
- This version of the table itself will be a very interesting decoration of the gazebo, but in order to further decorate it, you can supplement it with mosaic or pieces of tile.
to contents ↑Important! In order not to cause damage to the floor of the gazebo, to install such a table, you should use a stand or castors for furniture.
Hexagonal table
Do-it-yourself hexagonal table in the gazebo will be a wonderful choice for a small gazebo.
Before proceeding to its manufacture, it is necessary to carry out preparatory work. It is necessary to make an accurate drawing of the future table, make all the calculations, as well as cut and process the material.
Build process:
- Draw a circle on the ground and mark the corners of the future countertop.
- Using screws, fasten the outer row of boards.
- Take six boards, fix them with each other in the longitudinal direction according to this pattern: attach one end in the center, the other in the corners.
- Lay out the transverse rows of boards, starting with the outer row.
- Make legs and fix them on the inside.
Mobile table
The advantage of mobile furniture for the gazebo is that it can be cleaned for the winter, so you can extend its life.In addition, in the process of gatherings, it is possible to remove the table from the gazebo, making room for dancing or any other purpose.
Installation of a mobile structure is not too different from the installation of stationary products:
- Take two beams 8-10 cm less than the length of the countertop.
- Fix the boards with self-tapping screws, making sure that there is a little free distance to their ends - up to 5 cm.
- Screw the longitudinal bars to the countertop.
Important! The longitudinal and transverse bars must be fixed at right angles.
- Make four square legs, fix them with spacers.
Arbor benches
Making a table and a bench for a gazebo with your own hands is a very exciting process. If you follow the standard sizes, then on the bench three people can fit.
Assembly steps:
- Take boards with a thickness of 3.5 cm and a width of 15 cm - it is necessary that the length of the material corresponds to the length of the wall along which the bench will stand.
- Work your workpieces with an electric planer.
- Round and grind sharp corners.
- Cut a piece of timber along the length of the boards 5 by 5 cm.
- Also, from the timber, prepare two pieces each of 40 cm.
- Take five bars measuring 50 by 30 mm and each cut off the corners on one side - you will get stops under the seat.
- Saw off five pieces of 50-centimeter bars and cut the corners on both sides.
- Paint and varnish every detail.
- After complete drying, fasten the 5 to 5 bar to the posts of the gazebo.
- Install two supports under the beam.
- After approx. 70 cm, secure the prepared stops over the timber.
- Place a special spacer under each of the supports.
- Lock the boards on the stops.
Stock footage
Making a table and bench for a gazebo with your own hands is a great chance to demonstrate your skills, as well as save the family budget. In the work, do not forget about observing safety rules and selecting good, durable materials. Then every minute spent in the gazebo will delight you and give you pleasure.
- How to choose a vacuum cleaner taking into account the characteristics of the house and coatings?
- What to look for when choosing a water delivery
- How to quickly create comfort at home - tips for housewives
- How to choose the perfect TV - useful tips
- What to look for when choosing blinds
- What should be running shoes?
- What useful things can you buy in a hardware store
- Iphone 11 pro max review
- Than iPhone is better than Android smartphones
 (No ratings yet)