DIY solid wood table

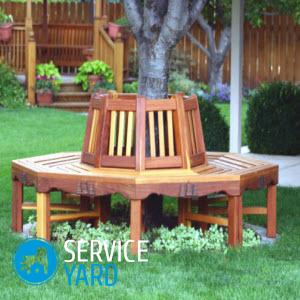
People who at least once in their life saw furniture made from natural wood massif know for sure how much it looks and in strength differs from modern store counterparts. Handmade products look simply gorgeous in appearance, they are incredible in style, durability and originality. Natural materials have always been considered a sign of sophistication and excellent taste, so furniture made from natural pine, oak and other species always looks better than artificial materials. In this article we will tell you how to make a table of solid wood with your own hands.
to contents ↑Features of creating interior items from an array
To make furniture from oak or other species with your own hands, you will need to spend a lot of time and effort - this process is quite laborious and complicated, requiring the use of special equipment. It should be noted that exclusively professional joiners are engaged in the creation of such furniture. But having a great desire, you can master any profession you like.
To create oak furniture, a lot of equipment will be required, namely:
- Drill with a set of drills.
- Miter saw and jigsaw.
- Set of clamps.
- Manual frezer.
- Electric hand planer.
- Grinder machine.
- Vernier caliper, tape measure, corner.
- Varnishes and glue for processing.
Important! This is just the minimum set of everything necessary to start working independently. If you intend to make shaped, conical, cylindrical parts or surfaces, then you will also need a lathe.
Remember that oak is a very hard wood, which is why when buying drills, heads for milling cutters, knives for a plane you must give preference to the highest quality options.
to contents ↑Where to start making solid wood furniture?
If you decide to make a table of oak with your own hands, then you should carefully understand this issue so that the final result does not disappoint you. First you need to prepare all the drawings, study the training workshops, watch the video instructions to determine how many blanks and which ones you need.
Important! It is better to take blanks with a margin, in addition, they should be even and dry.
Of course, it is easier to make furniture from boards, but such products are only suitable for a house decorated in an old rural design. In addition, the boards are also short-lived, so it is better to make a countertop, for example, from glued bars, so that it can withstand huge loads and constant exposure to moisture.
to contents ↑Important! You can also use pine massif as the main material, because it is inexpensive, great for beginners to practice. In addition, it is easier to work with pine, it is softer, it is much easier to process it than oak. Its only drawback is the presence of resin in the wood, which contaminates the surfaces of the cutting elements and the surface of the grinder.
Methods of joining solid furniture elements
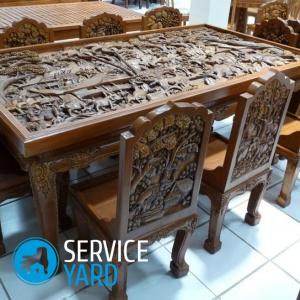
Have you ever seen finished oak furniture? If so, you probably noticed that there are no screws or other fasteners on it, since it has only internal fasteners that do not spoil it externally.
Options for joining furniture parts:
- Folded. This type of connection consists in creating a protrusion at the end of one spare part and an opening of the corresponding size on the other spare part. Precision is incredibly important here, because if you make a little more protrusion, then the workpiece will simply crack. If the hole is too large, the part will constantly loosen.
Important! In the process, it is necessary to monitor the depth of the hole. It is necessary that it be more by a couple of millimeters than the ledge itself, so that no gaps remain at the junction.
- Double-sided studs. This is the easiest way to connect wood parts. But it should be remembered that it is not suitable for all existing nodes. The fact is that its use requires free rotation of the part. The cover of a stool or table cannot be fixed with studs. To use a double-sided stud, it is enough to drill one hole on the fastened elements and then drive them together tightly.
Making a dining table from an array of do-it-yourselfers
Before you make a table from an array with your own hands, be sure to go through the list of all the necessary materials and tools so as not to miss anything. If you notice already in the course of work that something is missing, then difficulties may arise.
Material List:
- 40 to 40 mm bars for attaching the supporting part to the countertop and giving the table stability and strength.
- Bars 70 to 70 mm for the manufacture of supports. If you intend to use classic balusters, but have never worked in this direction, then you can purchase the appropriate option in the store.
- 40 mm thick boards for countertops.
- Confirmants, dowels.
- Glue for wood.
- Antiseptic.
- Azure or varnish for processing wood products.
Tools required:
- Measuring instruments.
- Roulette.
- Metal ruler.
- The square.
- Manual level.
- Hacksaw or saw.
- Sandpaper, grinding machine.
- Jointer.
- Screw or wedge clamps.
- Screwdrivers with different points.
- Mallet.
- Screwdriver.
- Drill.
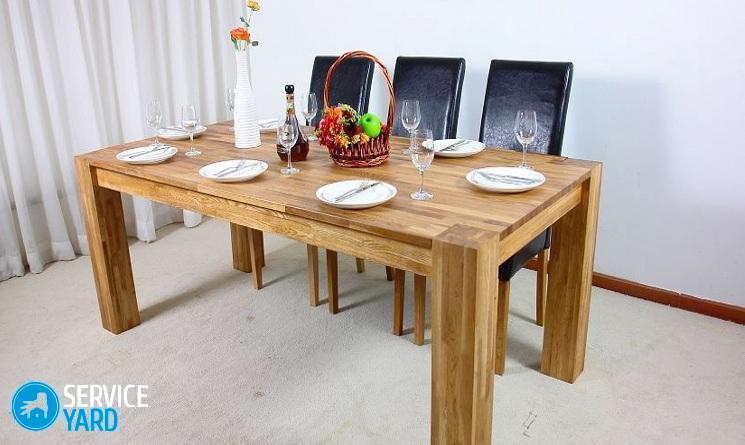
Make a dining table made of solid wood with your own hands according to the following scheme:
- Countertop. Carefully process all boards. As soon as you achieve a smooth and even surface, in each end, drill special holes for dowels at a distance of 10-12 cm. Treat all edges with a milling cutter, sand the surfaces carefully. Coat the edges with wood glue. Fasten the boards together with wooden dowels placed in the prepared holes. Dry the canvas from the boards, secure with clamps. Then cut off the excess glue with a construction knife, machine the surface. Prepare the finished shield with an antiseptic.
- Underframe. It will consist of a rectangular frame and four legs. Saw off the bars of the required size for all parts, then process them with a grinder, cover with an antiseptic. Fasten the pairs of legs previously smeared with glue with transverse bars using screws. Also fasten the legs with long bars. Drill holes for the assembly of the table in the center of each support.
- Final assembly. Lay the countertop down on a clean, flat surface with the face down, attach the underframe to the top, draw a pencil on the inside, mark the joints on both surfaces in 2-3 cm increments. Drill holes in the countertop and underframe, remove chips, glue them, assemble the product furniture fasteners. If necessary, use a mallet.
- The final stage. After the do-it-yourself oak tabletop has been connected to all other elements, perform the final grinding, apply decor elements in accordance with the project, cover with several layers of blue or varnish.
Stock footage
Having spent a minimum of time and financial means, you will receive a durable and reliable piece of furniture that fully meets your requirements and ideas.
 (No ratings yet)