DIY artificial stone worktop
The correct selection of the kitchen wall and countertops is one of the most crucial moments in the arrangement of a modern kitchen. This is not surprising, since the requirements for working surfaces are quite stringent (strength, moisture resistance, ability to withstand significant loads). The same requirements (moisture resistance, resistance to mechanical damage, chemical neutrality) are imposed on countertops mounted in the bathroom. The stone product meets all these requirements. There are a huge number of products made of artificial or natural stone on sale, but the prices, as they say, bite. Therefore, it is worth thinking about the independent manufacture of stone products. If everything is done qualitatively, then in appearance and performance, the do-it-yourself countertop made of artificial stone is not inferior to the factory one.
to contents ↑Materials of manufacture: possible options
Here are the most common options for artificial stone, which can be made with your own hands:
- Concrete. The most durable and cheapest artificial stone for do-it-yourself countertops. It can be used not only in capital construction. It will make a wonderful countertop, strong and durable. Aesthetic appearance can be achieved with fillers and additives.
- Ready product. This is an artificial stone made of marble or granite chips on an acrylic basis. The base of the countertop is made of plywood, and on top of it a sheet of acrylic stone is fixed.
- Ceramic tile. A simple budget option that looks great both in the bathroom and in the kitchen. Tiles are laid on the base of OSB or plywood.
Once you have decided on the material of manufacture, proceed in accordance with the above algorithm.
to contents ↑How to make a countertop made of artificial stone with your own hands: dimensions and design
The first thing you need to know before starting work is the configuration and dimensions of the product. If we are talking about a familiar rectangular surface, then there is nothing complicated about this. If you need to make a U-shaped structure for the hob, then everything becomes a little more complicated.
Be sure to take measurements.
Important! If you dismantled the old, worn out, countertop, then you can perform all measurements on it. There are also certain standard parameters. For example, the standard working surface depth is 600 mm. Given the edge, then 605 mm. The length is measured in accordance with the available basis.
Make a scale drawing of the tabletop on a small piece of paper, and then make a full-size mock-up of cardboard or a sheet of thick paper. Attach the layout to the installation site, make sure that it does not protrude or mow. Only with this approach, the manufacture of the working surface will pass flawlessly.
If the countertop has a complex shape, then cut the layout into several parts. After that, you can proceed directly to the manufacture of the product itself.
to contents ↑Concrete
This material has long gone beyond the usual building materials. With the help of various additives, it is possible to control its appearance and strength properties.To prepare the concrete mix you will need:
- Portland cement 500 (or cement grade 400).
- Fillers: large and small.
- Plasticizer.
A granular or marble crumb or ordinary gravel can serve as a large filler, granite flour or river sand as a small filler.
Important! An interesting idea is to use melted broken glass as a filler without sharp edges. The multi-colored cullet looks especially beautiful, which creates a unique beauty pattern on the surface.
Additional components are various paints and colors. If you add color to the mixture and occasionally distribute it, then after solidification you will get a beautiful, unique pattern. To work, you need a sheet of plywood or particleboard with a waterproof glossy surface.
Operating procedure:
- Guide the outline with a ready-made template.
- Screw the block along the contour.
Important! If the technological holes are known in advance, mount hole models on the surface of the substrate so that concrete does not fill these places. However, the hole can be made when the surface is completely ready.
- To save time on finishing, form a plasticine chamfer along the perimeter of the base, leveling the plasticine with a spatula.
- Fill the resulting frame with concrete mortar. In order for the solution to be distributed evenly, it is advisable to use a vibrating table. Reinforcement is optional. If you decide to reinforce concrete, you can use a grid connected from reinforcement with a diameter of 10 mm.
- Fill in 2 steps. First fill in about half. Wait a day until the mortar hardens, then lay the reinforcement and pour the rest of the concrete.
- The time for complete solidification of concrete is 2-3 days. After that, carefully remove the wooden frame.
- Using a grinder, level the surface of the product approximately 1 mm. Then clean, vacuum and rinse the surface. It remains to wipe it with cement mortar to eliminate pores.
- The final point is to grind the finished product in 2-3 stages, reducing the grain size of the grinding nozzle.
Install the finished countertop on the base. She will serve you for several decades, without the slightest hint of wear.
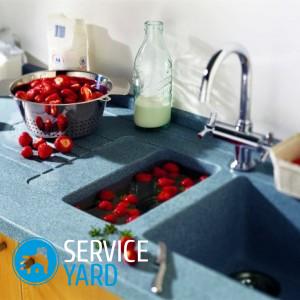
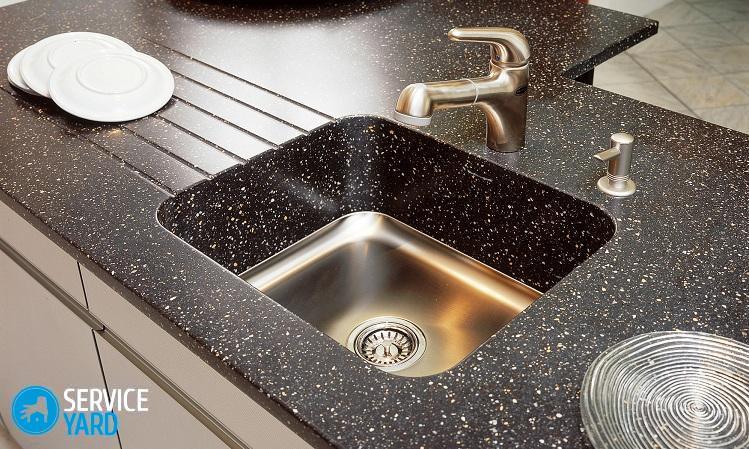
to contents ↑DIY acrylic countertop
Ready-made plates based on acrylic mixture look beautiful and easy to use. The size of the standard sheet is 366x76 cm. The thickness is different.
Important! The countertop can withstand temperatures of 180 degrees, so there is no place for hot pots and pans. Certain difficulties cause the care of the work surface. In particular, removing a stain (such as coffee or tea) will be somewhat difficult. But the repair of countertops made of artificial stone with their own hands is a real pleasure. All minor defects are perfectly eliminated by grinding.
Operating procedure:
- As a basis for artificial stone, plywood is chosen. Then attach the artificial stone to the base using two-component glue.
- After the glue has completely hardened, use a milling machine to level the ends of the countertop.
Important! If there is no milling machine, you can use a block with large sandpaper.
- The remains of artificial stone will go to the decoration of the end parts. Cut strips with the appropriate parameters, remove dust and degrease the ends. Apply glue to the base, carefully glue the composite strips. To make them fit tight, use clamps.
- If the countertop has a curved shape, then warm the strip in places of bending using a hair dryer to 160-180 degrees. Only after the strip has completely cooled can the remaining part be glued.
Important! To ensure that the joint between the main sheet and the end part is not too noticeable, add paint that is similar in shade to the materials used in the adhesive.
- After complete glue polymerization, grind the ends.
- Screw the finished product to the base of the bedside tables in the bathroom or kitchen table. Select the length of the screws so that they enter only the base, without touching the composite material. Make technological holes with an electric jigsaw.
Ceramic tile
Laying ceramic tiles on a base of moisture-resistant OSB or plywood is an option suitable for the bathroom. It is important to choose the right base: so that it can withstand the weight of the tile:
- Cut the base from plywood or OSB.
- Form an end from strips of OSB or plywood screwed around the perimeter.
Important! If you are going to decorate the ends with tiles, make the width of the end faces at least 50 mm, as it is much easier to cut tiles. Alternatively, a metal edging or laminated strip can be used.
- After the base has been prepared, prime it with a special composition for wood with a flame retardant and antiseptic. Only after that the surface is ready for laying tiles.
Stock footage
A tile top is as practical as a concrete or do-it-yourself acrylic table. At the same time, laying it is much easier. Which option to choose - the decision is yours!
 (No ratings yet)