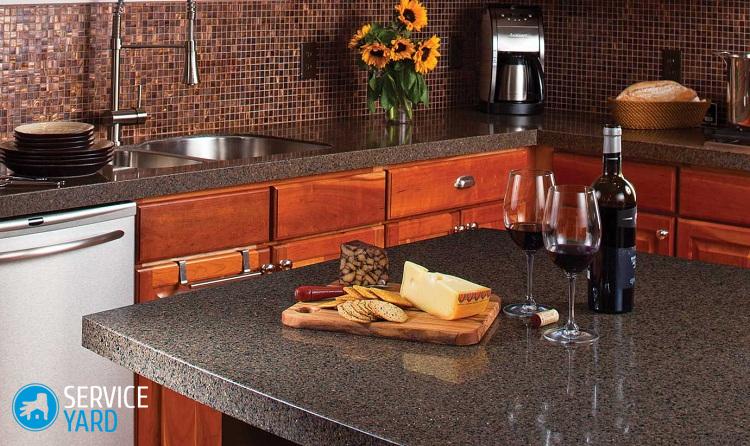
Do-it-yourself countertop

Prices for finished modern countertops are quite high, but you can find an alternative. And the best way out is a do-it-yourself countertop. There are many ways to make it, depending on the effort expended, the material and, of course, the cost. When manufacturing kitchen worktops, it is worth remembering that it must comply with operating standards. It is necessary to select high-quality, durable and wear-resistant material, which in the future will contact without problems with hot and will not be susceptible to minor mechanical damage.
to contents ↑Preparation for the manufacture of countertops
If you are going to make a countertop for your kitchen with your own hands, then first of all you should decide which of the coatings suits you the most. In this article, we describe the manufacturing process for two types of worktops - marbled and tiled. The technology for creating such countertops has already been fully developed, so you can safely act on the recommendations given in our article.
So, to make a countertop yourself, you need to buy the following:
- Bar for the frame - preferably 50X50 or 40X50, from solid and even wood.
Important! The better the timber, the easier it will be for you later to make its lining.
- Crushed stone, cement, sand - for the manufacture of the base under the countertop.
- Metal rods - for reinforcing countertops.
- Boards (almost any, the main thing is to be even and whole) for the manufacture of formwork.
- Pigments and plasticizers for concrete.
- "Liquid Nails".
- Plastic or aluminum profile for finishing the edge of the countertop.
If you are going to finish the surface of the countertop with tiles, then you also need the tile itself, glue for it and a composition for grouting the seams.
Important! It is desirable to choose a grout of good quality, since the seams on the surface of the countertop will be subjected to increased stress.
Necessary tools
Despite the fact that the kitchen worktop is done without the use of any complex tools (with one exception), you will have to prepare the following:
- Screwdriver or drill - for the manufacture of formwork and frame assembly.
- Grinder with a cutting wheel.
- Jigsaw.
- Spatula and trowel for working with concrete.
- Tile cutting machine.
- Trowel grater.
- Level.
- Roulette.
to contents ↑Important! In addition, if you are going to make a marbled countertop, you will need a grinder with a power exceeding 1000 watts.
Frame and formwork
After all the tools and materials have been prepared, you can begin to manufacture a frame for the countertop. Since the countertop based on the concrete slab has a significant mass, it will not work to install it on standard kitchen modules - here you will need a special frame, which is done as follows:
- Determine the height of the future countertops.
- Cut fragments of the corresponding length from the bars 50X50 - in the future they will act as vertical racks of the frame.
- Use the metal corners to attach the uprights to the floor. In those places where the posts adjoin the walls, drill through them and secure with anchor dowels.
- After installing the racks, connect them with horizontal jumpers, assembling the frame of the frame.You can strengthen the frame with diagonal braces.
Important! The frame of the frame can be checked for reliability by sitting on top of it. If it does not stagger and does not change its configuration, then there is no need to strengthen the frame additionally.
- From the boards, make the lower part of the countertop, as well as the formwork around the perimeter. Assemble the formwork so that it can then be removed without damaging the concrete itself.
- Inside the formwork, namely in the place where the sink will be located, lay the ring from a metal strip. If you are going to install a hob, then along its perimeter also lay out the sides of wood or metal.
- Cover the entire formwork with polyethylene, since the solution will be liquid, and it is necessary to protect the floor from possible leaks.
Countertop Making
To make a countertop with your own hands, you need to follow this sequence of actions.
Solution preparation and pouring
After the formwork is ready, you can proceed with the manufacture of the base for the countertop:
- Lay the reinforcing rods connected to each other in the formwork. The better the fittings you have, the more reliable the result will be a countertop.
- Prepare a solution: mix cement, gravel and sand in a ratio of 1: 2: 2. Add a plasticizer to improve the quality of the solution. Dilute the solution with water until a creamy consistency is formed - it is necessary that the solution spreads easily enough.
- If you are going to make a countertop made of imitation granite or marble, add a special pigment to the solution, which can be bought at almost any hardware store.
Important! To obtain a beautiful “granite-like” texture, the pigment is first diluted with water and then added to the solution itself.
- Pour the finished solution into the formwork to the desired height, controlling horizontal surfaces with the help of a level. Level the solution, cover it with a film, and then leave to dry for 7-10 days.
- To make the countertop durable, do not let it dry out when the solution hardens. To do this, periodically monitor the surface of the countertop, and if necessary, moisten it from the spray gun.
- After the solution has completely hardened, remove the formwork and proceed to finish the countertops.
Countertop trim
The final step in the manufacture of countertops with their own hands is its decoration. We will describe two finishing options - polishing decorative concrete and tiling.
Tiling is as follows:
- Using a grater, apply tile adhesive to the countertop. Evenly distribute the glue and form grooves on it for more effective gluing of the tile.
- Place the selected tile (it is desirable that it is strong, smooth and with a matte surface) on the adhesive layer and press, carefully aligning it on a plane.
- Using plastic crosses, align all the seams between the laid tiles.
- After laying the tiles, wait until the glue has completely dried and grout the joints.
- At this stage, install a profile on the ends of the countertop, fixing it with “liquid nails” or tiled glue. For more reliable fastening fix it using clamps.
Important! The advantage of this finishing option is that the repair of such a kitchen countertop will be to eliminate damaged tiles and replace it with a similar one.
Making a countertop with your own hands, the surface of which will imitate a natural stone, is somewhat more complicated:
- First, grind the concrete surface with the addition of the desired pigment with a coarse-grained nozzle of the grinder, achieving a perfectly smooth surface.
- Then repeat the operation using a finer grain disc.
- Remove dust from the surface and treat it with special impregnation - silling.
Important! This impregnation is often found under the name of “filler for concrete products”.
- Putting on a grinder disc suedepolish the countertop at low speeds, achieving a mirror-like shine.
to contents ↑Important! The advantage of this finishing option is that you do not have to think about how to update the countertop - it will be enough just to polish it again, and it will become like new.
The benefits of homemade kitchen worktops
The instructions presented in our article will help you master the technology of making homemade kitchen worktops. In addition, you will get the opportunity to reduce costs, as well as:
- Independently choose the color and shape of the product.
- To control the quality of its manufacture at all stages, making adjustments if necessary.
- Make a truly durable countertop, which will not be afraid of moisture, high temperatures or mechanical damage.
to contents ↑Important! Among other things, furniture that was made independently always looks especially and unusual.
Stock footage
Summing up, we note again that the do-it-yourself kitchen worktopcan be made even by those of us who have not previously been engaged in the manufacture of kitchen furniture. Therefore, do not be afraid - study our recommendations and get to work.


