Kentucky Chair - Drawing
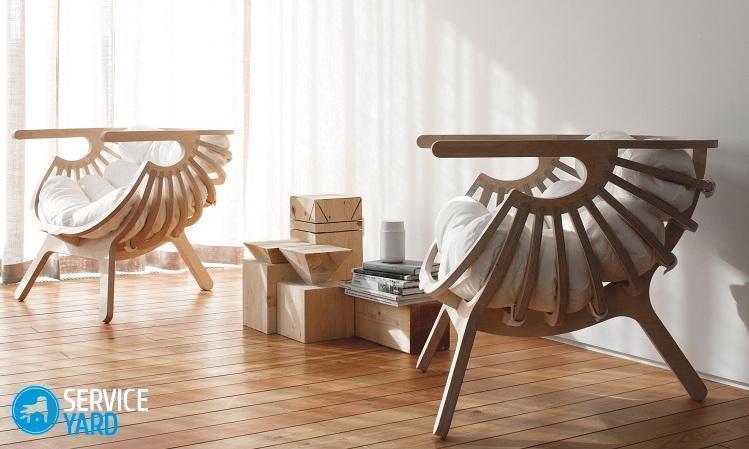
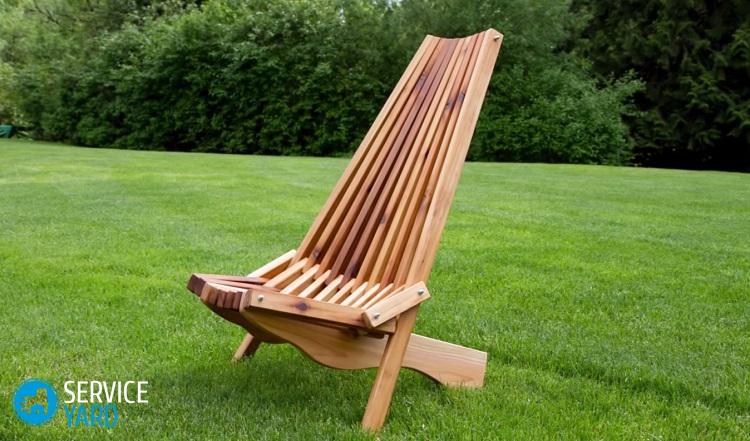
Anyone who has a summer house or a personal plot knows that even on five hundred square meters there will always be work. But not everyone goes out of town just to plant potatoes and grow cabbage. Many go to nature exclusively for the purpose of relaxation - alone, with family or with a noisy group of friends. And here, of course, you can not do without comfortable country furniture, on which you can comfortably sunbathe, you can sunbathe or read books in the shade of a tree. Well, if comfort is successfully combined with originality. A striking example of such country furniture is a Kentucky chair, a drawing of which can be found on the Internet. We will add a schematic drawing with detailed instructions.
to contents ↑Kentucky Chair
It turns out that a comfortable and unusual Kentucky armchair with your own hands can be done without much difficulty, without spending a lot of time on this. The product is assembled from small parts and does not even require you to have a workshop. The whole installation process can be done either in the open air or on the floor of the summer terrace, since there will not even be dust during operation.
Important! To make a vacation in a country house not only interesting, but unusual and comfortable, see also other lessons on making original furniture with a unique design:
You can build a Kentucky chair with your own from the boards and bars remaining from building a house or a bath. You can ask them the necessary shape or size using special equipment for wood processing. If this is not available, then all the elements can be ordered at the nearest furniture production or buy finished products in a hardware store.
Here, tips for choosing materials are exactly the same as in the production of any country furniture:
- Coniferous wood, which is great for stools, will not work for this product, even hard larch. Any coniferous raw material is straightforward, and under certain loads leads to chips along the layer. And in such unusual furniture as a Kentucky do-it-yourself chair, this predisposition will lead to quick wear of parts due to the constant assembly / disassembly of the chair.
- Multilayer dense species will be an ideal option, because oak, beech, walnut or elm have a strong structure that can withstand any load. In addition, the surface of this wood has an interesting pattern. Topcoat can consist of a simple stain treatment.
- Aspen has similar properties. Plus, it is highly resistant to moisture, which is very important for furniture such as a Kentucky do-it-yourself chair, because most of the time it will be on the street. Also, this breed with good processing is able to withstand direct sunlight and not dry out over time.
to contents ↑Important! A few more points that experienced furniture makers advise to consider before buying material:
- A tree for a Kentucky chair with your own hands will cost less if you buy not an sawn material, but an array. It can be processed on a circular or with the help of a Bulgarian or circular saw.
- The last thing to consider when choosing a tree - “decorative” defects are unacceptable. In the finished product, slanting, twisting, tight-fitting knots can be beneficial, eventually giving a beautiful texture, but a chair made of such a tree will quickly break.
Tools and materials
In order to make a Kentucky armchair with your own hands, you will need very few tools and materials, but they have special requirements:
- The basis of future furniture is wooden blocks of the same cross section, its classic version is 45x33 mm. It is these values that are obtained when converting inches to millimeters.
Important! You can take the bars a little more or a little less than the classic version. Any workpieces close in size will do. The most important thing - if you put all the details in one row, you should get 13 meters.
- Metal wire, ideally if its diameter is 4 mm.
- Special scissors for cutting wire or wire cutters.
- 16 brackets for fixing the wire, it is better to take galvanized parts.
- Drill with a drill for woodwork.
- Joiner's glue.
- Hammer.
Important! In order to create a do-it-yourself Kentucky chair, you can use galvanized studs and nuts instead of wires and staples. For one product, 8 units of both materials will suffice.
Now we need to deal with the preparation of bars, which will become the seat and, at the same time, the back of the future Kentucky chair with our own hands.
A complete list of parts is as follows:
- Whetstones for a seat 375 mm long - 6 pieces.
- Bars for the rear legs 875 mm long - 2 pieces.
- Bars for the long part of the backrest 787 mm long - 4 pieces.
- Bars for the short part of the backrest 745 mm long - 2 pieces.
- Wheels for front legs 1050 mm long - 2 pieces.
- Connecting parts 228 mm long - 9 pieces.
to contents ↑Important! These dimensions must be observed exactly to the millimeter, only in this case the do-it-yourself Kentucky folding chair will be comfortable.
Seat assembly
Before you start assembling a Kentucky chair with your own hands, all cut blanks should be processed with sandpaper or a grinder. Not only the surface of each part, but also the ribs and ends. The next step should be sorting the workpieces by length and laying them out on the surface into specific piles - this will simplify your work in the future.
Important! You can also take advantage of our master classes and complement the interior of the house with the following furniture, so that there is a place to put all the necessary things in your home:
Since the ready-made Kentucky chair is a construction of bars strung on a wire, holes must be made in each blank. And here there are some nuances:
- The diameter of the hole should be 2 mm larger than the diameter of the wire itself. In our case, if 4 mm wire is taken as the basis, then the holes should be 6 mm in diameter.
Important! If you make them smaller, you will encounter difficulties in laying out the finished product. If you do more, the design simply will not hold the weight of a person.
- Holes must be made on a wide part of the bar, which is equal to 45 mm.
- Drill work strictly perpendicular to the surface. The holes themselves are located exactly in the middle of the bar. Otherwise, the connections will be fragile, and the surface of the finished Kentucky armchair with your own hands will turn out to be uneven.
To assemble a Kentucky armchair, a drawing will be needed already at this stage. For even construction, all holes must be drilled in a specific order - on each element of future furniture.
At first, bars that are prepared for the seat and backrest will be used. It is important to note that the hole that is drilled first must be 37 mm from the edge. The second hole is drilled like this:
- for the bars of the seat, a distance of 300 mm from the center of the first hole is maintained;
- for backrest bars, the same segment is 625 mm, the value is laid off from the center of the first hole.
For the bars of the future Kentucky do-it-yourself chair, which are designated as connecting parts, the following principle applies:
- 31 mm from the edge of the bar is the value for the first hole;
- 166 mm is the value for the second hole, the distance must be laid off from the center of the first hole.
Seat
Now move on to assembling the seat. We take the details of this element and arrange them in the following order:
- first we put two blanks with a length of 375 mm (a);
- to them goes a bar 875 mm long (in);
- then again two bars (a);
- one blank (c);
- two blanks (a).
Thus we add eight bars. Moreover, the first hole for each part, which is made at a distance of 37 mm from the edge, should be on one side - from the left or right - no difference. We align the workpieces along one edge and pull the wire through the holes. The front of the seat of the future Kentucky do-it-yourself armchair is ready.
Farther:
- We pick up the bars, which are designated as connecting elements.
- There are nine in total, and on the Internet drawings they are marked with the letter (f).
- We place these parts between the bars intended for the seat.
- At the beginning and at the end of the row we put transitional parts.
- Schematically, the order of connection of the elements looks like this - (f), (a), (f), (a), (f), (b), (f), (a), (f), (a), (f) , (b), (f), (a), (f), (a), (f).
- Now we fold the blanks so that the openings of each coincide with the neighboring one and connect using wire.
Important! If you correctly deal with the layout of the Kentucky chair layout with your own hands, then you can lay out all the blanks on a flat surface and simply connect them by pulling the wire through all the holes. Our tips from the following articles will help you create a more comfortable place to relax:
Back
Now we will deal with the back of the future Kentucky chair with our own hands. To do this, we need the bars indicated in the drawings by the letters (c), (d and (e):
- We lay out the bars in the following order - (e), (c), (d), (c), (c), (d), (c), (e).
- We pay attention to the fact that for all the bars the hole drilled at a distance of 37 mm from the edge is on one side.
We level the bars and connect them with wire, pulling it through the first hole of each bar. Thus, the finished upper back appears.
Final assembly
The next step is the assembly of all the elements of the Kentucky chair with your own hands in a single design:
- The assembled backrest elements are placed on the seat elements. Moreover, in such a way that the top of the back rests on the front of the seat, and the bottom on the back. 8 parts of one element must lie on 8 bars of the seat.
- One by one, we push apart the transition bars of the seat, revealing an element like a fan, and between these bars we place the back parts. At the edges of this design should be transitional bars.
- Now, gently connect the edge of the transition bars with a wire to the bottom of the back. We compress the details of the elements together so that they fit snugly together.
Important! To make sure that everything is assembled correctly, that all instructions are followed, just take the design by the top of the back and open the product. In front of you, you should see a Kentucky armchair with your own hands.
Finish line
But that's not all. Now you need to remove the excess elements, such as wire, which is still sticking out on both sides. We cut off its excess with the help of special scissors or nippers:
- Cutting off excess, leave a small supply of metal on each side - 7-10 mm will be enough.
- This segment should be enough to make a thread on the wire and fix it on the ends of the washer and nut.
- If it is not possible to process the ends in this way, then the wire can be fixed around the edges with a bracket. We drive it into the wood with a hammer so that the connection holds firmly, and there are no sticking ends left outside.
- If the Kentucky chair with your own hands is assembled using studs, then simply cut them and tighten them with nuts. By the way, these places on the chair can also be covered with decorative nuts.
The final stage for the assembly of a Kentucky armchair with your own hands includes only a few points:
- Grind the edges of the seat and back with sandpaper or a grinder.
- To give a more pleasant appearance, we round the edges.
- We cover the finished chair with stain or varnish.
to contents ↑Important! If you chose the second option, then be careful when working. If the coating in excess gets into the hole where the wire is located and dries, opening Kentucky chairs with your own hands will be problematic.
Stock footage
As we have just seen, it’s not at all difficult to make such original and simple furniture as a Kentucky armchair or a drawing with your own hands. which only at first glance seems complicated. And in the process, everything falls into place. Such furniture is, in fact, universal. It is comfortable to rest on, but if something happens, it is easy to assemble and put it to the wall. For work, you don’t need any complex tools or special skills, it is enough to follow the instructions and at the final stage carry out high-quality wood processing, because she will have to test various weather conditions.
 (No ratings yet)