DIY garage chair
When it comes to garage furniture, this means various racks, bedside tables, racks, chairs, workbenches that allow you to neatly and in perfect order store work tools. In addition, they serve for minor repairs. Today you will learn how to make a chair in the garage with your own hands, and get acquainted with a few more interesting ideas. If you are able to translate these ideas into reality, then all familiar motorists will envy you. In this article, we will provide not only detailed workshops, but also useful tips without which you can’t do this kind of work.
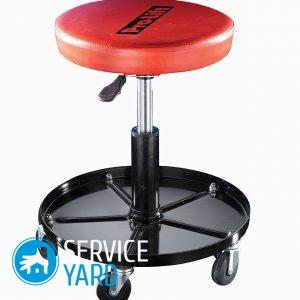
to contents ↑How to make a chair for a garage with your own hands?
Joiner's practice, of course, is better to start with something simple, gradually moving on to more complex structures. For example, you can make a garage chair with your own hands, only it will not be an ordinary stool, but something more like a stepladder, which you can’t do without in this room.
Prepare for work:
- Wood.
- Thick paper for the template.
- Chipboard sheets.
- Chipboard trim.
- Pencil.
- Buttons.
- Electric jigsaw.
- Grinding machine.
- Melamine, furniture edge.
- Stiffening rib.
- Racks.
- Seat.
- Clamps.
- Piano loop.
- Confirmats.
- End caps for confirmations.
Do all the work following this detailed diagram:
- Use for design a special computer program or select the appropriate project for a step-chair on the Internet. Make heavyweight side pillar patterns out of thick paper.
- Pick chipboard trim so that it fits all available templates. Carefully pin the buttons to the chipboard with the buttons, then circle with a pencil.
- Saw the parts with a jigsaw, sand the ends on a typewriter. Cut the remaining parts from chipboard according to the design. Cover the prepared elements with furniture or melamine edge.
- First, collect the smaller part of the chair that will be stationary. Screw the stiffeners to the step. Then a step to one of the sidewalls, so that it is clearly in the middle of the rack. Screw the second rack, install a stiffener for the seat. Mount the seat so that its edge coincides with the edges of the racks.
- Now you need to collect the second part of the stepladder. It will turn over, so the middle step is mounted upside down. Screw the stiffener for the upper step, then screw it yourself.
- At the final stage, tighten the seat. Install both parts to form a stepladder, aligning the ends of the seat, fixing with clamps. Screw the piano loop. Install the plugs.
Such a wonderful, and most importantly - a functional chair is ready, it will be displayed in two positions, which is very convenient for a garage.
to contents ↑How to make a garage cabinet yourself?
Doing a cabinet in the garage with your own hands will be a little more difficult, but you will get a convenient, combined design that will save usable space and truly decorate this room.
Important! This solution is most appropriate for large garages, the shelves of which are always filled with various tools and parts. Such a cabinet can be equipped with drawers and shelves for storing all kinds of objects and things.
We will again use the finished project, but you can resize the parts, depending on specific conditions and your own requests.First, carry out the calculation, trying to do everything as clearly as possible so that in the future you do not have to redo all the work. Number each detail on the diagram, indicate all sizes.
Important! Designate the parts as they are manufactured, so that later it is easier to assemble the entire structure.
Prepare the following elements from joiner plates with a thickness of 38 mm:
- Base cover.
- Side wall of the cabinet.
- Three front walls of the base.
- Five base partitions.
- Seven risers.
- Eleven steps.
- Seven shelves.
- Two front panels for drawers.
- Five shields of a stepped wall.
From the same plate with a thickness of 19 mm, make the following parts:
- Four front and rear walls of the box.
- Four side walls of the box.
- Two bottoms for boxes.
From a bar with a cross section of 25 by 25 mm, perform:
- Shelf holder.
- Railing.
For sawing and assembly, prepare:
- Circular power saw.
- Wood screws.
- Furniture castors.
- Dowels.
- Lacquer.
Now that you already know all the sizes, and you know exactly how many details will be required, you can go to the materials store and get to work.
Make a cabinet according to this instruction:
- Label all blanks. Cut them out. Cut the workpieces, check their compliance with the required dimensions and rectangularity. Sand the edges of the cuts.
- First of all, assemble the base in the form of a box-shaped structure, the length of which can vary, depending on your desire and certain conditions.
- Screw to the cover of the base of the partition, while the width of the cells for the drawers should be 60 cm.
- Assemble separately from the shields, then glue the stepped wall. While the glue dries, leave the walls tightened with straps. Then place the structure close to the wall so that it serves as a base.
Important! It is better to glue on a smooth fugue of five blanks.
- Drill holes for screws according to the diagram.
- Mark the locations of the shelf holders on the wall. Fix them with screws and dowels to the wall. Install the same shelf holders on the back of the stepped wall.
- Assemble a flight of stairs from steps and risers. At the same time, fasten each step to the riser with several screws.
- So, you have collected separately the base, the step wall, the flight of stairs, it remains to open all the details with varnish. But first grind all the parts and components, then cover with two layers of acrylic varnish.
- Sequentially fasten parts and assemblies with screws. Set the steps. Put the stepped wall on the base, fix it with the upper and lower steps. Attach the side wall, top platform and stepped wall to the base cover.
- Attach the shelves to the side wall, then from the inside to the stepped wall. Place the shelves on the bar-shelf holders. Replace the flight of stairs, attach to the stepped and side walls.
- From the bottom, additionally fasten the shelves with the steps of the march using metal strips on the screws. Drown them in the grooves to make them invisible. Install the remaining steps, the front walls of the base, the lower step.
- Install the railing and drawers, each of which should consist of the same walls, interconnected by screws.
- Screw the bottom to the box, then the furniture rollers to it, so that the boxes can move.
- Screw the front panel with the handle from the inside of the box to the front wall. Insert the finished boxes into the wall.
How to build a homemade workbench table for a garage?
Do-it-yourself garage furniture is made the most diverse, because here motorists not only store various tools, but also perform minor repairs. A work table or workbench is an essential item for a garage.
To build a workbench, purchase all the materials on the list:
- For a board product cover with a width of at least 40 mm.
- A bar for the manufacture of legs with a section of 70 to 100 mm.
- Bar for crossbars 50 to 100 mm.
- Nails
- Self-tapping screws.

Build as follows:
- Make a frame with four legs.
- Attach a cover from carefully cut boards to the top of the structure. Its edges should slightly extend beyond the frame.
- Install longitudinal horizontal jumpers 50 cm above the floor to make the workbench more stable.
- Place a shelf on them to store materials and tools.
- On the countertop, install a hinge stop, a special recess with a wedge, drill holes with pegs so that the material is held firmly during transverse sawing.
- Attach the edge along the back wall so that the parts do not slide to the floor during operation.
- Additionally, attach a bench vise for clamping while machining parts vertically and horizontally.
to contents ↑Important! In order to ensure fire safety, it is recommended to install a workbench near the light source, and after completion of work turn off the light and all electric heaters. It is recommended to remove the spent raw materials from the workplace on time and throw them out of the garage.
Stock footage
We gave examples of the most useful items of furniture for the garage, which can be made with your own hands. In this case, you do not need to spend a lot of money on the purchase of materials and tools, because many suitable parts are already in the garage at hand.
 (No ratings yet)