

DIY Tool Bag

Many men faced the problem of storage, transfer of tools and ease of use. Of course, you can buy a tool bag in a regular store, but it will be much nicer if you make it yourself. And in this case, you can easily do everything clearly for yourself, without inventing anything superfluous, but organizing your set of devices in the most convenient way. You will learn how to make a tool bag with your own hands from this article.
to contents ↑Types of Work Bags
Tool bags are not only much more practical than containers and boxes, but they also cost several times less. A tool bag may even look different, for example, it may have a waist or rectangle appearance.
We will deal with each of them individually:
- The rectangle bag is equipped with a handle and shoulder straps.
- A bag with a belt clip does not have the same capacity as the previous one, however, it is indispensable for minor repairs.
Important! Both bag options can be either fabric or plastic inserts. You can make a tool bag with your own hands, the material of which you can choose yourself.
Workbags can be designed for different purposes. We will understand the purpose of each of them.
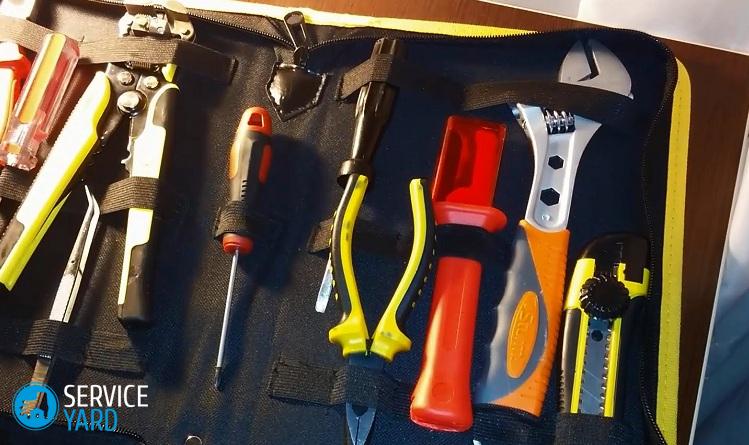
The classic version for storing and transporting tools
The internal distribution of space plays an important role in the selection of a particular model. Let's consider in detail what such a bag looks like:
- As a rule, such bags are locked from above, which, in turn, can have a different look. It can be in the form of a zipper, button, buckle, lace and other fasteners.
- There may be several pockets outside.
- Inside, the carrier is divided into several compartments, which vary in size. Most often, they have a clasp that separates them from each other. This internal distribution allows you to store large tools.
- Such a bag can take the form of folders interconnected - such bags are ideal for storing small appliances.
- In addition to various departments and pockets, additional fasteners can be stored in the carrier, as well as elastic bands that allow you to store frequently used tools for work. Many manufacturers even depict the contours of the devices that should be there.
Belt Bag
Waist bags for tools are ideal for working at home. This is due to the fact that all the necessary tools attached to the belt will always be at hand:
- Typically, such a bag has the appearance of a belt with compartments having different sizes located around the waist. It’s not so difficult to make such a tool bag for a belt with your own hands.
- In addition, it may have a pocket having several sections (usually it is attached to the belt).
Important! There are also apron-like bags. This option is indispensable for gardeners.
Barber bag
Many hairdressers as homework come to their clients' homes and, of course, they also need to carry around for their tools. In addition, the craftsmen need to move all the time during work, for the same reason they need a waist bag.
Let's look at the properties that a bag of a good hairdresser should have:
- On a mandatory basis there should be good roomy departments.
- The departments, in turn, must have dense partitions.
- The belt carry should have many pockets.
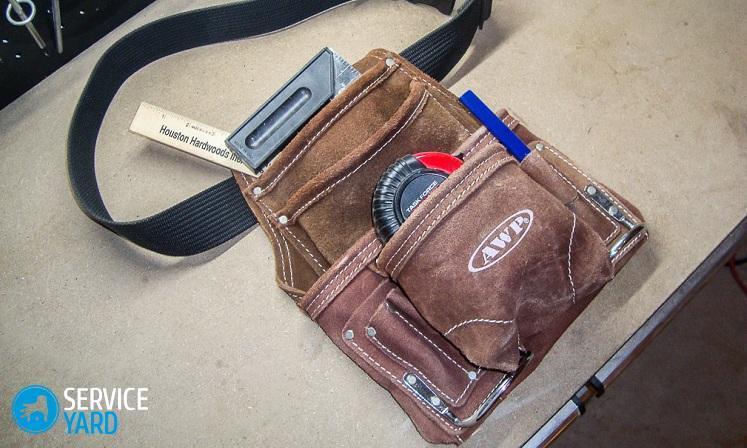
Mounting belt
Every man knows about this belt firsthand. Still, because it is necessary for any minor household repairs. Let's understand its functions:
- Such a bag, as a rule, has the form of an apron, which, in turn, has several compartments that differ in size.
- The described compartments may have so-called “nests” designed to store small tools.
Important! The advantage of such belts is that they can store a fairly large number of tools for work. Very often they are used by electricians.
Making such a tool bag with your own hands is not so difficult.
Carrying for nail service masters
Manicurists do not have to buy a waist bag at all, because they work at the table and they don’t need to change tools all the time. However, going to customers on order, they also need some kind of carrying in order to bring all the devices to the client.
Important! The advantage of this type of carrying is that each device in them always everything lies in its place.
Bag master nail service should have the following parameters:
- The bag should be dense and dark so that it does not penetrate the sun's rays. The influence of ultraviolet light can adversely affect the quality of the varnish.
- Due to the large number of items for transportation, the bag should be in the form of a suitcase, the size of which should be chosen by the master.
- Carrying should have many extra pockets and compartments.
- The fastener should be tight.
- This type of carry usually has two handles and a belt that needs to be worn on the shoulder for comfortable wearing.
to contents ↑Important! Manicure cases often have a frame that can be moved apart. There, the master puts the tools that he is currently using.
Bag making
If you are not a master at sewing products, then for the manufacture of a tool bag with your own hands, it is better to choose easier options. In this section, we will conduct two workshops on sewing two types of tool storages. For both models, it is better to first draw a sketch-pattern for further work.
We select material
When making a carry, you can use completely different materials. However, their choice plays an important role in how long a tool lasts. Typically, such products are sewn from two basic materials:
- Nylon. It is the easiest to use such material in the future - it is not afraid of washing in a washing machine, it is light in itself. It is relatively inexpensive and is used more often than the next.
- Skin or its substitute. Leather products are distinguished by their wear resistance in operation. However, such bags are much heavier than nylon and require proper care - this is their main disadvantage.
Sewing a waist bag
Before you sew a tool belt with your own hands, you need to make a detailed pattern. She, as a rule, does not differ in its complexity. Usually it is a few rectangles connected together.
Important! During the image of the pattern, think about how and where all the pockets and zippers will be located.
After the pattern is ready, you can start sewing the product:
- Pin the cut out pattern to the material with the help of safety pins, and then cut everything along the contour. When using oilcloths, seam allowances are not necessary.
- Cut out the main part to which the pockets will be attached.
- Process all cut parts. You can use a special tape for this.
- Sew a fabric belt to the main part.
- Place pockets in desired places and pin them with safety pins.
- Carefully inspect the work.
- If no errors have been noticed, sew up pockets.
Important! Pockets can also be sewn onto each other, so you will increase the capacity of the waist bag.
We sew a bag for the car
To make a tool bag in a car with your own hands, you will need the following materials:
- Material for sewing.
- Trouser braid.
- Duct tape.
- Safety pins.
- Chalk for fabric (it can be replaced with a piece of soap).
- Pencil and ruler.
- Scissors and threads.
This kind of carrying is also very simple. An algorithm will be given below, following which you can sew this item:
- Take a piece of material from which the bag will be made, bend it to the size of the largest tool.
- Lay out all the devices for which the product is sewn on the material. This is necessary in order to determine the number of cells and their size.
- Pin the cell with the required width for each instrument.
- Take out all the tools and start trimming the bag in size. To do this with chalk, you need to draw a line along which all unnecessary will be cut off.
Important! Note that you must leave an allowance for the hem.
- Draw a line that will be located 3 cm above the largest tool - it should be parallel to the top cut of the pocket.
- To retreat 2 cm from the top of the pocket, draw a line, make a fold along it.
- Sew this fold twice.
- Remove pins, draw seam lines.
- Sew everything along the line, preferably twice for greater strength.
- Sew the valve that closes all the instruments in the tool bag into the machine. To do this, put the item on the newspaper and, having decided on the height, cut off all the excess.
- Braid the bottom and sides of the valve.
- Process the same sidewalls of the bottom of the product itself. The result should be two parts - a valve and a pocket.
- Place the flap on the pocket, align the top edge and trim the braid.
- Sew additional small pockets to those already created if necessary.
Stock footage
In the end, you should get a convenient tool bag that can be rolled up, which is also a plus in saving space.
- How to choose a vacuum cleaner taking into account the characteristics of the house and coatings?
- What to look for when choosing a water delivery
- How to quickly create comfort at home - tips for housewives
- How to choose the perfect TV - useful tips
- What to look for when choosing blinds
- What should be running shoes?
- What useful things can you buy in a hardware store
- Iphone 11 pro max review
- Than iPhone is better than Android smartphones
 (No ratings yet)