Cast iron bathtub installation
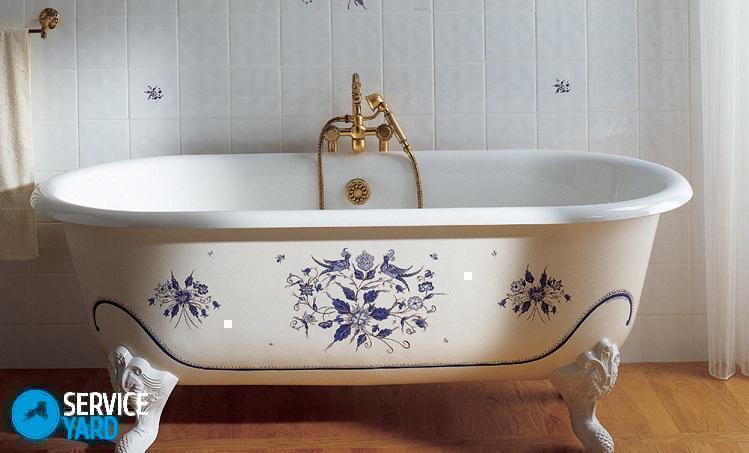
Despite the dominance of modern materials, bathtubs made of cast iron are in constant demand. They are durable, resistant to stress, store heat for a long time. Steel and acrylic products “play” under the weight of a full person, and reliable products of cast iron are not afraid of such a test. In addition, many modern models of this material are not inferior to steel or acrylic in the beauty of design. Completed in accordance with all the rules, the installation of a cast-iron bathtub is a rather labor-consuming work, but quite feasible. The mass of the cast-iron construction is quite large, so you will have to do the work together with an assistant. If everything is done correctly, then the new design will last you at least 50 years, since the material is extremely resistant to corrosion.
to contents ↑Installation requirements
Practice shows that the most sophisticated shower does not provide the comfort and enjoyment that gives a fragrant hot bath. But in order for relaxation to be complete, the product must be installed in accordance with all the rules:
- As a rule, the installation of a cast-iron bath is carried out on support legs.
- Fastening for legs are coupling bolts or special metal wedges. Fasteners come with a bathtub.
Important! The choice of attachment for the bathtub legs depends on their type. For adjustable legs, tie-in hardware is more often used, for unregulated supports - wedges.
- If the floor surface is not too hard, then steel gaskets are placed under the supports. The cross section of such a gasket is from 50 to 70 mm, the thickness is from 5 to 8 mm.
- There should not be any aluminum elements in the gaskets. Aluminum simply can not withstand the severity of the cast-iron construction and bends.
- If the floor is solid and perfectly flat, there is no need for linings.
Now about how to install a cast-iron bath.
to contents ↑Safe Shipping Tips
Naturally, before installing the bath, it must be delivered. Here are some tips to help you organize your product’s safe delivery:
- Place the bathtub vertically in the room. So she will take a minimum of space.
- Pre-close the door jamb and the threshold with soft material.
- When moving up the stairs, the drain hole of the product should be directed in the direction opposite to the direction of movement.
We equip the room
It is logical that first you need to prepare a place where a bathing vessel will be installed:
- Level the floor with a special screed mixture. You can make concrete mortar for this purpose yourself or purchase the finished mixture in a hardware store. In this case, it is enough to dilute it with water in the ratio specified in the instructions.
- Clad the floor over the concrete screed with ceramic tiles.
Important! Choose one that is designed to create a hard flooring.
- After the tile is mounted, wait a few days. During this time, the floor will become quite durable. If ceramic floor tiles are not provided for by the design project, then stock up with linings under the bathtub supports.
- The next step is wall cladding. It can be solid or partial. The latter option involves tiling part of the wall above the bathroom. If you have chosen a solid wall cladding, then it must be done before installing a cast-iron font. Partial wall cladding is performed after the bath is mounted.
Installation of a cast-iron bathtub
First disconnect the housing from the water supply, open the taps and taps, drain the rest of the water. The room is completely ready for installation work.
List of tools and fixtures
To successfully mount a cast iron design, prepare the following devices:
- Long ruler (rule).
- Construction level.
- Hammer.
- Set of wrenches.
- Screwdriver
- Putty knife.
- Roulette.
- Grinder (disk - for working with concrete).
- Silicone sealant.
- Hacksaw for sawing pipes.
Installation algorithm
The procedure is as follows:
- Withdraw sewage and pipes intended for mixers. Mark the wall on which you will install the bath.
- Bring the cast-iron structure into the bathroom, put it sideways. In this case, the bottom is directed to the wall along which the installation will be carried out. The distance from the bath to the wall is about 0.7 m.
- Installing a cast-iron bathtub on the legs has its own characteristics. Mount the first supports on the bathtub 2. If the legs are adjustable, make sure that the adjusting screws are installed in advance.
- Turn over the cast-iron structure, placing it as it should be installed. From the side where the legs have not yet been mounted, support the support to secure the cast-iron bath. For example, it can be a board made of wood about 0.6 m wide.
- Fit the remaining pair of supports. Be very careful. To avoid injury, work with an assistant. He will hold the bath, and you will mount the legs.
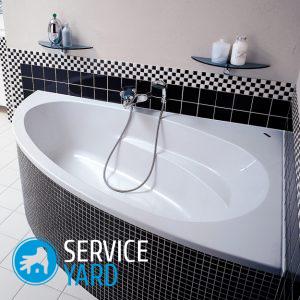
- Install the bathtub at the desired location. Make sure that the top edges are oriented horizontally.
Important! A typical mistake of many home craftsmen is to create a bias towards the drain. This is not necessary. The manufacturer took into account the necessary bias at the stage of production of the product.
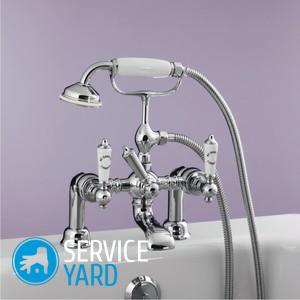
- Connect the bath to the communications. Bring the overflow to the drain hole at the top of the tank. Bring the siphon to the bottom. Then connect the top overflow to the siphon. Bring a pipe to the siphon that leads to the sewer.
- Use plastic pipes to connect the communications. The use of rubber gaskets is mandatory. Gaskets ensure tightness of all joints. It is important that the bath can be operated properly.
Important! It will not be superfluous to test the joints for tightness after installing a cast-iron bathtub with your own hands. Place newspapers or sheets of paper under all joints. Fill the bathtub with water and leave it for the whole day. If the paper gets wet, then you need to work on sealing a particular compound.
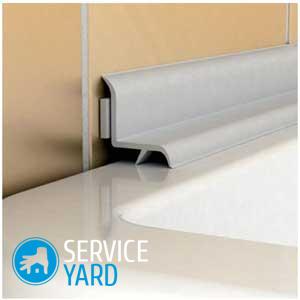
The final touch is sealing the seam between the tank and adjacent walls. Best suited for this purpose: silicone gel, plastic tape or decorative ceramic skirting.
to contents ↑Stock footage
So, if you have the time and skill, you can get to work. If not, installing a cast-iron bathtub with your own hands is not for you. Use the services of professionals. It’s better to pay money for turnkey quality work than to make mistakes, waste time and hopelessly ruin expensive plumbing.
 (No ratings yet)