Installation of sliding door wardrobes
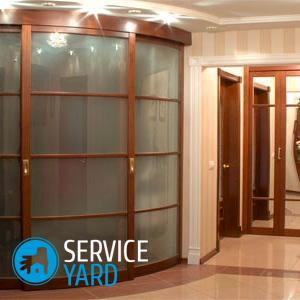
As a rule, major repairs in the apartment are associated with the replacement of furniture. Many people dream of replacing an old, morally (and sometimes physically) obsolete cabinet. Modern sliding systems are not just a tribute to fashion. They allow you to save space, convenient, fit perfectly into a variety of design decisions. From the moment of its appearance on the market until today, constructions resembling coupes in a train (hence the name) hold the leading position. You can assemble the cabinet yourself or invite a wizard. Installing the doors of the wardrobe is one of the stages of installation. Consider how you can perform it yourself.
to contents ↑How to install doors in a wardrobe? Step-by-step instruction
Installing doors is the most critical part of the job. Carry out the installation after the cabinet structure is fully assembled. It is important that the doors are aligned. This is the main condition for the design to work stably. That is why before installing the wardrobe, you need to align the surface of the floor and ceiling.
The standard procedure is as follows:
- Mounting the top rail.
- Securing the lower guide.
- Mounting the retainer.
- Adjustment of door leafs.
- Adhesive buffer tape.
Now consider each of the steps in more detail. At first - the installation of guides for the doors of the wardrobe.
to contents ↑Top guide
It is made of a metal profile with a section in the shape of the letter S.
Important! Profiles are fixed with self-tapping screws flush parallel to each other, in each recess of the profile. Otherwise, the metal profile is slightly twisted, and the system does not work correctly.
To correctly calculate the length of the profile, measure the width of the structure, subtract 2 mm and cut the profile. Installation on self-tapping screws is made in previously made by a drill and polished holes.
to contents ↑Lower guide
The size of the lower rail is also determined by measuring the width of the cabinet at the bottom. Then, holes for self-tapping screws are drilled on the profile.
Important! The peculiarity of fastening the lower guides is the displacement inward of the structure. The size of the recess is 20 mm (a deviation of 2 mm on both sides is possible).
To determine the exact distance, proceed in the following order:
- Stack the lower guide in the cabinet.
- Set door leaves (here you can’t do without an assistant). First, set the back, and then - the front canvas.
- By mixing the profile, the doors are aligned vertically, not forgetting to control the correct installation of the level.
- After the ideal position of the door leafs is found, the guide is fixed.
Lock
It is necessary so that the door leaf does not slip, but adheres to the sidewall of the structure. The latch is inserted into the lower groove of the profile, while it is not yet fixed to the bottom by self-tapping screws. Adjust the latch with a flat-blade screwdriver. Its position should be such that the center of the stopper is where the middle of the wheel with the door completely closed. The door is tightly closed, noting on the profile the place where the middle of the wheel falls.
to contents ↑How to adjust the canvas?
The purpose of adjustment is to install the doors so that they tightly and evenly adjoin the side walls, without cracks and gaps. For this, there are adjustment holes in the lower castors.Adjustment is made using a hex key. When you turn the key clockwise, the door leaf rises, against - lowers.
to contents ↑Buffer tape
It plays a protective role, preventing dust from entering the furniture. In addition, it serves as a shock absorber, softening the impact of the end part of the door leaf on the side of the cabinet. The use of a buffer tape helps extend the working life of the sliding system. There are 2 types of tape along the length of the pile:
- Long - 12 mm.
- Short - 6 mm.
Important! Long pile tape is used less often, but it provides more comfortable operation of the cabinet. Its color is selected in accordance with the shade of the entire sliding system.
Sticking it is very simple: first remove the protective sheet, and then stick on the end of the door.
to contents ↑Repairs
Sometimes over time, the doors of the wardrobe begin to close poorly. Often this is due to the fact that dust and debris get inside the working mechanism. Repair consists in lifting the blade up as far as possible, evaluating the condition of the roller and cleaning the mechanism of debris. If necessary, disassemble the worn roller and install the rollers on the door of the wardrobe.
to contents ↑Important! Jamming of the door in any position indicates that the profile is deformed. If the guides cannot be aligned, then they are replaced. After the replacement is made, the door is put in place.
Stock footage
Self-repair and installation of the wardrobe will give you the joy of the work done by yourself, and the happiness of creativity. At the same time, save the family budget.
 (No ratings yet)