Installation of curtain rods
Self-installation of curtain rods - this is a very simple task, which absolutely everyone can do. The most important thing is to take measurements correctly and choose the model of the cornice that is right for you, which will not only fit into the general interior of the room, but will also be functional. Therefore, so that you do not have difficulties during the installation process, in this article we will tell you how to choose a cornice and carry out installation so that in the end it is fastened with high quality and reliable.
to contents ↑Types of Cornices
Today, the market offers a huge variety of different models of curtain rods, which can be divided into the following types:
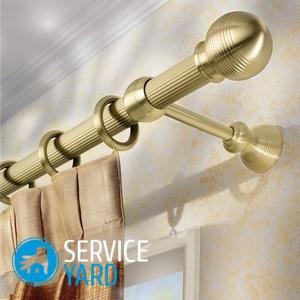
- Round. Basically, such cornices are made of wood or metal. The style and size can be completely different. Most often, such products are already sold complete with brackets.
- Baguette. These are flat cornices, the width of which varies from 6 to 10 centimeters. They can be both two- and three-way.
Important! Their feature is that they make it possible to assemble the curtains in a shallow fold.
- Profile. This is the most convenient option used for window openings of a non-standard shape. And due to the fact that they can have different shapes and lengths, such cornices can be called the most universal.
- Strings. This is a rather original kind of cornices. Their only drawback is that they are suitable exclusively for light and airy tissues.
- "Cafe". Pretty elegant items with fleuron-tips. They are mainly made of brass or polished copper. Rings with clothespins are hung on such a cornice or special fabric loops are made.
- Spacers. They are adjustable in length, so they fit almost all window openings. The spring, which is hidden inside the rod, holds them in place.
Important! Spacer models do not require the use of mounting brackets and screws, so you can be calm about the wooden elements of the frames.
- Automatic or mechanical. They are designed so that you can slide and slide the curtains using additional mechanisms or rollers.
- Lifting for Austrian, Roman and French curtains.
to contents ↑Important! Eaves are also classified by the method of attachment to the surface. They can be ceiling and wall.
Rules for choosing cornices
Before you install a curtain rod for curtains, you need to pick it up in advance so that it fits not only the general design of the room, but also meets all your requirements. Therefore, when choosing, you should pay attention to such points:
- Strength. Note that the design must support the weight of curtains, respectively - you need to choose products made from durable materials.
- Way of fastening. To do this, take into account the total weight of the curtains and cornice, as well as the type of surface on which the structure will be mounted.
- The length of the cornice. It should be wider than the window by at least 40 centimeters.
- The number of rows. Depending on how many rows it is planned to hang curtains, choose one-, two- or three-row systems.
Important! Pay attention to the fact that you need to mount the cornices at the end of all repair work. An exception is only suspended ceilings, since the place of future fastening is determined in advance and is under the film.
In addition, when choosing a cornice, you should always pay attention to the quality of the structure itself, because good material will last quite a while without causing any hassle. For example:
- If the cornice is made of metal, take a look so that there are no signs of corrosion or scratches on its surface.
- Plastic should be crack-free and strong enough.
- As for the wooden cornice, it must be processed with special means and varnished.
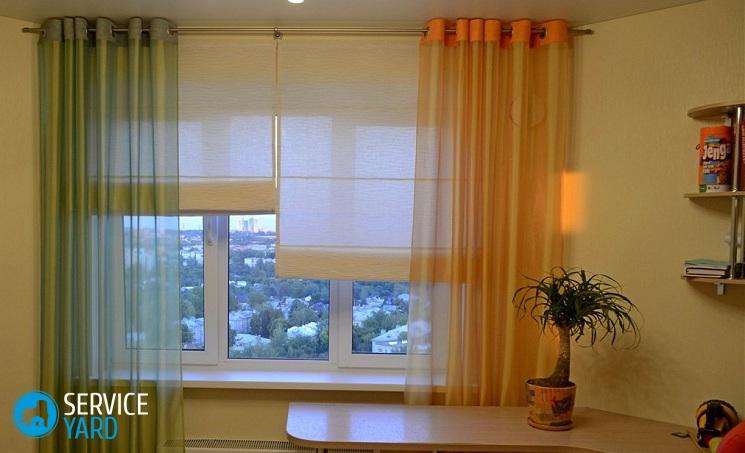
to contents ↑Important! With the help of various curtains, you can occasionally change the interior to refresh it and make it more interesting without much time and effort. Therefore, be sure to save yourself the following ideas and experiment with them:
Installation of curtain rods
First you need to prepare the tools that you will need while working. You can purchase them, or you can rent them.
Important! It should be borne in mind that to any ledge in the kit is a set of accessories designed for its fastening.
You will need:
- Hammer;
- Hammer drill;
- Self-tapping screws;
- Dowels;
- Level;
- Roulette;
- Plumb line;
- Pencil;
- Staircase or stepladder.
How to install a curtain rod on a wall?
After you have chosen the model you need and prepared the necessary tools, you can proceed directly to the process. Progress is as follows:
- Attach the cornice to the wall surface and determine its optimal height relative to the top edge of the opening.
- Using a level, draw a straight horizontal line.
- Make notes in future attachment points.
- Drill holes for dowels.
Important! For standard fastening, dowels of 6x40 and 6x30 millimeters are used.
- Insert into the holes of the dowel and attach the corner bracket from the cornice.
Important! Remember to plumb the mounting points on the vertical axis.
- Attach the remaining brackets.
- Assemble and attach the curtain rod. Visually check the correct location.
Important! Pay attention to the fact that the drill can slip by a few millimeters when drilling, which will ultimately lead to a skew of the entire structure. In order to avoid this, make a deepening in advance at the drilling sites of about 2-3 millimeters with a nail.

How to install a ceiling cornice?
The installation of the curtain rod for the curtains on the ceiling takes place according to the following procedure:
- On the ceiling surface, make the necessary markings.
Important! When choosing a ceiling cornice, you should pay attention to the fact that such structures are mainly made of aluminum and PVC, so you need to consider the weight of future curtains.
- Cut the profile to the length you need, install caps and other finishing elements.
- Drill holes in the front of the structure, which in diameter will be slightly larger than the self-tapping head.
- Take a drill with a smaller diameter and drill holes from the side adjacent to the ceiling.
Important! The greater the weight of the curtains you choose, the smaller the distance between the holes should be.
- Apply the profile to the ceiling, according to the previously drawn markings. Attach it through the central hole with a single screw. This way you can adjust the profile.
- Check the location, if necessary, drill holes for the remaining dowels.
- Fix in other places of fastening.
Important! If fastening is made to the ceiling of drywall, butterfly dowels are used as fasteners.
Fixing curtain rods to a stretch ceiling
In this case, places of future fastening are marked with a marker, after which small pieces of adhesive tape are glued to them. This is necessary so that the diameter of the hole is fixed and does not increase during the installation of the ceiling.After that, the cornice is fixed in the usual way, which is described earlier.
to contents ↑Important! If for some reason you cannot install the cornice on the ceiling, you can mount it on the wall using the L-shaped brackets for these purposes.
Features of the installation of curtain rods depending on the type
In addition to standard actions, depending on the chosen model of the cornice, there are nuances that must be taken into account when installing the structure. So that such moments do not catch you by surprise, then we will talk about them in more detail.
Installation of round cornices
To begin with, when buying your chosen design, you must definitely check the availability of fasteners in the kit.
Important! There are times when it is advisable to replace the standard hardware included in the kit with dowels and self-tapping screws measuring 5x80 millimeters.
If the length of the eaves exceeds 2 meters, you will need an additional bracket for fixing in the center. Therefore, it is best to opt for models with open brackets, where a rod with rings is simply threaded into a small recess. Thus, you will not need to constantly remove the cornice from the wall.
Important! When installing the cornice on the ceiling, make sure that the curtain protrudes a few centimeters beyond the edge of the window sill and the battery.
Installation of rail cornice
Installation of this design can be done both to the wall and to the ceiling. Such cornices are most often sold in a set with the necessary accessories for installation and operation. Installation of this design also begins with a preliminary marking.
Important! When installing on the wall surface, the edges of the brackets must be placed 5-7 centimeters higher from the window opening. In the case of ceiling installation, the distance from the wall completely depends on the features of the layout.
You also need to determine in advance the location of the extreme points and the installation location of the brackets. To do this, it is enough to mark with a distance of 25 centimeters along the entire length. Drill holes at the marks and screw on the bracket. After that, the rail must be fixed on the front of the bracket. At the finishing stage, tighten the adjusting screws, which are located along the entire rail. Install limiters.
Installation of string cornice
The string made of steel or polymer thin cable acts as the basis for the fasteners of this design. Such cornices are mounted mainly on the ceiling. For installation, it is necessary to hammer the dowels into previously drilled holes and screw the fasteners into which the string is threaded and fixed. Close the construction with plastic boxes.
Installation of a molding
To begin with, according to the instructions, you need to assemble the design together. To do this, connect the strip of the baguette and the bus. Attach corner-shaped inserts to the sides and attach the base. Fix the structure to the wall with brackets, while screwing it to the ceiling with the upper plane.
to contents ↑Stock footage
As you can see, installing a curtain rail for your own curtains is quite simple. The most important thing is to carry out all the calculations correctly and choose the cornice itself. We hope that the above tips will help you with this, and your window opening will always look stylish and original.
 (No ratings yet)