

Installing skirting boards in different ways
- Skirting Features
- What are the baseboards for the base material?
- Other principles for classifying skirting boards
- Choosing the color and size of the skirting board
- Skirting board calculation
- How to install a wooden baseboard?
- How to install veneer skirting?
- Installing a plastic baseboard
- Features and subtleties of installing skirting boards
- Stock footage
One of the final touches in the repair of an apartment is the installation of skirting boards. Agree that somehow any floor covering looks unfinished without an effective transition from floor to wall. In addition, the installation of skirting boards around the perimeter of the floor allows you to carefully hide the wallpaper and some irregularities in the edges of the flooring, makes the interior of the room beautiful and stylish, and in the future, the installation of a decorative element will help to conduct hidden cabling and remove unsightly communication. Today we will tell you how to install wooden floor elements and install a plastic baseboard with your own hands, so that the assembled structure has a presentable appearance.
to contents ↑Skirting Features
A plinth is a plank that is mounted at the junction of the floor and wall. This important decoration element has several functions:
- Decorative. The floor covering, whether it is parquet, linoleum or laminate, does not look so impressive without a decorative element. The baseboard allows you to arrange color accents on the surface of the floor.
- Protective. Finishing material protects the walls from damage and water ingress during cleaning.
- Leveling. The skirting board closes the gap between the wall and the floor, allows you to hide minor flaws at the junction of surfaces.
What are the baseboards for the base material?
Skirting boards are made from several types of materials.
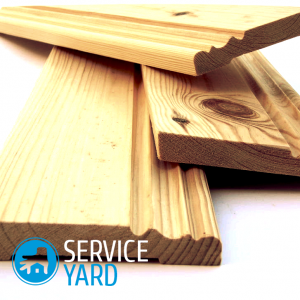
Wood
Wooden elements are made from solid wood. Most often, for a massive baseboard, valuable wood species are used, such as: oak, beech, pine, walnut, rosewood, merbau, kempasa, larch, gift.
Wood products are durable, lend themselves well to restoration and for a long time retain a beautiful appearance.
Among the minuses of wooden products can be identified:
- high price;
- complexity of installation.
Important! To nail a massive baseboard, it is necessary that the wall is perfectly flat. Installation of a wooden product is carried out using a dowel-self-tapping screw. It is screwed into the front side, and the cap is covered with sealant.
Veneer
Products are first made from more accessible types of wood (coniferous), and then the finished plinth is covered with a thin veneer of natural wood of valuable species.
Advantages of veneered products:
- naturalness;
- more affordable price;
- ease of installation.
Plinths are mounted using special fasteners.
The lack of products - during operation it is necessary to observe a certain temperature and humidity conditions.
Important! Veneered products should not be used indoors with a warm floor.

MDF
Laminated MDF products are made on the basis of wood-fiber boards. This finishing material in its structure is not much different from a laminate. On top of the MDF board, paper is pressed in, which is subsequently coated with melamine. The coating prevents the paper from fading and protects the surface of the product from various mechanical influences.
Important! Laminated products are not very expensive; they are produced in a huge number of colors and shades, however, they cannot be used in rooms with high humidity.
Plastic
This is the easiest and most affordable option:
- Plastic products can be used in all rooms and on any surfaces.
- Plastic floor skirting is not afraid of aggressive environment, moisture, does not rot.
- The life of plastic is practically unlimited.
- Due to the flexibility of the material, it is possible to hide small blemishes at any curvature of the walls and decorate floors that are not rectangular in shape.
- Plastic does not require painting and varnishing, and a wide range of colors, made with imitation of different types of wood, allows you to find the best option for any room.
- The plastic is easy to clean and can be washed with any detergent.
- It does not fade over time and does not support combustion.
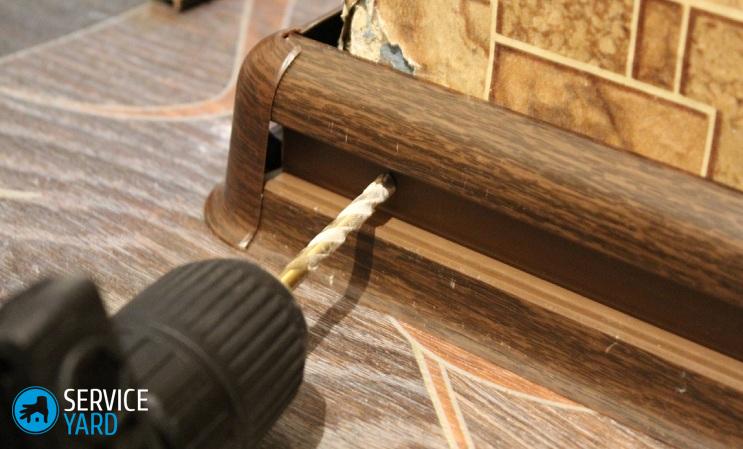
- Another advantage is the cable channel. A plastic baseboard for the floor with a cable channel allows you to hide the wiring, television and telephone cable.
Among the disadvantages, the following can be distinguished:
- it is not recommended to cover the floor laid with an elite board or art parquet;
- plastic products look good on linoleum or laminate, but on the floor or on a board made of valuable wood species, these products are completely useless.
Other principles for classifying skirting boards
By structure and purpose, skirting boards can be divided into the following types:
- Ordinary. Plinths made of wood or MDF are classic models installed in most houses of the old construction.
- Skirting boards with cable channels. Skirting boards with cable channels not only play a protective and decorative role, but also improve the design of the room, hiding all wires and cables. Fasten products using self-tapping screws, connecting profiles or glue.
- Connural profile. The konneluru skirting board is designed for the factory flooring on the wall. It is used for carpet or linoleum. Generally used in public places.
- Fillets. Ceiling models allow you to decorate the joints of walls and ceilings. Fillets are attached using special glue.
- Aluminum tapes allow decorating joints in rooms that do not have a rectangular shape.
- Planks for fixing the carpet. L-shaped products are made of hard plastic, fastened to self-tapping screws or contact nails. The edge of the carpet is glued into the profile, which ensures reliable fastening of the coating and prevents it from slipping.
Choosing the color and size of the skirting board
The color of the product should be chosen according to the color of the floor. In this case, there is practically no risk of mistakes. If you correctly select the shade of the baseboard, then it will not be evident, but will merge with the floor covering:
- You can choose the color of the product and the color of the doors, or you can choose the average shade between the wall and the floor.
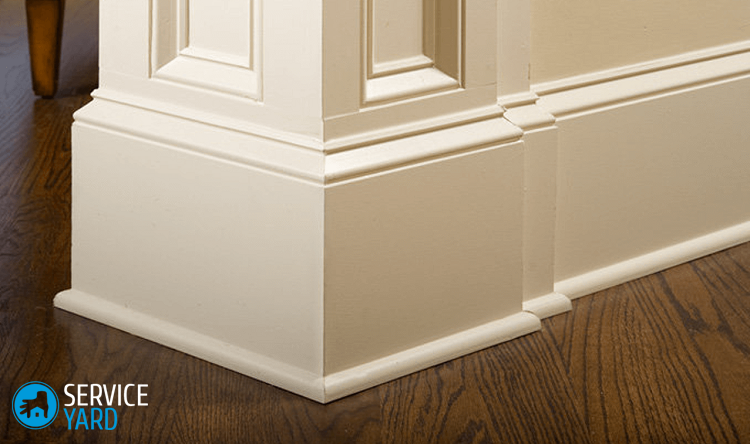
- White skirting boards look stylish, but it should be remembered that such a color visually reduces space. In addition, dirt and dust are always visible on white.
Important! The size of the product should be selected based on the area of the room and its height. The larger the room, the larger the skirting boards should be, otherwise they simply will not be noticeable.
The profile of the plinth is chosen according to the profile of the platbands or based on the general style of the room.
to contents ↑Skirting board calculation
When choosing wooden skirting boards, the following nuances should be taken into account:
- Only ideally dried products are suitable for installation, otherwise - in the process of drying, the material may become deformed and become unusable.
- Grinding quality should be perfect. This is especially true for massive skirting boards.
- The meter and number of products should be calculated according to the length of all walls of the room. Do this with a tape measure in this way: measure the length of all the walls in the room, then subtract the length of the doorways from the result, divide the difference by the standard length of the product.The resulting figure will indicate the number of planks needed. If the figure is not integer, then round the result up.
Important! We recommend purchasing one more skirting board more for stock, as during installation or operation the product may be damaged or deformed.
- Before installing wooden products, be sure to let them rest. The tree must adapt to humidity and room temperature.
to contents ↑Important! When buying plastic models, pay attention to the following points:
- Choose products of the same texture, the same shade and with the same pattern.
- Pay particular attention to the batch number. In different production batches, products may vary slightly in color and surface texture.
- Fittings according to the color and texture of the baseboard.
How to install a wooden baseboard?
To install wooden models you will need the following tools:
- Tape measure and pencil.
- Hammer or drill.
- A set of drills for wood and concrete.
- Professional miter box.
- Screwdriver.
Step-by-step instructions for installing the skirting board:
- Lay out the skirting boards along the walls so that they match each other as much as possible in pattern and color. Planks on which there are scuffs and knots, install in places of furniture.
- Start installation work from one corner. Cut the two slats at an angle of 45 degrees using a wort and arrange them perpendicular to each other.
- Lay the baseboards in the corners. Check the fit of the joints. If cracks are found, then adjust by selecting the angle.
- Lay out the skirting boards on the walls, carefully trim the joints.
- Mark on each bracket the locations of the mounting holes. Keep the distance between the holes from 80 cm to 120 cm. In addition, each hole should have a center at a height of 2 cm from the floor.
- Make holes in wooden skirting boards with a drill (diameter 3 mm).
- Make a tapered recess for the self-tapping head.
- On the bottom edge of each strip, stick the backing along the entire length. This will improve the ventilation of the floor and reduce the resilience on wooden floors.
- After all the joints are perfectly fitted, proceed to the fasteners:
- Press the baseboard firmly against the wall and floor.
- Insert a nail into the hole and mark a place in the wall under the dowel.
- Make a hole in the wall with a puncher and install the dowel.
- Place the baseboard against the wall and fix it with a self-tapping screw.
- Repeat the algorithm for each product.
to contents ↑Important! You can mask the heads of self-tapping screws with a special putty on wood. You can use skirting boards with decorative overlays that are glued after fixing the product.
How to install veneer skirting?
Installation of veneered products is quite simple. It consists in cutting the product and fixing special brackets on the wall with dowels and screws. The strap is very easy to put on the staples, as it has a special groove.
to contents ↑Installing a plastic baseboard
In addition to plastic products, it is necessary to purchase special accessories:
- External and internal corners. When buying, please note that the shape of the inner and outer corners is different.
- Couplings. Elements are designed to connect parts of the skirting board and do not have a specific mounting side. Couplings are difficult to calculate in advance, so it is better to purchase them with a margin.
- Stubs. Elements are used to close the ends of the baseboard. There are left and right plugs.
To attach plastic models, you can use:
- Special glue “Liquid nails”. Mainly used for plasterboard walls.
- Self-tapping screws. Use this option for brick walls.
To work, prepare the following tools:
- Roulette, pencil, square.
- Miter box or angle cutting machine.
- Hacksaw for metal.
- Drill and drill.
- Self-tapping screws, dowels.
- Vacuum cleaner to remove dust after drilling.
- Safety glasses and gloves.
Consider the advantages and disadvantages of different methods of installing plastic skirting boards.
Installation of floor skirting with glue
The advantage of this method is the lack of drilling. It is faster and less dirty.
Important! The disadvantage of this method is the one-time use of the product. Re-use the plastic baseboard does not work, since its dismantling will ruin the appearance. In addition, it is necessary to properly dose the adhesive and try not to stain the flooring and wall decoration.
Step-by-step instruction:
- Carefully process the strip of the wall under the baseboard with a primer.
- Measure, trim and install the strips first without glue.
- Glue the accessories on the baseboard.
- Apply a thin strip (or drops) of glue to the inside of the strip.
- Press the profile against the wall.
Installation of floor skirting boards using special fixtures
This method has many advantages: there are no traces of fasteners on the finished surface, if necessary, the baseboard can be easily dismantled and moved to another place.
If the process of fixing the skirting boards involves the use of special locks, then proceed as follows:
- Mark the places of fasteners at a distance of 40-50 cm from each other. The distance from the corner should be no more than 10 cm.
- In the designated places, drill holes to a depth of 3-4 cm.
- Insert plastic dowels.
- Fasten the locks-fasteners around the perimeter.
- Lock the strips on the prepared mounts.
How to install a plinth on the floor using self-tapping screws?
The installation of the floor skirting can be started from any corner of the room, but it is best to start from the corner of the longest wall of the room. Thus, you can use the maximum number of integer trims. The cut pieces will go for installation in niches and for the outline of short sections of the wall.
The entire installation process consists of three stages:
- Installation of floor skirting in a straight wall.
- Mounting and positioning of the inner corner.
- Installation and connection of the outer corner.
Let's consider each stage in more detail.
Plinth installation on a straight wall:
- Disconnect a decorative insert which covers an internal channel.
- Set the inside corner to the end of the bar. To do this, insert the baseboard into the corner element to the stop bar, which is located on the inside of the corner.
- Attach the resulting structure to the wall so that the transverse side of the inner corner abuts against the wall perpendicular to the wall to which the structure is attached.
- Fix the baseboard to the wall with screws. Most products already have special holes, so insert screws into these holes and tighten them all the way. It is advisable to carry out fastenings in increments of 25 cm.
Important! If the walls are concrete or brick, then pre-mark and drill holes for the dowels, and then mount the structure.
- Insert the connector into the opposite end of the strip.
- Attach the following strip to the connecting element and fasten it to the wall with screws.
- Install the last section of the baseboard on the wall. If it does not fit completely, cut off the required length. To correctly cut the required length, mark the location of the internal stop on the front surface of the connecting element. Perform the same operation with the internal angle to which the cut section will dock. Then attach the docking corner in the corner of the room and measure the distance between the marked lines on the docking element and the inner corner. The resulting parameter minus 2-3 mm to the gaps and will be the length of the required length of the baseboard.
- Replace the decorative strip covering the mounting points and the cable duct.
Fixing and positioning the inside corner
How to install plastic skirting boards without corners on a straight wall - we figured it out. It remains to dock the inner corner with the baseboard adjacent to the perpendicular wall.To do this, attach the bar along the adjacent perpendicular wall and insert it into the inner corner to the stop bar. Secure the structure with screws.
If you need to make the transition from the inner to the outer corner, then proceed as follows:
- Mark the location of the internal stops on the faces of the outer and inner connecting elements.
- Attach the connecting (inner and outer) elements to each other and measure the distance between the marks.
- Cut a piece of the bar to measure minus 2-3 mm into the gaps on both sides. This segment will serve as the frame on which the corner elements will be mounted.
- Install the inner and outer corner elements on the cut piece of the bar.
Mounting and connecting the outside corner
- Approaching the baseboard in a straight section to the outer corner, cut it in length so that the end does not reach an angle of 2 mm.
- Dock the end face with the outer corner element until it stops.
- Secure the structure with a screw.
- Attach the bar to the perpendicular wall and thread the end into the outer corner element until it stops.
- Close the channel with a decorative cap.
Moving gradually along the perimeter of the room, install the plinth in straight sections, framing the outer and inner corners.
to contents ↑Features and subtleties of installing skirting boards
When mounting baseboards on the floor, use the following recommendations:
- Do not forget that the floor and walls should be even, as the skirting board can only partially smooth out defects.
- When gluing the plank, choose less aggressive compounds so as not to spoil the plastic product.
- When drilling holes for dowels, use a vacuum cleaner. Bring the vacuum cleaner tube without nozzle as close to the drill as possible to collect all debris.
- When marking and trimming the slats, wear the connecting elements, since they have landing gaps that must be taken into account. Work by eye may result in installation errors.
- Do not tighten the screws too much so as not to damage the plastic. When tightening the screws, make sure that the plastic does not wrinkle or crush.
- Place the baseboard around the perimeter of the room so that the connecting elements are in the least visible places.
- Choose high quality skirting boards with sufficient softness. Such products are easier to drill.
Stock footage
As you can see, the installation of skirting boards is a simple job that does not require special expenses and special skills, but it can radically change the appearance of the room. Use the right materials and our tips to make you happy.
- How to choose a vacuum cleaner taking into account the characteristics of the house and coatings?
- What to look for when choosing a water delivery
- How to quickly create comfort at home - tips for housewives
- How to choose the perfect TV - useful tips
- What to look for when choosing blinds
- What should be running shoes?
- What useful things can you buy in a hardware store
- Iphone 11 pro max review
- Than iPhone is better than Android smartphones
 (No ratings yet)