

DIY air humidifier

Despite the fact that air is not matter, it cannot be felt or sniffed, but it is different in different rooms. All because the level of its humidity in different rooms is different. In order to increase or decrease this indicator, there are humidifiers for air. But what if you do not have the desire to purchase such a rather expensive device? In this article, we will teach you how to make a humidifier yourself.
to contents ↑Simple options for increasing indoor humidity
The easiest humidifier for air is to hang an ordinary wet towel on the battery. The battery warms the fabric and therefore moisture evaporates.
The advantages of this method are obvious: the use of electricity is not required, but generally requires almost nothing, in addition to a piece of cloth or a towel.
Important! The disadvantages are also very large:
- humidifies the room directly only near the place of evaporation of moisture;
- constant requires “recharge”, that is, wetting;
- extremely low efficiency of this method.
Complicated Option
Towel one end lower in a basin with water, hang the other end on the battery. Water will soak into the fabric and eventually evaporate into the air thanks to the battery.
The advantages of this method are obvious: an automated air humidifier with your own hands, which does not require investments.
Important! The disadvantage of this method is the low efficiency of the method, despite automation through the basin, along with water, the humidity level near the battery rises.
If such solutions do not seem aesthetic to you, nor are they effective, then you can always familiarize yourself with the ultrasonic humidifier and purchase a suitable model for yourself. Or make a similar device with your own hands.
to contents ↑What is a humidifier for?
Before you make a humidifier with your own hands at home, understand what it is for. The air of a normal humidity level in the room is somewhat difficult to maintain precisely in the winter, because central heating incredibly overdries it, and inhaling dry air is fraught with consequences. Among these consequences: respiratory diseases, allergies and other troubles.
It is especially important that he be in a house where a small child is present, because his body is still imperfect and therefore requires special conditions for optimal growth and development.
Important! All humidifiers perform one very important function, maintain the necessary level of humidity in the room at the level of 50-70%, and it is this level that is considered the most optimal for human life.
If you are going to make a humidifier yourself, we offer you some interesting ideas to simplify the whole process.
to contents ↑Idea 1 - bottle humidifier
Making a humidifier for the air on the battery with your own hands is quite simple, for this you need to have a heating battery, and so that it is not walled into the wall.
All the materials you need to make:
- a water bottle of approximately 1.5-2 liters;
- scotch tape - best take a wide;
- piece of fabric; gauze about a meter long.
Important! The advantage of this method is that it does not consume any resources, well, in addition to water, it is quite possible to make it in a matter of minutes, but the effect will be no worse than from a store.
The correct sequence for the manufacture of a do-it-yourself humidifier from a plastic bottle:
- Cut a hole in the bottle up to 13 cm long and up to 8. wide. This must be done in the side of the bottle.
- Hang the bottle to the pipe that slots away from the battery itself. To do this, use a rope or a fabric cut.
- In order to prevent this design from turning over, stick the place where the bottle is connected to the fabric using tape
- Take the cheesecloth, and then fold it several times - so that a strip comes out whose length would be no more than 1 meter and a width of about 10 centimeters.
- Lower the resulting piece of gauze into the bottle with one end, and wrap the other around the pipe, if you wish you can make several such segments, then the effect will increase several times.
- After the preparation, you can start the humidifier by simply pouring water into it.
Idea 2 - from decorative flowerpots
Another battery humidifier is:
- Using a rope threaded through the holes, secure containers on the accordion that will not spill water.
- You can use light oblong vases. In addition to its main moisturizing option, which will take place as a result of the evaporation of moisture from them, they will definitely be a decoration for your interior.
to contents ↑Important! If you do not have the desire to look for such decorative elements, you can do even more simply, put a metal container with water on the battery and that's it. True, in this case, it may be necessary to say goodbye to her at the very end of the heating season, because a serious scum from tap water forms in the tank. Alternatively, use a few while one is working, the second goes through a cleaning procedure.
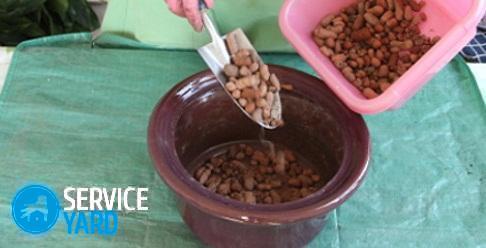
Idea 3 - a humidifier from a bucket and expanded clay
Expanded clay material has excellent qualities that make it possible to become an excellent basis for an air humidifier with your own hands. Such a homemade humidifier can both absorb and release moisture, we can say, 2 in 1.
In this case, you will need additional materials, namely:
- 4 mesh buckets - these are used for garbage, 2 a little more and 2 less.
- A bucket of approximately 12 liters.
- Aquarium pump.
- The computer cooler is 14 cm in diameter.
- A building hair dryer that has a very high heating temperature.
- Plastic ties.
To make such an air humidifier with your own hands:
- The first step during the manufacture of the device will be the ordinary gluing of buckets, those that are smaller in size, together. This can be done with a hairdryer. If not, then ordinary plastic fasteners will do.
- Thus, you get a humidifier case that will have a void inside.
- In addition, it is necessary to connect and larger buckets. Before you do this, place the first creation inside.
- To fill expanded voids with expanded clay in the humidifier, cut off the roof at the top container or cut a hole into which it will be convenient to fill it.
- Please note that expanded clay should only be selected with a fraction that does not wake up through the mesh bucket.
- Finally, the same 12 liter bucket comes into operation: put the aquarium pump to the bottom, and bring its tubes to the top of the mesh bucket design. Next, install on top of the plastic ring in which there will be holes.
- On top of all this creation, attach a cooler - it is he who will pump air into the expanded clay structure, which will be saturated with moisture. Through holes, all moisture will enter the room.
to contents ↑Important! In this type of moisturizer, it is extremely important to select the most important ingredient, expanded clay, in a quality manner, granules must be selected carefully, and before falling asleep, rinse it under ordinary running water.
Idea 4 - a humidifier from a plastic bottle
There is an easy-to-make humidifier from a plastic bottle at home, and it will give the effect of cold steam. To make such a humidifier, you will need a very large, 10 liter plastic bottle, scotch tape and a computer cooler. Unit assembly sequence:
- In the bottle, cut the neck so that the cooler can fit in the resulting hole.
- Then fix the cooler - this can be done in two versions: simply insert it into the hole, and then wrap it with tape or cut out fasteners from a fairly thick cardboard. And to be more precise, take cardboard, attach the cooler and cut a hole a little less than the cooler itself, and then attach it all to the bottle with exactly the same adhesive tape. The second option will be more reliable.
- Now just plug in the cooler and then enjoy the right air.
Important! You can make such a humidifier from a large plastic container, due to the fact that such containers have legs, as well as tight lids, and a much larger volume, it will be much more convenient for you to use this option.
In this case, cut a hole directly in the roof of the container, but now all other actions are similar to the previous one.
to contents ↑Stock footage
Now, an air humidifier for you has become not an object that can only be purchased in stores, but an apparatus that can be made with your own hands. We hope that you have managed not only to choose a suitable option for your device, but also to give it an attractive appearance.
- How to choose a vacuum cleaner taking into account the characteristics of the house and coatings?
- What to look for when choosing a water delivery
- How to quickly create comfort at home - tips for housewives
- How to choose the perfect TV - useful tips
- What to look for when choosing blinds
- What should be running shoes?
- What useful things can you buy in a hardware store
- Iphone 11 pro max review
- Than iPhone is better than Android smartphones
 (No ratings yet)