

DIY vase from a cardboard pipe
A vase is just that trifle that is able to give special charm and comfort in any room. Of course, to acquire this beautiful little thing is not difficult. However, a truly beautiful and refined vase is not cheap. Well, some cheap products do not paint the dwelling at all, or even look vulgar. We suggest that you make this piece of jewelry yourself, with a little effort and spending a little free time. Products made with their own hands look very original and unusual, in addition, it is always pleasant to admire the subject of their creativity. One option is a do-it-yourself vase from a cardboard pipe. We will offer you some ideas for creativity in this article.
to contents ↑We make a vase from cardboard
To begin, we will analyze the simplest option for making a cardboard vase with your own hands. To do this, you will need the following:
- The cardboard box is rectangular and small in size.
- Glue.
- A few sheets of corrugated cardboard.
- Paints.
- Putty.
Sequencing:
- Form a hexagon out of the box.
- Engage in the decoration of our corrugated cardboard vases. To do this, cut the triangles of small size with different sides.
- Put glue on the face and lay out the decor elements along the faces of the future vase, leaving small gaps between each figure.
- After you have pasted over the whole vase and it has completely dried, apply a small amount of putty between the decor elements.
- After drying, paint the vase with contrasting colors: dark in the areas between the triangles.
Fancy cardboard vase
The manufacture of such a vase is slightly different from the previous version. In order to make a vase of cardboard, you will need:
- Narrow glass jar, for example, from canned mushrooms.
- Cardboard.
- Scissors.
- Marker.
- Glue.
- Ruler.
Sequencing:
- Start from the bottom. Take the jar, attach it with the bottom to the cardboard and outline the outline with a marker - this will be your bottom for the vase.
- Cut it with scissors, adding a couple of centimeters to the drawn outline.
- From the remaining cardboard, cut a large number of thin strips 1-1.5 cm wide. The width of all strips should be the same, so for this purpose you must use a ruler.
- Cut the same lengths of 3-4 cm from the obtained strips. Their length depends on the diameter of the bottom of the future vase.
- Engage in the manufacture of the vase itself. To do this, glued cardboard pieces along the bottom edge. You need to do this in such a way that the workpieces do not go beyond the outline drawn by the marker.
- Apply a second layer of cardboard pieces staggered. In the same way, continue to lay out the entire vase.
- Insert the craft into the jar periodically to check that it fits.
- When the can is completely hidden, work can be stopped. Leave the vase to dry until morning.
The very next day, a new vase can begin to be used for its intended purpose.
to contents ↑Important! The can inside can be left, then the design will be somewhat stronger. In addition, such a product can be used as a candlestick, but then the candle must be inserted into a jar.
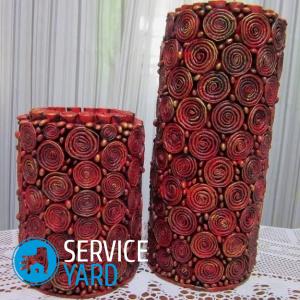
Cardboard floor vase
In order to make a floor vase from a cardboard box with your own hands, you will need:
- Cardboard from the boxes.
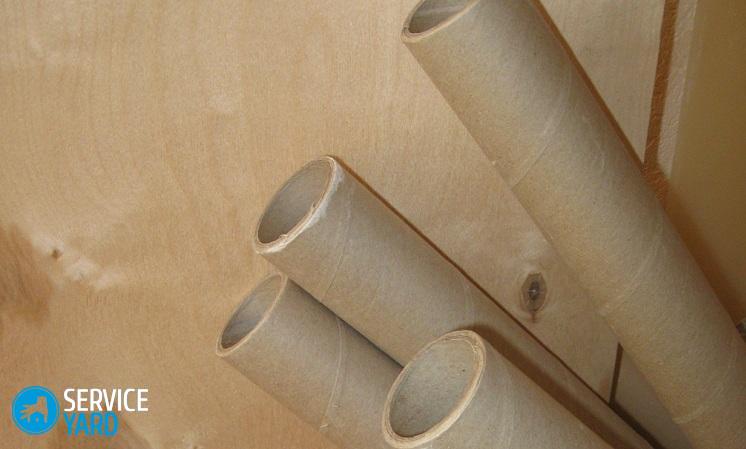
- Cardboard tube (suitable for linoleum).
- Hot-melt adhesive or “Titan” glue.
- PVA glue.
- Pencil, stationery knife, scissors.
- A lot of paper or newspapers.
- Polymer putty, for example, finishing “Hercules”.
- Acrylic paints.
- Fine sandpaper.
- Acrylic lacquer.
- Two-step craquelure.
Sequencing:
- Draw the shape of your future vase. In our case, this is a form of ancient Greek amphora, therefore there will be pens on four cardboard details.
- Cut the blanks from cardboard. Four blanks with handles. Around should get 30 pieces.
- Glue the blanks to the pipe. Glue the blanks with handles on both sides in two.
- Try to place the workpieces close to each other - at a distance of about 1 cm.
- Paste the resulting shape with paper or newspaper pieces with PVA glue. It is advisable to do this in several layers so that there is a good density and that the newspaper does not tear during the application of the papier-mâché layer.
- Soak the cardboard egg trays in water, then squeeze and mix them with PVA glue using a mixer. After the mass has been thoroughly mixed, coat it with the entire vase.
- When the vase is dry, turn it upside down and also spread with a lot, or apply a net-sickle.
- Coat the bottom of the product with putty, and when it dries well, coat the entire vase.
- After drying, go through the sandpaper to make it smooth.
- Paint the vase with gold spray paint.
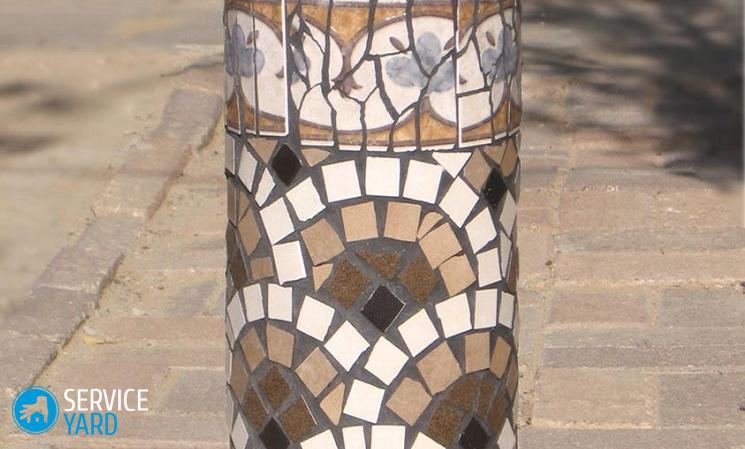
- Draw a picture and color it. However, before applying the drawing, you must first make a sketch of the vase, so that everything is correctly thought out how it will look as a result.
Important! When applying the ornament, you can make a stencil so that the pattern is even, circle with a pencil and paint with a thin brush.
- Apply a two-step craquelure to an almost finished product to give the effect of antiquity, creating small cracks.
- Spread with gold acrylic paint and immediately wipe away so that the gold remains only in the cracks.
- Cover the vase with acrylic varnish.
Stock footage
So, do not be afraid to experiment and let loose your imagination, because it’s not difficult to make a vase from cardboard with your own hands. But such a product will always please you and surprise your guests.
- How to choose a vacuum cleaner taking into account the characteristics of the house and coatings?
- What to look for when choosing a water delivery
- How to quickly create comfort at home - tips for housewives
- How to choose the perfect TV - useful tips
- What to look for when choosing blinds
- What should be running shoes?
- What useful things can you buy in a hardware store
- Iphone 11 pro max review
- Than iPhone is better than Android smartphones
 (No ratings yet)