Venetian plaster
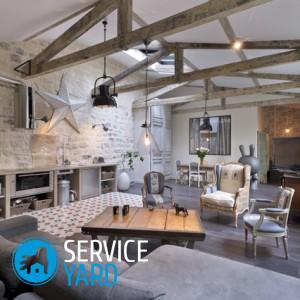
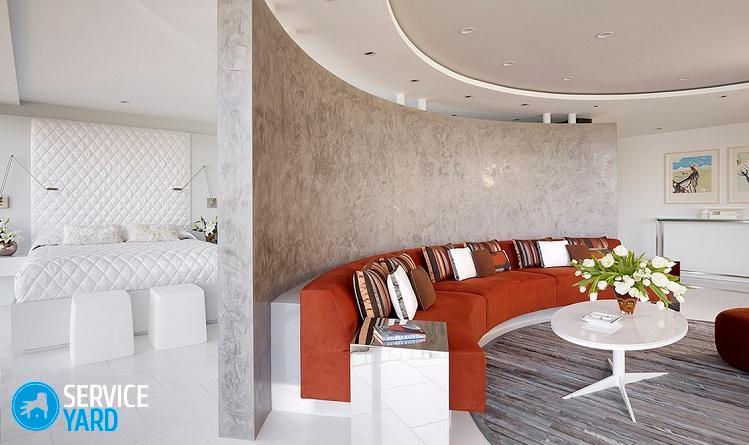
Despite the huge variety of finishing materials for walls, it is very difficult to choose the suitable option. Practicality, durability, beautiful appearance and reasonable price - these are the main requirements that are imposed on wall decoration most often. Venetian plaster almost completely meets this set of requirements. She is practical. Walls can be washed. The mixture is ideally applied to any surface - even or curved. There is no need to talk about beauty. Venetian stucco in the interior gives the room an exquisite “palace” effect. But there are also disadvantages. Firstly, it is a rather high price. And, secondly, it is difficult to get a truly beautiful surface without special skills. Even if you hire a wizard, you will not be disturbed by basic knowledge about this material.
to contents ↑What it is?
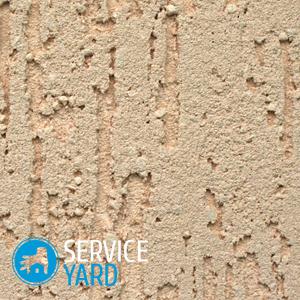
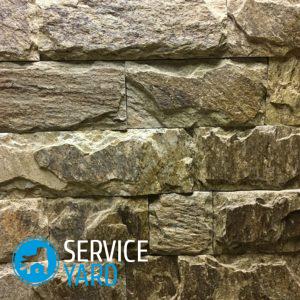
Outwardly, the “Venetian” resembles a solid marble surface without seams.
Important! The birthplace of this decoration material is Ancient Rome. When mixing the dust obtained from processing marble with slaked lime, an elastic mixture was obtained. Applied to the walls, after drying, such plaster looked like real marble. To emphasize the pattern of the ornamental stone, dyes were added to the initial solution.
The most popular wall decoration material was clay. Reddish or pink stains on the walls created the effect of natural marble. To last longer, it was coated with a layer of natural wax and polished. The walls looked great. At the same time, plastering the walls was much easier than revetting them with natural marble. In addition, it cost much less than natural stone.
Important! This decoration later became common in Venice. For some reason, the name “Venetian plaster” has taken root. Most likely, this is due to the excessively chatty merchants from Venice, who spread fame around the world about a new way of decorating walls.
Since then, little has changed in the technology for preparing the “Venetian”. The main three ingredients - slaked lime, marble dust and dye, are still used. As you can see, the finish is 100 percent genuine. Synthetic acrylic dye is sometimes used. Sometimes granite crumb, rubber juice juice is used as components. But all this is called Venetian plaster, since the main component - marble dust, is present.
to contents ↑Important! To finally determine the type of wall covering and the basic design concept, also look at our other articles:
DIY Venetian stucco - features of the application technology
To put the “Venetian” on the wall so that it turns out really beautifully, is not easy enough. This is a creative process, and there are several ways to plaster walls. Different movements during application make it possible to obtain completely different surfaces.
Without experience, it is impossible to find out exactly what kind of result you will achieve. The only way to gain experience is through trial and error. Of course, you cannot call cheap material, and science, as they say, “will fly a pretty penny”.
A good way is to train on pieces of plywood with an area of at least one “square”. Moreover, you need to train, withstanding all the nuances of application. You should not immediately try to apply the decoration to the wall. You will almost certainly have to remove it and do it all over again.
to contents ↑Important! If you come across “training” dealers who show at a special stand how to work, then you are very lucky. But this happens less often than we would like.
Preparatory work
The main foundation requirement for applying Venetian plaster is a perfectly aligned surface:
- Using latex putty, the wall is leveled to the ideal state. The composition, applied to an uneven wall, will only emphasize all the flaws. In addition, material consumption will increase significantly.
- The next stage is the treatment of the wall with a deep penetration primer. About which mixture to choose, see our separate review. "Primer for decorative plaster and liquid wallpaper". It is advisable to apply 2 coats of primer. This will make the surface unattractive to mold and improve its adhesion to the finish.
Mixing, tinting
Venetian stucco is sold in buckets, has a pasty consistency. The base finish is white. Different types of colors allow you to get a variety of shades. In addition, you can use the additional decor: sparkles, mother of pearl, etc. You can tint the mixture yourself or in the store.
To independently tint, you will need a drill with a special nozzle-mixer. Sometimes water is poured on top of the plastering mixture so that the composition does not dry out. Water must be drained. The composition is mixed with a drill with a nozzle and only then the color is poured. Mixing time is from 5 to 10 minutes.
Important! Be careful: sometimes the mixture at the walls of the bucket does not stain. Draw a wooden block against the walls so that there is painted material near them. Continue mixing until the mixture is completely and uniformly colored.
Consider one more nuance. Sometimes decorative Venetian plaster after drying changes color. Therefore, apply the finished tinted mixture to a piece of plywood and wait until it dries completely. If the color does not suit you, then add either a white composition or color - depending on what kind of result you want to achieve.
to contents ↑Important! It must be remembered that when tinting manually, you need to prepare the composition with a margin. Fully repeat the shade when preparing a new solution will fail.
Plastering Rules
The peculiarity of the “Venetian” is also that it is applied in several layers - from 2 to 10. It all depends on what kind of effect you want to get. Layers are applied in different ways, but they must be smoothed and ground to a perfect smoothness. Before applying the next layer, you need to wait until the already applied is dry. Only after all the layers have been applied and dried, it is possible to cover the surface with wax - bee or synthetic.
Important! The use of synthetic wax makes the surface resistant to moisture. Therefore, it is advisable to use just such an option for the bathroom.
Base
The first coat is applied evenly, following the same principle as conventional plastering. The base layer can be tinted or not - it all depends on your taste. If you are going to apply the composition in 2-3 layers, the base will shine through the colored layers. If the number of layers is more than 5, then the base layer will simply not be visible. It all depends on the quality of the composition.
Subsequent layers
Starting from the second layer, the mixture is applied in strokes, randomly. The composition is applied with a spatula or a special Venetian trowel. In this case, it is necessary to try so that the trace from the first touch with a spatula is not noticeable.
Important! Uniformity is not necessary. It is the randomness of the application that allows you to achieve an amazing "marble" effect.
The drying time of the composition is from 1 hour to 10. It all depends on the manufacturing company, the ingredients, the humidity level in the room and the air temperature. After the surface is completely dry, it is wiped with a dry trowel. This is necessary to completely smooth out all the bumps obtained when applying the composition.
Finish layer
For its application, a metal thin spatula is necessarily used. The application technique is called “on the seam”, the layer is almost transparent. Take a little mixture on the spatula, apply it to the wall, and then collect it back on the spatula.
Important! At this stage, you need to ensure that the wall is as flat as possible. Of course, you will have to grind it anyway, but you need to strive.
Ironing
After the last layer is applied, they pass to the ironing of the surface.
Important! When moving to the ironing step, the plaster layer does not need to be completely dried.
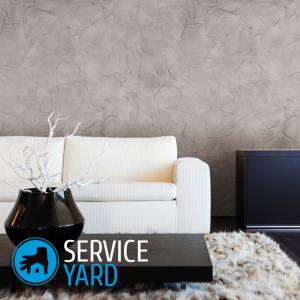
By ironing we mean surface grouting with a special Venetian trowel. At the same time, the surface must be impeccably clean and dry, without the slightest scratches and burrs. Smooth the surface in a circular motion. It is at this stage that the marble effect appears, a deep and layered pattern characteristic of a natural material.
Important! In the process of ironing, it is necessary to ensure that there are no scratches on the plastered surface. Do not touch the wall with the edges of the trowel.
The wall is treated in stages, in small sections. Ironing is sometimes the final step. For living quarters or a corridor this is enough. If you decorate the walls with a “Venetian” in the kitchen or in the bathroom, an additional wax coating is required.
Waxing
The wax layer is applied after the plaster layer has completely dried. It is advisable to wait 24 hours. The technology of applying wax “on sdir” using a wide spatula.
Important! If you leave a thick layer of wax on the wall, it will peel off over time. Therefore, you need to achieve the thinnest layer.
Half an hour or an hour after application, the wax is polished. A fleecy nozzle on a grinder or drill is well suited for this purpose. It is necessary that the pile is short and soft to the touch, not crumble. The maximum number of revolutions per minute is 3000. If you set the drill to a higher number of revolutions, the wax is not polished, but simply erased.
to contents ↑Important! The duration of polishing depends on how shiny the surface you want. Wax dries for about 2 weeks. If we are talking about the bathroom, you need to use it as little as possible during this period.
Stock footage
Artistic Venetian plaster is a difficult and painstaking process. But the final result will exceed all your expectations.
 (No ratings yet)