Video intercom - connection diagram
Today, video intercoms are installed for security purposes not only in offices, but also in private as well as apartment buildings. Gradually they supersede traditional audio devices. If you are going to connect a video intercom with your own hands, you need to know everything about this device - from a standard set to possible connection methods. One of the components of a video intercom is a monitor that displays a picture of what is happening behind the front door. There is also a calling panel of the device, in which the camera is built-in - due to it, the owner of the house will see his guest in advance. The market offers a wide variety of devices such as a video intercom, the connection scheme of which will be discussed in our article.
to contents ↑What will be required to complete the work?
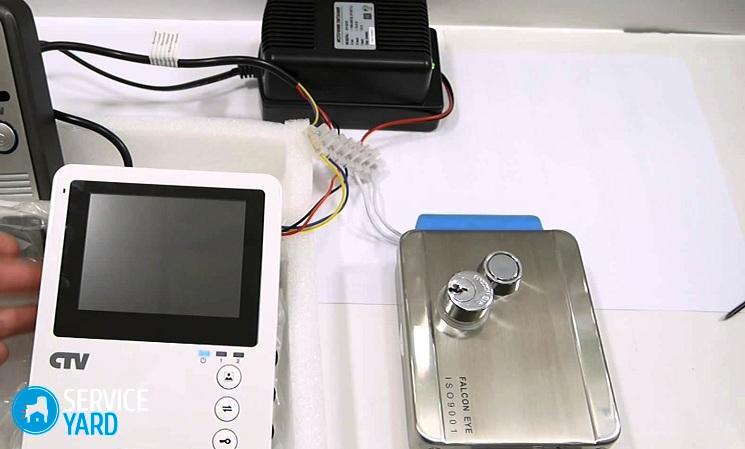
Before connecting a video intercom, you should prepare everything you need, that is, the immediate components of its system:
- Monitor.
- Castle.
- Power Supply.
- The calling panel.
- Connecting wires.
Power Supply
It’s quite difficult to pinpoint the requirements that apply to the power supply. In many respects they depend on the number of constituent elements that they will supply energy (lock, cameras), and operating conditions.
Important! If it is not included with the purchased system, then you need to calculate the consumption of all connected parts and purchase.
Castle
When connecting a video intercom, you need to think about the lock with which it will interact. Locks are electromagnetic and electromechanical.
The difference between them is clear and simple. The electromechanical model is based on the usual lock mechanism, which operates with an electric drive.
What to give preference to when connecting a video intercom yourself - each one determines for himself, depending on requirements, as well as operating conditions. When the power in the system decreases, the appliance continues to reliably protect the door and can be closed / opened with a regular key.
An electromagnetic lock is a pair of magnets that prevent the door from opening. The disadvantage is clear - when the voltage drops, it turns off and ceases to provide proper reliability.
Important! The electromechanical model is a wonderful solution for fire-hazardous rooms, on common entrance doors, when the video intercom is connected to the entrance intercom or you need to unlock all the doors one-time and quickly.
When choosing a device for an apartment or a private house, it is worth giving preference to the second type.
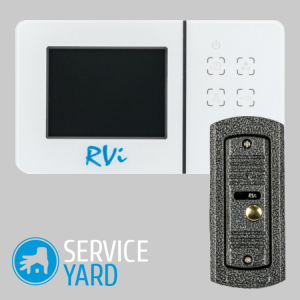
Monitor
The monitor contacts directly with the calling panel of the video intercom and is intended to display the picture that occurs behind the door or gate. It is also used for communication, remote control of locks. Its installation can be made in any place convenient for you.
Connecting wires
To connect a video intercom in the apartment, it is necessary to lay the connecting wires - it is from them that the reliability and quality of the entire system will depend.
Important! Particular attention should be paid to insulation, so that it protects the signal from external influences.
To connect the door station and the monitor of the video intercom, it is recommended that the SCM wire model, which consists of three cores:
- Blue (for sound).
- Yellow (for broadcasting a video).
- Orange (power, 12V).
Such a cable for connection is only suitable if the distance between the devices is not more than 30-40 m. If it exceeds 50 m, then you will have to lay a coaxial cable. In the event that there are other cameras that are located on the territory, then the same wire is used from them.
When connected, the lock is connected by a wire, the cross section of which should be at least 0.75 mm. square, for example, ball screw.
Call panel
One of the main devices of the video intercom system is the call panel. It is on its quality and capabilities in the future that the organizational chart depends. This is a kind of protective barrier through which the owner or operator decides for himself whether to let the guest in or not.
Thus, the calling panel is a device through which the guests are displayed, as well as the connection between the two sides. As a rule, it is directly connected to the monitor and receives power from it.
Depending on the layout of the door station and doorphone model, the following elements may be present in the case:
- Designed to control the relay lock.
- A speaker and microphone that make up the intercom for two-way communication.
- IR illumination, which provides the ability to shoot at night.
- Small camcorder.
When choosing a door station, it is worth considering the operating conditions. If all the elements of the system are purchased separately, you will have to consider that the video signal that the camera transmits corresponds to that received on the monitor.
Important! If the door station of a video intercom is installed directly on the street, then safer anti-vandal, but expensive devices are offered. They are protected from the vagaries of nature and resistant to mechanical stress.
Tools
In addition to the basic elements, to connect a video intercom yourself will also need:
- Screwdriver Set.
- Pliers and nippers.
- Soldering iron and solder.
- Tester and multimeter.
- Drill, hammer drill, a set of drills and drills.
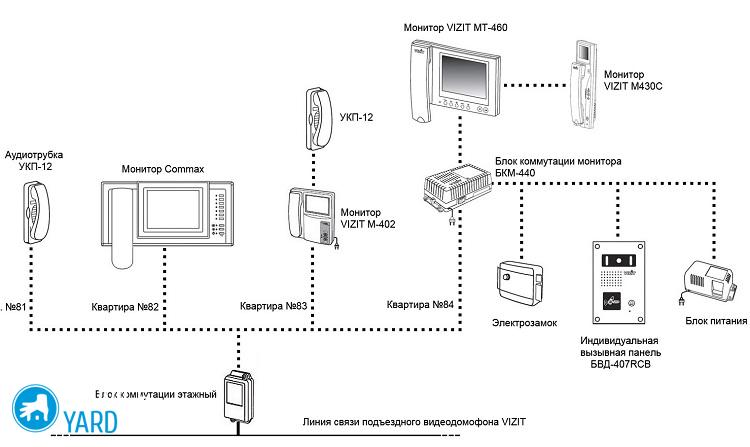
Connection diagram and work in stages
The connection diagram of the video intercom for a private house is as follows:
- The center of the system here is the call panel, which is located at the entrance.
- Connect the lock, power supply, and monitor to it (the last two are powered by 220 V sockets).
But the scheme for connecting a video intercom for housing in an apartment building looks somewhat different:
- The center of the system here will be a special controller.
- Connect the electric lock, monitor, call block and call button to it.
Step by step:
- To begin, determine the location of the calling panel of the device. The most optimal place is the area near the entrance at an altitude of 1.4-1.6 meters from the ground.
Important! You can determine this value yourself, but you need to make it convenient for guests to call without getting up on their toes.
- The viewing angle of the integrated video camera is approximately 60 degrees. At the same time, it should capture all the main space at the entrance. On sale there are special corners that allow you to deploy the panel 40-50 degrees.
Important! It can also be hidden in the wall, making a visor if necessary.
- Having made a platform for the panel, as well as equipped with a through hole for the wire, attach it using the dowels included in the kit.
Important! When connecting equipment from the street, consider the possibility of sunlight entering the lens - if necessary, make a visor.
- The overlay of the video intercom consists in installing a monitor that can be located anywhere: in the desired room or directly at the front door. However, you should not increase the distance between it and the call panel, otherwise - the damped video signal will be of poor quality.
- If you are connecting to more than one camera, they need to be launched on different lines. The amplitude of the standard signal is 0.7 V, so a large load will lead to its loss.
- The next step in installing a video intercom is laying wires. What to give preference to - we described above. In this case, all wires must be placed in a shielded braid, which eliminates possible interference.
- Lay the connecting line along the skirting boards or in special boxes on the walls. It should be out of reach to the maximum so that it cannot be accidentally cut off.
It is also worth following some tips:
- No noodles are allowed.
- There should be no power lines or power wiring nearby.
- You should try to make the line without connecting blocks - from one piece.
- The indications in the instructions supplied with the device should be strictly adhered to.
Continuing to connect the video intercom, we independently proceed to the installation of an electric lock. Locksmith work can be skipped, highlighting only a few key points:
- Provide power from a separate source with galvanic isolation with a panel and monitor.
- If you try to power it from some other elements, then the power will not be enough, or it will work unstably.
- Connect the electric lock to the panel with a two-wire cable.
- Connect the contact relay supplying the block and the lock in series.
- When installing the relay, consider the need for the lock. Most models produce 12 V and current up to 10. In the event that the voltage is higher, the current must be lowered.
Having gathered everything together, as well as having almost completed the connection, the last step remains - checking the system. If the signal quality suits you, everything works well, you can start operating.
to contents ↑Some tips
Regardless of the type of installation scheme of the video intercom, it is advisable to adhere to the following recommendations:
- Do not install the panel on the parts of the doors that extend - frequent shaking can cause the lens to shift (even fractions of a millimeter can reduce the viewing angle).
- There is a seal on the reverse side of the call panel - by connecting the intercom, it should never be damaged.
- The panel screws need to be tightened after the entire system is fully assembled and tested - this will greatly simplify the introduction of amendments.
- When connecting the device in an apartment building and wiring from the front door at a considerable distance, it is advisable to install special signal amplifiers.
Stock footage
Now, having received the answer to the question of how to connect a video intercom yourself, you can immediately get to work. However, if you do not feel confident in your abilities, you should seek the help of specialists.
 (No ratings yet)