

DIY embroidery on a towel
Even the simplest product can become a worthy element of the interior, if embellished with embroidery. By hanging a towel with a beautiful pattern, you will immediately notice how this room will be transformed, even if there are no other decorative elements there. Do-it-yourself embroidery on a towel is not only affordable, but very exciting, even if you took the needle for the first time in your life. We will talk about what types of embroidery are suitable for different fabrics, how they are performed.
to contents ↑What are your towels?
Inspect the contents of your linen closet. Surely there are a variety of towels:
- terry;
- waffle;
- linen or linen.
Do-it-yourself embroidery on a terry towel is the most specific genre, so we'll talk about it a little later. It is difficult to imagine that there is not a single towel in the apartment at all, but if this suddenly happened, they should be done with their own hands, since you will find a lot of terry cloth, waffle and ordinary cloth.
Can all towels available in your home be embroidered? In some cases, this is not worth it. For example, bright products with a large pattern can only be spoiled, although sometimes it is necessary to embroider a monogram on them. It is best to choose for embroidery products:
- from monophonic fabric;
- if possible - without a picture.
If in your closet, as luck would have it, there were only variegated towels - well, nothing prevents you from stitching plain ones and then decorating them with embroidery. For this is done simply:
- Cut out a rectangle from a canvas, waffle or terry cloth (depending on where your creation will be used later) - the sizes are arbitrary, but you can take standard ones.
- If the fabric is not particularly wide, leave the edges.
- Sew a terry towel over the edges with an overlock.
- Waffle and linen - cut from all sides where there are no edges, and stitch.
Kitchen towel
The question of how to make embroidery on a towel is most easily resolved if you have a product designed for dishes. As a rule, it is sewn from a fabric with a clear weave, which means that you can use any seams:
- easy and bilateral smoothness;
- different types of cross;
- tapestry;
- Vladimir painting;
- "Goat";
- stalked;
- different options for loop seams.
Trim the edges
If you are not yet experienced enough in embroidery, but want to master the basic decorative seams, there is nothing better than decorating a kitchen towel, for this you can imagine. You will kill two birds with one stone - learn to embroider a little and design a kitchen item in a simple but effective way.
Important! For simple linear seams, the hoop is not necessary at all - it’s enough to sew even stitches and make sure that the fabric does not tighten.
You need only two things:
- wide-eye needle;
- threads for embroidery.
For such types of needlework, no one has invented anything better than a mouline thread, but, in principle, other threads can be used:
- iris;
- chamomile;
- snowflake;
- poppy;
- darn;
- thick sewing threads.
In general, cotton and silk knitting threads are quite suitable. They are quite thick, will look good on the fabric, even if you make the simplest seams.
Important! Woolen threads for embroidery on towels are not suitable - they break very quickly, besides, they fade.
The simplest pattern
To get started, you can simply decorate the short edges of the kitchen towel with several straight seams:
- Determine how far from the edges the colored lines will be.
- Pull the transverse thread across the entire width of the towel, only carefully so as not to damage the rest.
- Pull a few more threads at a distance of 1.5-3 cm from each other.
- Lay several seams with different threads.
For example, such combinations may look good:
- loop stitch, stalk, “forward needle”;
- looped, goat, stalked;
- several types of buttonhole stitches - single and double chains in different sequences, chains where the loops alternate with straight stitches, etc .;
- strips made by Vladimir painting - on towels they look especially good.
You can make strips with one seam as well. When sewing “forward needle”, you need to ensure that all stitches are the same size. The ends of the seam must be securely fixed, as invisibly as possible.
to contents ↑Important! For the goat, you need to draw not one thread, but two - so that the stitch height is the same.
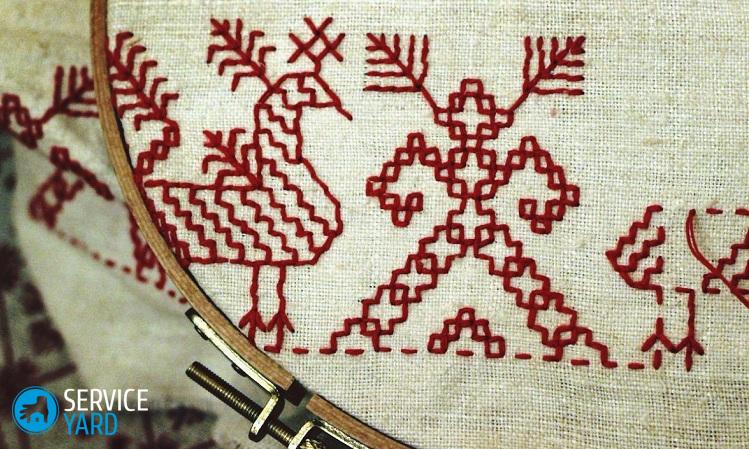
Merezhki
A fairly simple way to decorate a kitchen towel is to make hemstitches, that is, through patterns, at the edges. They are different:
- posts
- "Goat";
- curly with cross stitches.
The easiest option for embroidering on a towel with your own hands in this way is columns. To do this, you need threads of the same color as the towel itself. Then we do this:
- We outline the top and bottom of the hem - along the entire width of the towel (you can draw lines or pull out the threads).
- We pull out all the transverse threads between the marks, leaving only the shared ones.
- We fix the thread at a long cut.
- We count 5-10 threads, bind them into a bundle with one loop.
- Make a simple stitch over the hem of the hem.
- We count the same number of threads and make the second bundle.
- Thus, we sew to the end of the hem.
- We make the second edge, capturing the same threads in the loops.
Important! The goat-frog is done in much the same way, only in the second row there is a shift - the first loop captures not the entire extreme beam, but half. In the second loop, half of the first bunch and half of the second, and so on. If the openwork strip is wide, you can intercept the bunches in the middle with threads of contrasting color.
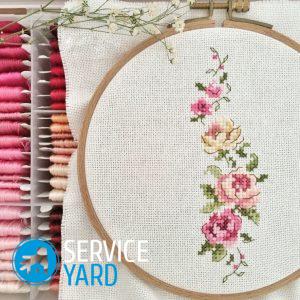
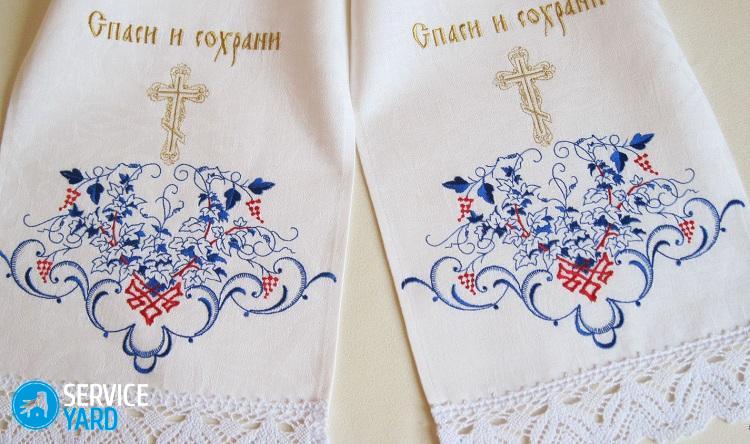
We embroider a picture
Sewing a cross-stitch or stitch pattern on a simple kitchen towel is easy. The weave is clear in order to evenly distribute the stitches; there are no obstacles. There is only one question: where to get the picture? And then a computer will come to the rescue. There are many programs for embroidery, so you can easily turn any picture you like into a pattern for a cross or tapestry. And then - know embroider according to the color layout and do not forget to hide the ends of the threads under the stitches.
With stitching, everything is even simpler. You can find a picture on the Internet, print and transfer to the canvas in one of the most common ways:
- through a carbon paper;
- spraying method.
Important! The surface can be both light and two-sided. You can use the slotted, as well as other types of lace embroidery - Richelieu or Hardanger, for example.
There are certain requirements for the drawing:
- it can be located along the edge or in the corners, but should not capture the main part;
- preferably not paintings, but patterns of small elements;
- it is possible to combine smooth surface with linear seams.
Why is it better to place the pattern on the edge? Just because the towel is not so much for decoration as for quite utilitarian purposes - they need to wipe something, in this case, the dishes. And the embroidered picture is not very suitable for these purposes, that’s all.
to contents ↑Important! For a cross and smooth, hoops are required.
Waffle and terry towels
With simple kitchen towels, everything is more or less clear, although they are sometimes made from materials that make it very difficult to make out the weave. But in waffle and terry, it is generally noticeably bad, so you have to look for some other embroidery options. They are.It was for such materials that a canvas - a grid with cells - was invented at one time. You can buy it in the store of goods for needlework, it comes in different thicknesses. It all depends on the size of the pattern and the thickness of the threads and fabric. If it is, nothing will limit the flight of your imagination, because any seam will be within your power.
Operating procedure:
- Cut off a piece of canvas - it should be larger than the picture.
- Sew it to the place on the towel where we will embroider.
- We make a diagram on a computer or take a finished needlework book.
- We embroider a pattern.
- We pull out the canvas.
Embroidery ribbons
An interesting way to decorate a terry towel is embroidery with ribbons. You can use several options:
- volume embroidery;
- flat embroidery.
Important! If we talk about the drawings, then in the first case it will be a variety of flowers, most often roses. In the second - you can limit yourself to linear seams. Since the ribbons are usually bright and wide enough, even the simplest seams will look beautiful.
You will need:
- drawing (can be very approximate);
- sewing threads or floss in the color of ribbons;
- different needles.
In general, it is on towels that this type of embroidery is somewhat akin to applications. On a waffle towel, a drawing can be applied with chalk or pencil. Most likely, this will not work with terry, so we do this:
- We lay the tape along the contours of the future drawing (for example, a flower).
- In several places we sweep with contrasting threads.
- We form the volume (for example, petals).
- Sew the fragments reliably, but imperceptibly.
In this way, you can do something like a lowercase seam - for example, “goat”:
- Draw two parallel lines in any way.
- Lay the ribbon in a zigzag pattern.
- Sew the corners of the tape to the towel.
Important! You can make the second row of “goat” from a tape of contrasting color, combine the tape with thick threads - in short, there are enough options.
Thick needle and thin tape
If you have a large needle that makes wide enough holes in the terry cloth, and a tape width of 0.5-1 cm, you can decorate the terry towel with lower case seams - they will look just fine. True, pulling the thread in this case will not work. It is best to stitch it with a basting seam, and then along the same line - with a buttonhole or forward needle. After you thread the thread into the hole, the threads of the fabric must be carefully straightened.
to contents ↑Important! For such embroideries, it is better to choose patterns with a minimum number of details. If you need to complete the picture (for example, make the middle of the flowers), do it better with threads. But from such elements as beads or beads, in this case it is better to refuse at all.
Stock footage
In a word, the options can be quite interesting, and even the remains of threads and ribbons are suitable as materials, if you have them - in any case, the embroidered fragment should not be too large.
- How to choose a vacuum cleaner taking into account the characteristics of the house and coatings?
- What to look for when choosing a water delivery
- How to quickly create comfort at home - tips for housewives
- How to choose the perfect TV - useful tips
- What to look for when choosing blinds
- What should be running shoes?
- What useful things can you buy in a hardware store
- Iphone 11 pro max review
- Than iPhone is better than Android smartphones
 (No ratings yet)