

DIY Tool Box
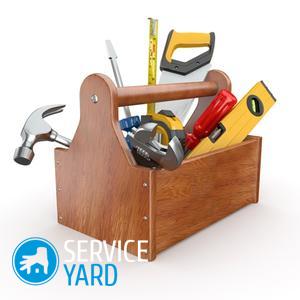
A convenient and roomy tool storage box is a dream for any craftsman. This is understandable, because in the box you can quite comfortably place the entire arsenal of carpentry or locksmith tools. There are two options: purchase a finished box or make it yourself. However, the purchased product has quite certain dimensions, and there can be much more tools. What to do - go and buy another one? There is another way: make a tool box with your own hands. It is enough to choose the right material, calculate the dimensions and make the structure not only for all tools, but also “for growth”. Conveniently? More than.
Now about how this box should be. For a standard set of tools, “home master” is quite enough ordinary boxing. An organizer is more convenient for storing plumbing tools. But the simplest option is a box with a pen. So, for the job!
to contents ↑Simple construction
To begin with, we will take up the choice of material. It can be wood, MDF or even metal. The next stage is the execution of the drawing on ordinary Whatman paper. There are also special computer programs: “Compass” or “AutoCAD”. The advantage of these programs is that you can correct errors if necessary and see in advance what your product will be.
Important! Computer programs for making a drawing of a tool box made of wood are useful only if you know how to use them and have the skills to work with them.
Material in stock, now you need to pick up a tool that is useful when working. Of course, a lot depends on the material you choose, but there is a universal classic set:
- Hammer.
- Screwdriver.
- Fasteners.
- Measuring instruments.
Important! For a tool box, we take an ordinary pine board with our own hands. It is a simple material, affordable, with good strength properties.
 You have a drawing of a tool box made of wood, now you need to translate it into material. To do this, you need a pencil and a ruler. Mark out the material and start cutting parts with a hacksaw or electric jigsaw. If you chose the non-closing option, you will need 5 planes: the bottom and 4 walls.
Important! It is advisable to use wood glue when assembling the box. Before gluing the joints, it is necessary to clean. Squeeze the parts firmly and allow the glue to dry.
After the glue has dried, you can strengthen the structure with self-tapping screws. As a handle, a wooden rail is used, which is screwed or nailed to the upper faces of the side parts.
The box is ready!
to contents ↑Important! Then proceed at your own discretion. You can sand the edges with sandpaper or varnish the product.
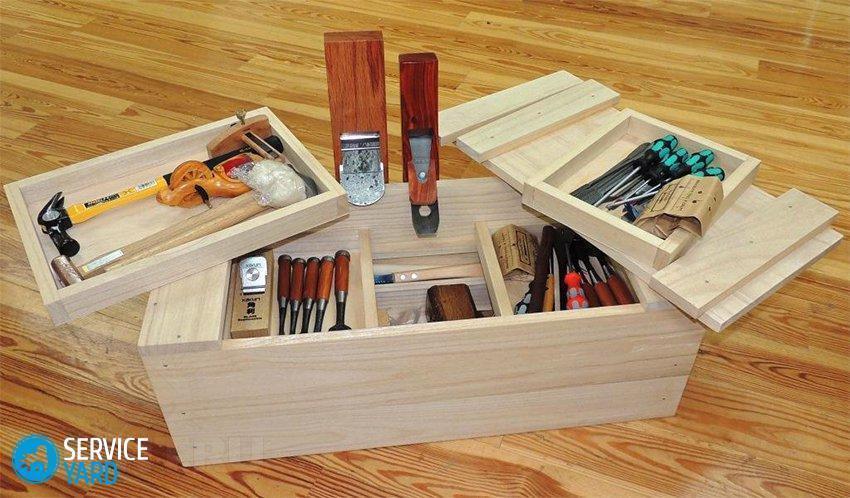
Organizer
Speaking about the organizer, we move “from simple to complex”. Do-it-yourself tool box made of plywood with an open top is perfect for a large tool: a hacksaw, a hammer, a mallet. And what to do with small tools - Cogs, bolts, nuts and other small things? They are constantly lost or not at the most crucial moment. Organizer will come in handy.
Important! It consists of many drawers for storing parts, fasteners and small tools. At first glance, it might seem that making such a product is very difficult.In fact, there is nothing particularly complicated. The most laborious stage is the manufacture of a sliding mechanism. All other points are much simpler.
Now about the stages of execution:
- The main body. It is made open with sufficient depth. The main body is useful for placing wrenches, hammers and other medium-sized tools. In essence, this is an ordinary box divided by partitions into sections.
- Making four smaller boxes. Keep to the bottom drawer sizes. Boxes will be installed on top of each other. The upper pair of boxes will be provided with covers. They can be made retractable (as in a wooden pencil case) or folding - on piano loops.
- Connection boxes between each other. For this, connecting metal strips are used. One short metal plate on each side will be needed to connect the lower boxes and 2 more plates to connect the drawers. The longest metal bar serves as a handle, and at the same time connects the upper floors of the organizer.
Metal tool box
This is the most difficult option, and only an experienced locksmith with the necessary tools can handle it.
Important! Shop boxes, as a rule, are made of aluminum and have a small mass. At home, using aluminum is quite difficult. The simplest option is a regular box of galvanized sheet with a thickness of 0.3 mm.
The toolbox is as follows:
- Vernier Caliper.
- The square.
- Marker or sharpened core.
- Hammer.
- Anvil.
- Ruler.
- Pliers.
- File.
The scenario is the same as in the manufacture of a wooden product - the execution of the drawing, the layout of the metal sheet:
- Drawings of a tool box with your own hands are best done on a paper or graph paper.
- For marking, you can use a core or marker, as convenient.
- After the scan is drawn, cut off “all the excess.” This should be done with metal scissors. The result is a complex geometric figure resembling a rectangle with wings.
- Next will be a work reminiscent of a blacksmith. Use the hammer to bend the sides of the product one at a time. “Petals of rigidity” bend last.
to contents ↑Important! After you wrap the parts of the product, having assembled the box, you need to go over it with a hammer - “straighten”.
Stock footage
According to the above algorithm, you can make a box of the size you need to place the tools. So, you know how to make a tool box with your own hands. This is not at all difficult. It’s worth a try!
- How to choose a vacuum cleaner taking into account the characteristics of the house and coatings?
- What to look for when choosing a water delivery
- How to quickly create comfort at home - tips for housewives
- How to choose the perfect TV - useful tips
- What to look for when choosing blinds
- What should be running shoes?
- What useful things can you buy in a hardware store
- Iphone 11 pro max review
- Than iPhone is better than Android smartphones
 (No ratings yet)