How much can three Vienna chairs be restored?

Light and graceful Viennese chairs, invented by Austrian masters almost two centuries ago, today are a worthy decoration of the interior. But any furniture, even made by upscale cabinetmakers, periodically fails and needs to be updated. How much can three Vienna chairs be restored? It depends not only on the nature of the damage, but also on where you go for help. If you know how to handle carpentry tools, it is possible that the restoration of these beautiful interior items will cost you only the cost of the material. About whether Vienna chairs can be restored, read our article.
to contents ↑What is a Viennese chair?
Before you try to make a Viennese chair with your own hands, it makes sense to try to repair a similar item if you have one and are not of great artistic or historical value. This may be the most ordinary chair made of natural wood, with a bent back and the same legs, bought at a store forty to fifty years ago. No emperor sat on it, this chair did not stand in the studio of a great artist or famous musician, but spent his last years somewhere in the attic - so why not try?
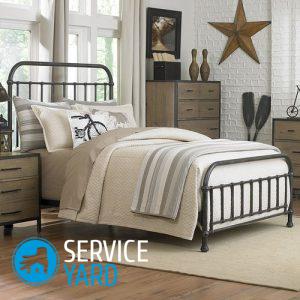
Important! Viennese chairs have a lot of advantages, and with their help you can create interiors in a variety of styles - from Loft, where every item seems to be brought from the trash, to Classics, when everything is thought out to the smallest detail in the room. Viennese chairs look especially good in interiors, suggesting an alpine house or a country estate in the Modern style.
It was during the Modern era that Vienna chairs were especially popular and testified to the high well-being of their owners, the strength of their financial situation and good taste. In those years, they were mainly made to order, which not all could afford.
The benefits of Viennese chairs are also appreciated by modern interior designers:
- light weight;
- compactness;
- grace;
- great strength;
- convenience.
Different from others
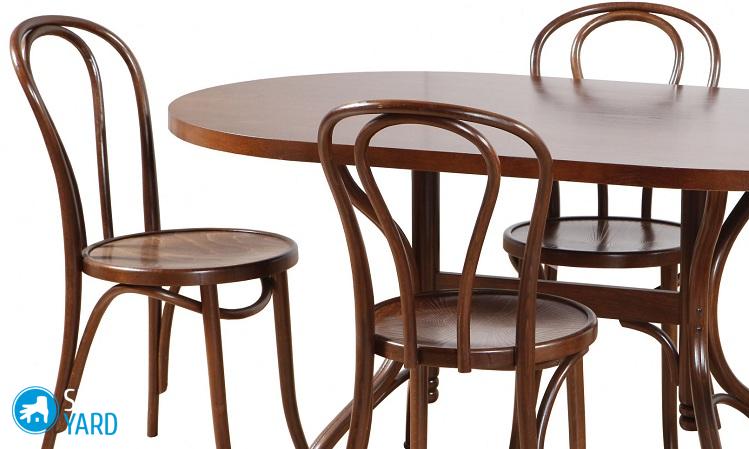
What is the difference between a Viennese chair and its “brothers”? First of all, by the appearance and material from which it is made:
- it is most often made of beech (although later they began to use walnut, oak and even conifers);
- all bends are achieved through the use of steam;
- he has high legs;
- the Vienna chair has an open bent back;
- the seat is made round.
In general, this model combines two things that seemingly impossible to combine:
- very high strength:
- ultimate grace.
Important! The Austrian master M. Tonet invented this interior miracle.
Now such furniture is available to almost everyone, it has long ceased to be a luxury item. And it is no coincidence that Vienna chairs are still considered the most comfortable seating furniture, so you can see them in a variety of places:
- residential buildings;
- cafes and restaurants;
- small concert halls;
- offices.
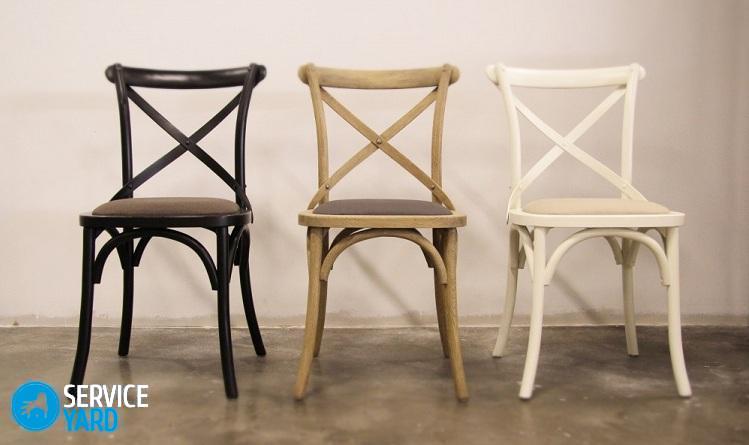
Classic Viennese Chair
For modern models, not only different types of wood are used, but even other materials - plastic and metal.If you make a Viennese chair with your own hands from wood, the main thing is that the wood is light, strong and bent well. In addition to wood, apply:
- embossed plywood;
- grid;
- a special type of weaving is Viennese straw.
What needs to be restored?
With Vienna chairs, in spite of all their strength, troubles still occur:
- they can lead;
- the wood is getting dark;
- curved back and legs may crack;
- legs are broken from improper use (although this is extremely rare - there are chairs that have successfully withstood the test of wartime, with almost no damage to their appearance).
We restore wood
So, the first thing you need to inspect the chair. The most common nuisance is darkened wood. Actually, it’s not the tree itself that gets dark, but the varnish with which it is covered. If everything else is normal, that is, the Viennese chair has not loosened, and the back with legs are like a glove, you will need:
- sandpaper with a large and small fraction;
- a vacuum cleaner;
- rough polishing cloth;
- a bath or basin larger than stool fragments;
- furniture varnish;
- a place where you can hang the parts (you can just pull the rope in the bathroom).
Restoring a classic Viennese chair
There is no point in processing the chair in assembled form - there are still corners where you cannot get. Therefore, we act like this:
- We remove the fasteners, being careful not to damage the parts themselves.
- We put the fasteners in a box so as not to get confused.
- We remove the old varnish - it is better to do it with a large skin, the varnish must be removed completely.
- We process all the elements with a fine sandpaper, removing all irregularities.
- We polish the parts with a rough cloth.
- We go through all these legs, backs, seats with a vacuum cleaner. Dust should not remain at all, otherwise - the varnish will lie unevenly.
- Take a bath or basin.
- Pour the varnish there, having pre-selected it by color.
- We lower each detail in turn so that it is completely immersed.
- Suspend parts vertically to dry.
- We periodically turn over each element so that no drips appear below.
As you can see, in this case, the question of how much you can restore the three Vienna chairs is not entirely relevant. You will have to “go broke” only on varnish, but preferably of good quality.
If the seat breaks
Despite the strength of all the elements of Viennese chairs, they are not insured against breaking through the seats. Trouble? “Not really.” This, of course, will be more difficult than varnishing the product, because the plywood will have to be bent.
For work you will need:
- thick plywood;
- large pan;
- cargo in the form corresponding to the future seizure.
Important! As a load, it is best to use a stone of a suitable shape, a pood weight, but in principle a round boiler with water or even a pan will do.
Then we act like this:
- We cut the seat out of plywood - plywood must be taken at least 5-6 layers, while it is not necessary to cut the workpiece that is exact in size right away, it can be sawn off later.
- We fill the pan with water (it should be of such a diameter that it can be covered with a plywood blank).
- We put the pan on the fire and wait for the water to boil.
- Cover the pan with plywood.
- After some time, turn the sheet so that the material is steamed both on one side and on the other.
- When both sides are steamed and the sheet becomes pliable, we turn it over on the side where the cavity should be.
- Turn off the stove.
- We lay the load on a sheet.
- We are waiting for the entire structure to cool - during this time, plywood should bend.
- We look so that the deflection is not too large.
- After the plywood has cooled, remove the load and let the sheet dry.
- We cut the seat in shape.
- Putting up a chair.
Important! During steaming, you need to ensure that plywood does not stick out in layers and does not bubble.
You don’t need any special expenses to restore the Viennese chair in this way either - only time and your accuracy.
to contents ↑Cracks
If you have broken some elements of the Viennese chair, they will have to be repaired, not restored. The fact is that the wood is bent according to certain technologies that can hardly be used at home - there is simply no appropriate equipment. With your own hands, you can get rid, for example, of cracks in the back. They arise due to the fact that microfibers are stretched when the wood bends under the influence of steam.
Cracks can:
- to glue;
- fasten with additional keys.
Cracks close up
Regardless of which repair method you choose, you need to steam out the damage site. This is done the same way as when punching plywood for the seat, but since the area is small, the method will be simpler. The procedure will be as follows:
- Clean the place near the crack - remove dirt in the crack itself and nearby, this can be done with a thin clerical knife and sandpaper.
- Wet a rag in boiling water.
- Wrap the cracked area with a rag (you can wrap a rag and put an iron or steam generator next to it).
- When the tree becomes soft, pour a thin crack with wood glue.
- Firmly squeeze the gluing place so that the crack does not diverge - for example, clamps can be used.
- Wait until the glue is completely dry.
If the crack is large
Just sticking a crack that goes into the depth of the wood more than a quarter of the thickness, you will not succeed. You can close it with a wooden key:
- Drill a few holes in the part of the chair to be glued.
Important! Drill should be perpendicular to the crack.
- Prepare the keys - they should be the size of a third of the thickness of the structure.
- Lubricate with wood glue.
- Insert the key - while the element of the chair should return to its original position.
Important! Joiner glue very quickly sets, so you have to work confidently and nimbly.
End of work
The fact that you stuck a crack will not make it less noticeable. Traces of repairs do not decorate furniture, so you should try to prevent them from being visible. On the surface usually remain:
- excess glue;
- marks from a knife and clamps.
Now you have to bring your chair into a divine form. To do this, you need a varnish of the same color as the material manufacturer had. This is a fairly difficult task, but you will be helped out at a hardware store.
Important! You can take colorless varnish, and cover the repair marks with stain, fortunately, in any store that sells lumber, you will be offered several dozen shades.
Leave no trace
Is it possible to repair a Viennese chair with your own hands so that then you do not have to rack your brains than paint over the crack? There is such an opportunity:
- Work with tools very carefully.
- Do not allow places that you do not need to repair to touch the knife, iron, or other devices that you use.
- In some cases, you can make upholstery - for example, cover the seat and back with leather or leatherette.
- Bent parts - legs and back frame can also be covered with leather.
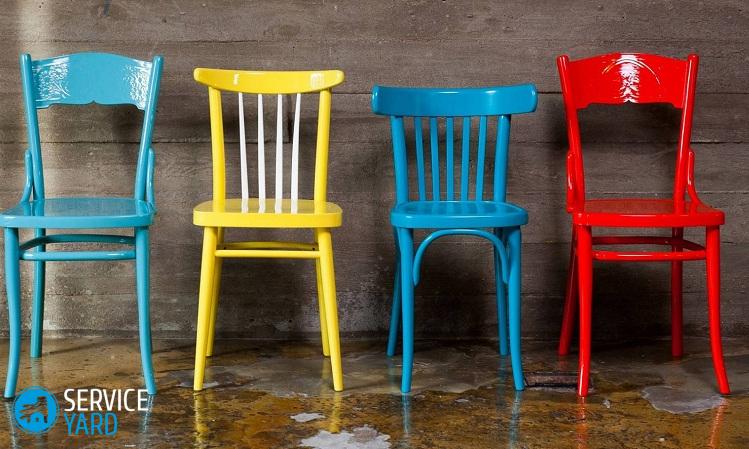
Modern chairs
Vienna chairs, in which all the elements are made of wood, are a classic of the genre. But the invention of the ingenious Austrian furniture maker was improved over time, so now you can find many models, including those with soft seats.
The backrest is also not necessarily made open, it can be high or low, there are also Vienna chairs with armrests - something in between a chair and an armchair. The materials have also changed. Quite often, a metal frame is used, or even the back and legs are made metal. Paint tends to peel off, so metal elements are best painted.
to contents ↑Do-it-yourself Viennese chair
Can I make a Viennese chair myself? Classic, which consists of a seat and curved due to the impact of a pair of beech rods - is unlikely. Just because it is very difficult to buy a beech of the right quality and shape.But now, for the manufacture of such furniture, metal bars are often used, and this, you see, makes the goal more accessible:
- The seat is made of any material - best of wood.
- Pipes under the legs and back are bent according to the usual technology for such cases.
- Tighten all the details with leather.
- We connect them in one design.
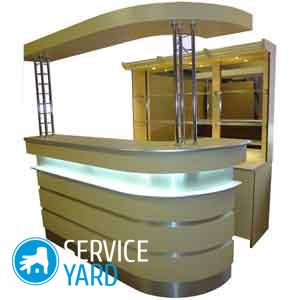
Vienna chair in a bar interior
Restored Viennese chairs allow you to create a wide variety of interiors. Now it is very fashionable, for example, to allocate part of the living room or studio apartment under the bar. Accordingly, special furniture is also needed. These can be classic Viennese chairs, which need to be slightly modified.
How to make a bar stool from a Viennese chair? The task is no less tricky than its restoration. If the chair is not loose and looks good, the only thing you have to face is with the lengthening of the legs. For this we need:
- timber;
- cardboard or graph paper;
- jigsaw;
- wood glue;
- sandpaper with coarse and fine grains;
- putty;
- varnish.
Option 1
If you do not want to disassemble the chair, you will have to make templates for the legs directly on the finished product:
- Determine how much you want to extend the legs.
- Lay the chair so that a sheet of cardboard or graph paper is under the leg.
- Circle the bottom of the leg.
- Extend the side lines to the length you need.
- Connect the ends of the lines.
- Cut 4 workpieces from timber.
- Sand them with sandpaper and polish.
- Treat the stain to the color of the wooden parts of the chair.
- Glue wood glue to the legs of the chair.
Important! You can insert metal pins into additional elements, which are screwed into the legs themselves.
Option 2
If you can make out the chair, it is best to do it. In this case, the chair is dismantled in the same way as when restoring color. This method is better because you can make the seams completely invisible:
- Then templates are cut out and extensions for legs are cut out.
- The stain is processed in its entirety, then all together is varnished.
Stock footage
In short, the good old Viennese chair will serve you for more than one year. No wonder such furniture is considered very durable. And if necessary, you can carry out some restoration work yourself. But, of course, if the chair is of historical value, it is better not to even try to repair it yourself. You can go to the restoration workshop - this, of course, will cost more, but the result will be more reliable.
 (No ratings yet)