

Do-it-yourself mirror
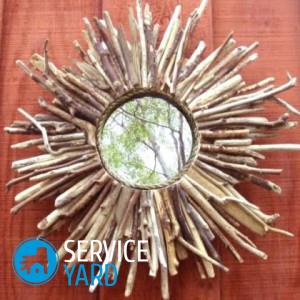
A do-it-yourself thing gives the interior a special charm. A home-made mirror will not be superfluous at all, especially now, when the historical reconstruction is perhaps the most popular hobby. People of various professions revive ancient technologies and materials, and ancient ornaments gain a second life. A do-it-yourself mirror can decorate a room in a medieval style or Baroque, remind of sunny Provence or gloomy Northern Europe. Want to try? Then this article is for you.
to contents ↑What are the mirrors?
Before you make a mirror at home, decide which one you need. Reflective surfaces are:
- household;
- parts of optical instruments.
An ordinary household mirror only reflects objects. As a rule, it is flat. Optical devices can have a variety of functions - for example, collecting light or magnification. Such mirrors have different curvatures; their manufacture requires special equipment and very accurate calculations.
to contents ↑Important! Even if the mirror for the device is made flat, higher requirements are imposed on it than on a household one. So even those who are interested in the construction of telescopes usually order mirror parts.
Materials
The question of how to make a mirror is certainly important. But no less interesting is the question of what it can be made of:
- from glass;
- from plastic;
- from foil;
- from cardboard;
- from metals.
What to take to make a mirror with your own hands?
- The most modern reflective surfaces are made of plastic. They are made by spraying. This process requires special vacuum equipment, which hardly makes sense to put at home, unless you are going to open your small mirror business.
- But a mirror of metal or glass can be made manually. The equipment for this needs the simplest. True, some silver chemicals are needed for silvering glass, but it’s easy to get them.
- In addition, it is possible to make a reflective surface of foil - it is also metal. Only the quality of such a mirror will be significantly lower than that of a metal or glass with a silver amalgam.
What metals are suitable?
Please note that not all metals are suitable for your purpose. Suitable are those that more or less well withstand grinding:
- gold;
- silver;
- bronze;
- steel;
- aluminum;
- beryllium;
- special alloys.
Important! A large plate of gold or silver will be very expensive, and finding it is problematic. In addition, any precious metals are soft alloys that cannot hold the rigid shape of the mirror. Therefore, they are used exclusively in the form of a surface layer on the surface of a reflective surface, they are applied by spraying.
Bronze and steel
Bronze is an ancient metal, quite accessible to modern man. It is quite hard, so it is convenient to polish it. Actually, the whole manufacturing process comes down to polishing.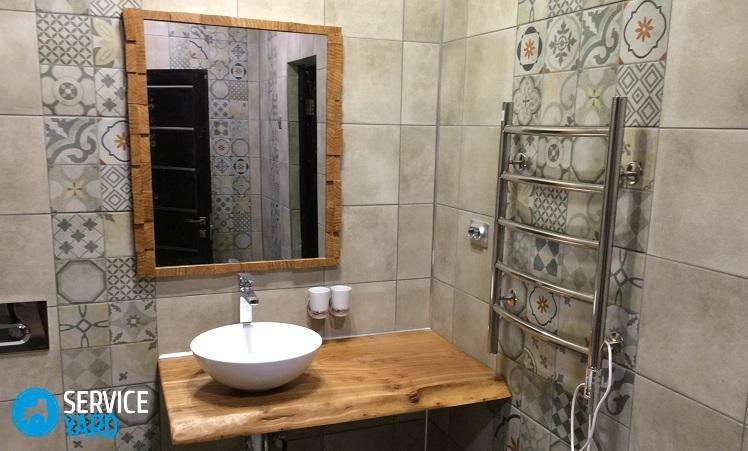
Steel people learned to do much later than bronze. It is also a very suitable material for the manufacture of reflective surfaces. They work with steel in the same way as with bronze - that is, they order the entire cast mirror, and simply polish the surface.
Important! It is possible to improve the reflectivity of a silver layer, but this is not necessary.
Aluminum and others
They make mirror surfaces and aluminum. It is a cheap and light metal, but it has a lot of disadvantages:
- It is soft, which means that polishing it is a laborious and thankless task.
- The mirror itself does not hold its shape well.
to contents ↑Important! As for other metals, such as beryllium and special alloys, such mirrors are made only at industrial enterprises where special equipment is installed. Beryllium is solid and very toxic. Usually only beryllium coating is done.
How to make a mirror of glass?
Glass is perhaps the most affordable material for making a home-made mirror.
Material selection
First of all, of course, you need to select the appropriate sheet:
- Quality Bohemian glass is most suitable - they almost never have scratches, and the surface is very well polished.
- But in the absence of the opportunity to get this material will have to be content with ordinary window.
Important! Choose a suitable sheet in the store. It should not be:
- sinks;
- chips;
- visible scratches.
In addition, the sheet should be as even as possible. Checking this out is easy:
- Lay a sheet of glass on a dark cloth.
- Place a light source nearby (such as a desk lamp).
- Take a metal measuring ruler.
- Gently, so as not to scratch the surface, attach it to the glass edge.
- Turn the lamp so that the ruler marks reflect in the glass.
- The ruler should be adjacent to the glass along its entire length so that there is no visible gap between it and the glass, and the reflection of the divisions would be an exact continuation of the divisions themselves, without breaks.
Pruning
After the sheet is selected, it must be cut off along the contour of the mirror. To do this, you need a sketch. It can be made from cardboard. If you do not have experience in glass cutting, it is better to entrust this to the master.
Trimming requires precision; no chips or nicks should appear. If you do it yourself, it is better to use a glass cutter with a cutting disc. It works cleaner than diamond.
Silvering
Making a mirror at home will require you some knowledge of chemistry. To get started, prepare the necessary materials and utensils. In addition to the already prepared piece of glass, you will need:
- distilled water;
- silver nitrate;
- glucose or refined sugar;
- caustic potassium or caustic soda;
- ammonia;
- Nitric acid;
- chemical glassware;
- filter paper;
- laboratory scales;
- set of weights;
- wax or sculptural clay;
- detergent;
- latex gloves;
- protective glasses.
Important! You have to work with hazardous chemicals, so you can’t do without gloves and glasses. Nitric acid and alkali cause serious burns, so they should not be allowed to get on the skin or mucous membranes.
 Chemicals can be bought at a chemical store, but it’s much more convenient to do this online. As for ammonia and glucose, they probably are in the nearest pharmacy. In addition, glucose can be replaced with the most common refined sugar.
Getting to work
For a start, glass is very useful to clean. For this you need:
- soft rag;
- dishwashing liquid.
There is nothing complicated at this stage. You need to ensure that the surface is clean and free from scratches. Therefore, even if the sheet you got is very dirty, you should not put much pressure on it. After washing, the workpiece must be dried, there is nothing complicated in this either. You can dry in any way possible.
Degreasing
Before silvering, the surface must be degreased; otherwise, nothing will work. For this you need a 15% solution of potassium hydroxide (KOH). This substance is sold in the form of granules that must be diluted:
- Before preparing the solution, put on gloves and glasses - this substance is very hot when combined with water.
- Weigh in the correct amount.
- Calculate the amount of distilled water: if you take 15 g of caustic potassium or caustic soda, then to get a 15% solution, you need 85 ml of water.
- Pour approximately ⅔ of the required amount of distillate into the chemical dishes with divisions.
- Put the granules there, dissolve them.
- Add water to the desired volume.
- Take a piece of soft, lint-free cotton fabric.
- Wind it on a stick.
- Wipe the glass.
- Rinse the workpiece first with plain water, then with distilled water.
- Let the edges dry.
We make a side
The side is needed so that during silvering the solutions are kept on the surface. For its manufacture, it is best to use wax, but sculptural clay is also suitable:
- Roll the plasticine into strips, taking into account the thickness of the glass - the side should be about 2 cm higher than the future silver layer.
- Fix the strips around the perimeter, while the plasticine should not fall on the part of the workpiece that you will silver.
- Press the strips tightly from the side on which there will be no silver, and from the sides.
- Lay the sheet side down on a horizontal surface.
- Fill the surface with distilled water.
- Cover it all with plastic wrap.
We prepare solutions
The first solution is made from silver nitrate and distilled water.
Important! To calculate the amount, approximately calculate the surface area. If you are going to make a silver layer 2 cm thick, multiply the area by 2. In order to silver out a 20x20 cm square, you will need about a liter of solution. Silver nitrate needs 52-53 g, the rest is distilled water. A precipitate will appear, but do not be alarmed, it should be so.
Then proceed as follows:
- Start pouring 25% ammonia solution.
- Pour it slowly, drop by drop, shaking it every time.
- Add ammonia until the precipitate disappears.
- When the precipitate has dissolved, add a little more distilled water (approximately 100 ml).
- Filter the solution.
- Leave the vessel for 10-15 minutes so that the chemical reaction is over and equilibrium sets in.
Important! While equilibrium is established in the first vessel, we prepare the second solution. Dissolve 50 g of glucose or sugar in 1 liter of water and filter.
Getting silver
Solutions must be prepared immediately before use. If you leave them for a long time, unwanted processes can begin that greatly reduce the quality of work. So, we start silvering:
- Drain distilled water from the glass.
- Immediately, without waiting for the surface to dry, fill in the glucose solution - it should completely cover the entire surface.
- Pour in a silver nitrate solution.
- Leave the glass for 10-15 minutes.
- Drain the solution.
- Rinse the surface with distilled water, placing it in an inclined position.
- Set the mirror to dry - upright.
- After the surface dries, carefully remove the sides.
- Clean the ends of plasticine.
Important! The drained solution must be destroyed because it is explosive and cannot be stored. It is possible to store unused substances, but not for very long - you can, for example, silver some other surfaces, not necessarily even. For example, an ordinary glass bottle can be turned into a beautiful silver vase.
Protective coating
The silver layer looks beautiful, but it is very fragile. In order for the mirror to serve for a long time, the surface must be covered with a protective layer. Perfectly suitable asphalt varnish. It is quite dark and perfectly protects the back of the mirror. It covers not only the surface itself, but also the ends, so that moisture does not get on them.
to contents ↑Important! Remove wax residue from the front of the mirror. This is done with a cotton swab dipped in alcohol. If a silver solution has got on the front side, it is removed with a swab moistened with nitric or hydrochloric acid, and then wiped dry with a cloth. After that, the mirror can be inserted into the frame.
Metal mirror
It is best to order a bronze or steel sheet of the desired shape in the foundry. This can be done including via the Internet, indicating in the application that the sheet should be even. Polishing is a rather laborious process, but the surface can turn out to be ideal.
Sanding the surface with abrasive powder. As a bonding element, a thick lubricant is used - for example, solid oil. As a grinder, a flat iron plate with a flat surface or a sheet of thick glass is used:
- Lay the grinder horizontally.
- Apply coarse abrasive mixed with solid oil to the workpiece.
- Carry the workpiece on the grinder in different directions, not leading to the edge.
- Remove abrasive and solid oil from the workpiece and grinder with a flannel rag.
- Apply abrasive with finer grain and repeat the procedure.
to contents ↑Important! The abrasive should be changed up to 5-6 times, choosing an increasingly smaller fraction. I control the depth of scratches visually on the eye and using a magnifying glass. When the surface quality satisfies you, polish it with GOI paste. Already without any grinder. The unpolished part can be varnished to mimic a patina.
Foil Mirror
Perhaps the easiest option. There are quite a few types of foil in the stores, you need the thinnest that you can find. The one that is designed for windows is most suitable. She sealed the glass in the summer.
The mirror is simple. It is advisable to choose a good even glass. You do not have to work with any dangerous substances - the sheet of foil is simply cut out in the shape of a glass and glued around the perimeter, after which the mirror is inserted into the frame. You can stick with ordinary tape.
to contents ↑DIY cardboard mirror
Some will be surprised to see this headline. Nevertheless, a do-it-yourself mirror can also be made of cardboard:
- The sheet should be sufficiently thick and dense. You can stick it on something more rigid - for example, on a plywood sheet of a suitable size.
- At the store, buy a spray can of mirror enamel. Coat the blank with this compound.
The mirror is ready - it will not be either strong or durable, and the reflectivity is small compared to silver. However, there is an advantage - in such a simple way you can make a mirror with your own hands of any shape, and this is important if your rooms are decorated in a certain style, but so far you have not managed to get all the necessary decorative elements.
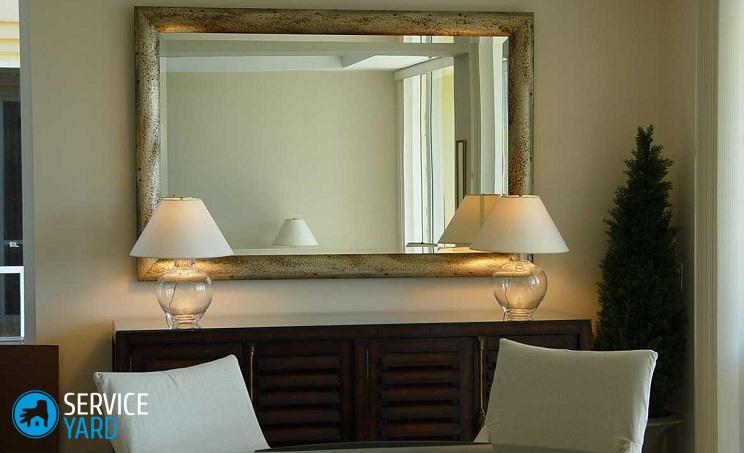
to contents ↑A few words about frames
It is not necessary to insert a metal home-made mirror into the frame - quite often it is a completely cast object. As for silver-plated glass, and especially home-made foil and cardboard, in these cases frames are simply necessary.
Glass
A classic glass mirror can be inserted into a wooden or metal frame - it depends on the style of the room in which it will hang. For example, thin planks are suitable for Hi-tech or Minimalism, and for Provencal or Baroque you need fairly thick wooden frames with beautiful carvings.
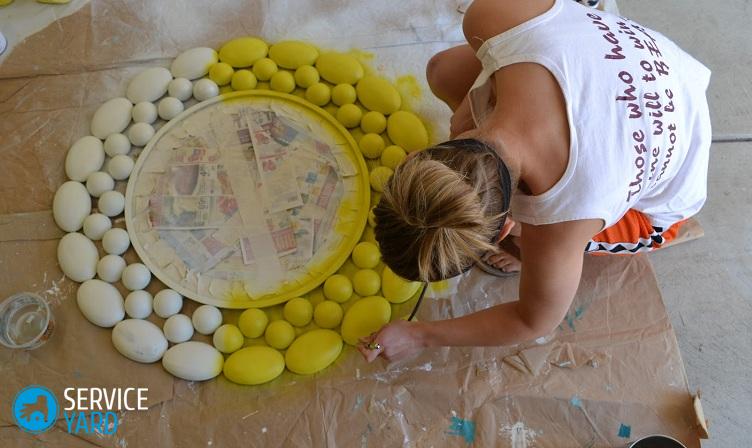
Foil
The mirror surface of the foil is a simple, but modern subject; the frame also needs an appropriate one. It can be made not only from traditional materials. Such things as, for example, plastic spoons or beaten CDs are also suitable:
- Make a passepartout a little larger than a mirror.
- Flatten the spoons and cut into pieces, disks - break into fragments.
- Make a beautiful composition from the fragments and stick it all on the front of the frame.
Stock footage
As you can see, you can really make a mirror with your own hands at home. The most important thing - if you choose a more complex option, clearly follow the technology and safety measures when working with reagents. Then the result will be of high quality, and do not hurt yourself.
- How to choose a vacuum cleaner taking into account the characteristics of the house and coatings?
- What to look for when choosing a water delivery
- How to quickly create comfort at home - tips for housewives
- How to choose the perfect TV - useful tips
- What to look for when choosing blinds
- What should be running shoes?
- What useful things can you buy in a hardware store
- Iphone 11 pro max review
- Than iPhone is better than Android smartphones
 (No ratings yet)