

Acrylic Putty
Acrylic putty is a popular type of building materials, which is in great demand among professionals. During the repair, before carrying out finishing work, it is necessary to repair all cracks, holes, and align the walls. It is for this type of work that putty is needed. There is not one type of building mixture for puttying (gypsum, cement and others). Why is acrylic in such demand? In this article we will consider the features of acrylic putty for walls and the basic rules for working with it.
to contents ↑The advantages of acrylic putty
The advantages of this type of mixture are explained by its composition. The composition includes: chalk, backfiller, niborite, talc, coloring pigments and, of course, acrylic. All components together create high-quality film-forming material, the main advantages of which are:
- High ductility. The mixture is well applied and does not react to mechanical influences and temperature changes, remaining integral. She also has no shrinkage.
- Water repellent. Putty does not let moisture in, and this prevents the spread of mold and fungus, which not only spoil the appearance of the walls, but also destroy the coating.
- Environmental Safety. The composition of the putty meets all standards, it is safe for humans and the environment.
- Fire resistance. This mixture is fireproof.
- Breathability. Despite the fact that acrylic putty is a film-forming material, it remains “breathable”.
- Good thermal insulation. Putty perfectly retains heat.
- Resistance to ultraviolet radiation.
- High adhesion with various materials.
- Convenience of work with acrylic putty. It is easy to apply, easy to sand, and dries quickly.
- It has a long service life.
Disadvantages of Acrylic Putty
As you can see, there are many advantages, although, of course, there are also disadvantages. For some, they are very insignificant and completely overlap with the advantages of building material, but it is worth mentioning them:
- Price. It costs acrylic putty more expensive than other types, not every budget will “pull” such costs.
- It cannot be used at subzero temperatures.
- Quick drying. This property is both a plus and a minus. You need to grind quickly and efficiently immediately. This nuance is good for professionals, but bad for beginners.
Types of acrylic putty
Now it’s worth talking about the types of acrylic putty. It can be classified according to various criteria.
The degree of readiness for application:
- Dry. Do-it-yourself acrylic putty composition is being prepared immediately before use.
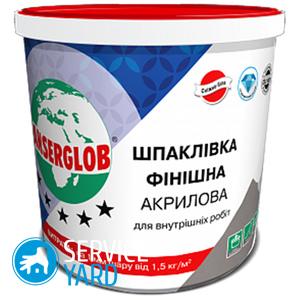
- Ready solution. Ready-to-use product is packaged in buckets, the manufacturer has prepared everything in the best possible way. Usually packaged in 15-20 kg.
Application area:
- Facade - for the floor and external walls.
- Water dispersion. For concrete walls, wooden structures.
- Putty acrylic universal. Designed for different types of work, even for metal coating.
- Special. To work with a specific type of material, for wood, for example.
Surface Finishing Stage:
- Starting. To eliminate significant defects - cracks, bumps, drops. It has larger fractions in the composition.
- The finish line.Final leveling of the surface, elimination of small irregularities. It has a small fraction.
Acrylic putty for interior decoration. Useful recommendations:
- Putty must be selected taking into account the characteristics of the room and the types of material on which it will be applied, as well as the types of subsequent surface finish.
- The dry mixture is kneaded immediately before starting work and in the amount that you use in the next 30-40 minutes. The finished mixture is thoroughly mixed prior to puttying until smooth.
Important! The mixture should be at room temperature. If you brought it from an unheated warehouse, let it stand and heat up.
- Start work only at a positive temperature, up to 30 degrees. If it is very hot, the surface to be treated must be constantly wetted.
Important! Frost reduces the elasticity of the mixture.
- Putty should be at a fast pace, the solution dries very quickly.
- The layer should be thin, not more than 3 mm, otherwise - it may begin to exfoliate and crack.
- When applying the starting mixture in large recesses, a masking grid is pre-applied. She will play the role of reinforcement. If the surface drops are such that 3 mm is small, then you need to wait for the first layer to dry and apply the next ones, but so that they are not thicker than 3 mm.
Important! The total thickness should not be more than 10 mm. For the finishing putty, the optimal layer is 1.5 mm.
- The composition can be applied with a spatula, roller or spray gun. Usually, the start is done only with a spatula, and the finish - in different ways. In the second and third cases, the solution should be more liquid.
- The average consumption of putty: 1.1-1.2 kg per 1 square meter, provided that the layer is about 1 mm. For outdoor use, the consumption is about 1.5 kg per 1 square meter of surface. Consider these data when calculating material consumption before purchase.
- A thicker solution is used for the ceiling.
to contents ↑Important! If you need to add water to the mixture, do not overdo it - the water in the mixture cannot be more than 0.5% of the total volume.
Application of acrylic putty for interior use
Work on the application of acrylic putty occurs in several stages.
Stage 1. Preparatory:
- To begin with, of course, we prepare the surface for puttying. To do this, remove the old finish. Using a spatula, we peel off the old wallpaper.
Important! Paper webs can be pre-wetted with warm water. This will speed up the process of removing wallpaper from the walls.
- We wash off the plaster.
- Using a solvent and a scraper, a grinder or a building hair dryer, we remove the paint.
- If the previous repair was done a long time ago, then the walls may have cracks, pits and other irregularities. We expand the recesses so that the edges do not crumble.
- We also remove greasy stains and other dirt, which can subsequently penetrate the surface of the finish.
- Next, we clean the surface of dust, cover it with a layer of soil and wait for complete drying.
Stage 2. Main:
- First of all, we apply a layer of starting putty on the surface. She will fill all the bumps.
- Mix well until smooth. During work, we use the level and the rule.
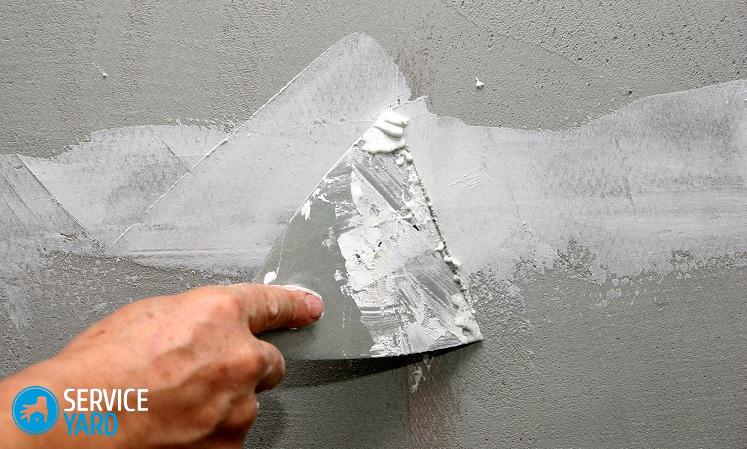
- With a small spatula, put a small lump of the mixture on a wide spatula, then distribute it evenly at an angle to the surface from the bottom up with smooth strokes. We fill the surface with sections until we finish processing the whole.
Important! Gross defects must be immediately repaired with a small spatula, as the putty dries quickly.
- Next we grind.
- If one layer was not enough for a flat surface, apply the second, and if necessary - the third.
- Do not forget to let each layer dry well.
Important! As already written, it is very important that one layer does not exceed 3 mm, and the total thickness is not more than 10 mm.
Stage 3. Final:
- After the start, it is necessary to apply a layer of finishing putty. It is applied in a similar manner with the only difference being that the layer should not exceed 1.5 mm.
Important! The thickness of the layer can be adjusted by the angle of inclination of the spatula to the surface.The sharper the angle, the thicker the layer.
- Sanding is done after the finishing putty is completely dry.
Important! To see the irregularities will help the light of a powerful lamp directed parallel to the wall.
- After completing these works, you can proceed to surface finishing (painting, wallpapering and so on).
to contents ↑Important! It should be noted that the finish acrylic putty can be used as a decorative one. To do this, the mixture is tinted in the desired tone and applied to the walls in a special technique to create a relief. For facades, ready-made acrylic fillings for exterior walls (“pebbles”) are sold, they can also be tinted.
Putty for wood
As we have already mentioned, among different types of acrylic putty there are special ones - for wood, concrete, metal and other materials. Compositions for metal and wood usually have a color, so they are selected for a specific surface. I would like to draw attention specifically to the characteristics of putty for wood. It is used for the restoration of window frames, wooden flooring, doors and frames. It helps to mask defects and extend the life of the product. Hardness of putty is in no way inferior to the hardness of the tree itself. Putty on wood - color, it is selected to match the material.
How to use wood putty?
- Remove the old coating from the surface (paint, varnish).
- We grind the area we are restoring with sandpaper, and then carefully remove all dust and dirt. We use a brush, sponge, vacuum cleaner for this.
- With a small spatula, we begin to fill in small cracks, chips.
- Large pits, depressions, voids are filled with putty layers.
Important! Layers should be thin, not more than 3 mm, each needs to be given time to dry.
- When all the defects are processed, sand the excess mixture with a sandpaper.
- Now we apply the putty finishing layer over the entire surface to be treated, it stretches evenly and as evenly as possible parallel to the wood fibers, it is not recommended to grind this layer.
With strict adherence to technology, you are guaranteed an excellent result.
to contents ↑Stock footage
Acrylic putty is an excellent building material that can solve many problems overnight. The ease of its application, the safety of the mixture and the durability of the finished result are its main advantages. With the help of such a mixture, repairs will be carried out faster and will delight you for more than one year with their practicality.
- How to choose a vacuum cleaner taking into account the characteristics of the house and coatings?
- What to look for when choosing a water delivery
- How to quickly create comfort at home - tips for housewives
- How to choose the perfect TV - useful tips
- What to look for when choosing blinds
- What should be running shoes?
- What useful things can you buy in a hardware store
- Iphone 11 pro max review
- Than iPhone is better than Android smartphones
 (No ratings yet)