

Art Vinyl - Flooring
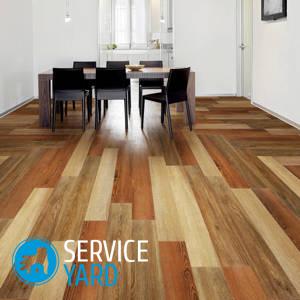
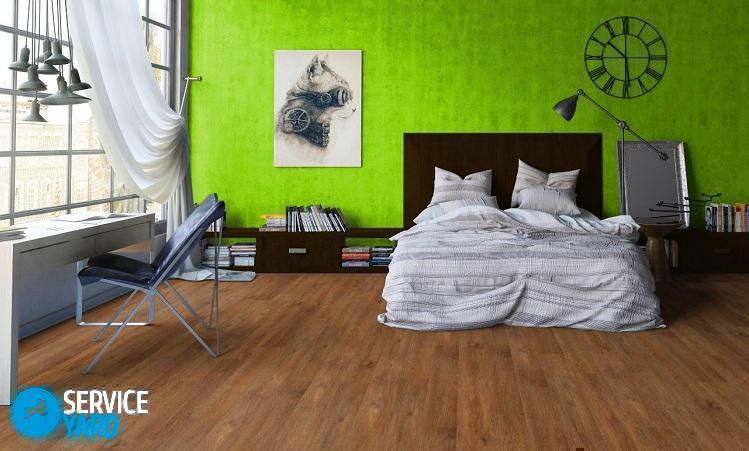
Those who appreciate comfort, beauty, reliability and practicality, as well as looking for a floor covering whose technical characteristics would meet these parameters, should pay attention to the material that appeared on the market relatively recently. Art vinyl is a new generation of flooring. The material appealed to both ordinary consumers and experienced designers. The popularity of this material is growing every day - let's figure it out what it is connected with.
to contents ↑What is art vinyl?
Art vinyl is a material that combines the advantages of three types of flooring:
- modularity of ceramic tiles;
- operational usability of linoleum;
- the beauty of parquet.
Important! Externally, the material can simulate almost any surface. There are natural textures of natural materials, and a wide color palette. Therefore, using art vinyl, you can create unique interiors, combining wood and marble, oak and slate in one space, assemble palace parquet or lay out the classic Christmas tree.
The special texture of this material creates a moisture-resistant floor covering, which is not afraid of temperature changes. Patented manufacturing technology provides reliable strength, excellent protective layer, as well as ease of maintenance.
to contents ↑Important! The term of use of art vinyl flooring is approximately 15 years, but subject to the rules of installation and proper operation, it may be longer.
Material structure
The structure that art vinyl has is like a layered cake. It consists of such layers:
- The base is made of durable vinyl - the strength of the modules, the presence of their sound and heat-insulating qualities, and their durability largely depend on its thickness.
- On top of the base is fiberglass. Its task is the hermetic stability of the tile.
- On the glass canvas is the basis for the decor.
- After that, there is a drawing on art vinyl.
- A transparent transparency covers the figure from above - this is a protective layer that prevents the wear of the pattern.
Important! The thickness of this transparency is 0.4 mm. The semi-commercial linoleum has the same indicator.
- At the very top is the finish layer - this is a patented polyurethane film that evens out the transparency and also protects the entire art vinyl flooring from the penetration of dirt deep into the structure.
to contents ↑Important! Art vinyl flooring is made from polyvinyl chloride by hot pressing. In addition to the polymer, the composition of vinyl includes plasticizers, stabilizers and quartz sand.
Art Vinyl Benefits
The cost of art vinyl flooring is comparable to the price of a laminate, however, the first type of material has a large list of visible advantageous characteristics:
- Floor vinyl is much stronger than a laminate. Due to its multilayer nature and the use of several vinyl protective layers, it was possible to create a universal floor covering that has high strength.
Important! According to the wear resistance class, the art vinyl flooring can be compared with a semi-commercial linoleum - their warranty periods are approximately the same.
- Vinyl tile is characterized by good moisture resistance. She does not care about water or dirt, so it can be safely used in rooms with high traffic. Its installation is advisable in bath complexes, SPA salons, large halls, which are used as vestibules between the street side and the living space.
Important! More recently, only ceramic tiles were used in these rooms. But she has one significant minus - when water gets on the tile floor, it becomes very slippery. But the surface of the flooring, art vinyl does not slip, which is why it is less traumatic.
- Art vinyl flooring collections boast a wide variety of color schemes, which provides unlimited possibilities for interior decoration.
- Ease of use is a very important requirement for modern materials. And the vinyl is quite consistent with it.
- Another important advantage of this material is fire resistance. Art vinyl has a moderate smoke-generating ability, as well as moderately hazardous toxicity when ignited.
to contents ↑Important! It is also worth noting the modularity of the material, which makes the process of laying art vinyl easy and not very time-consuming.
Features of preparation for laying art vinyl modules
Art vinyl is a floor covering that can only be laid on a perfectly flat base. Therefore, the preparatory work is not much different from the preliminary steps of laying a laminate, carpet or linoleum:
- The surface of the floor is completely cleaned of the old finish, repaired and poured with self-leveling mixtures.
- The thickness of the screed is determined after detecting significant differences in height. If they are small - up to 2 cm, then it is better to make bulk floors. Eliminate differences in 2-5 cm can help special cement equalizers. In that case, if the height difference is 5-7 cm, then it is worth using gypsum material.
Important! Ready-made mixtures exist on sale. It is worth choosing those that contain polymer additives. They improve grip and make it possible to create a perfectly flat surface.
- After the screed is completely dry, the floor is vacuumed or thoroughly swept. Next, a thoroughly cleaned surface must be primed: for a concrete floor, a usual water-soluble primer is taken, and for polymeric substrates - polyurethane impregnation. The primer fastens the top coat and significantly improves the adhesion, which is necessary for better adhesion of the adhesive to the floor surface.
to contents ↑Important! Before proceeding with the installation of the modules, it should dry thoroughly. The moisture percentage of the substrate should not be higher than 5%. This can be checked without even resorting to measuring temperature. Simply lay a 1 x 1 meter plastic wrap on the floor. Keep the edges tight: take a wooden lath, press it with some kind of weight and leave the greenhouse for about a week. If condensation forms inside, it means that the screed is not yet ready for further finishing work.
Laying art vinyl - we decide on the design
As a rule, manufacturers who produce vinyl modules attach design albums to their collections, which indicate the layout of the art-vinyl of individual elements. Only those who are completely confident in their artistic taste can create their own design.
But experts warn that this process may cause some difficulties in the installation of art vinyl flooring. Therefore, a little experienced person will be much easier to work with a ready-made recommended scheme, which is attached to a particular collection.
Important! The required amount of material is calculated according to the finished scheme. However, the material must be bought with a margin for cutting.In addition, when buying material, be sure to study the serial number of the package, since the vinyl used to decorate the floor must be from the same batch. This way you avoid color discrepancies.
After the packaging with the material is brought into the room, there is no need to rush to open it, especially in winter. Let the modules lie down for about a day inside the apartment and take the room temperature so that the installation of art vinyl is of high quality and the result is preserved for a long time.
Also, before laying, you need to create certain conditions in the room:
- Eliminate the likelihood of drafts. They should not be both during installation, and in the first days after the start of operation of a new floor.
- And glue, and wait for the drying of the adhesive mixture can only be at a temperature of 18 degrees Celsius. So, all 72 hours the room will have to be slightly heated, if the installation does not take place in the summer.
- Humidity in the room should not exceed 60%.
to contents ↑Important! As a glue mixture, water-soluble acrylic glue is used, which is also better to purchase with a small margin, since it is difficult for a beginner to immediately learn to maintain the glue consumption rate.
Essential tool
Before starting work on laying art vinyl, you need to collect in one place all the tools that you need to work:
- The square is medium in size.
- Roulette.
- Cork roller.
- Notched trowel.
- Trapezoidal knife with spare blades.
- Marking cord.
- Joiner pencil.
Installation sequence
After the floor is completely dry, and all the necessary tools will be assembled in one place, you can proceed to the direct installation of art vinyl. Vinyl modules are laid in the same way as ceramic tiles:
- Define the center of the room. Two main perpendicular lines connecting the middle of the opposite walls will help to identify it. Drive the screws into the floor, and then pull the beating cord over them. Using it, leave the marks, which then connect with a ruler and a pencil.
Important! With proper marking for perpendicular lines should intersect at right angles. This can be traced using a square.
- For the usual layout, such markup will be enough. However, if you are laying diagonal art vinyl, complete the layout with bisectors that divide the right angle in half.
Important! You can not connect the corner of the room with the center of the right angle. Square-shaped rooms are very rare, so it is better to trust the construction protractor.
- Next - according to the instructions, prepare an acrylic adhesive and apply to the floor. The instructions on the packaging should describe in detail how to work with this adhesive. As a rule, after application to the floor, it dries a little for about 10 minutes, returning to its working condition. Only after this time has passed, it will be possible to lay on it modular art vinyl flooring.
Important! The characteristics of the adhesive applied to the surface are maintained for the first hour. With this knowledge, it is not difficult to calculate the application area.
- Pour the diluted adhesive onto the floor, using a toothed spatula, without applying strong pressure, distribute it on the surface. Try not to leave puddles - to do this, use a spatula to perform wide arcuate movements “towards you”.
- Start laying art vinyl flooring from the center of the room. Arrange the first element according to the figure, and the next - lay tightly to each other, while avoiding the presence of gaps. Continue the laying process from the center to the wall opposite from the exit, if the usual pattern is chosen, and in the direction towards the far corner - with diagonal laying.
Important! On the back of the tiles there are pointing arrows that will help orient you in the existing pattern.
- Just lay art vinyl on glue and lightly smooth your hands from the center to the corners.Only use the cork roller on the finished finished fabric.
to contents ↑Important! If more than an hour has passed after the glue was applied to the floor surface, and the scarf was never laid, then the dried glue must be completely removed, and then a new layer should be applied.
Useful Tips
In order for the installation of art vinyl flooring to work without problems, consider these tips:
- To cut the tiles of the material you need a trapezoidal knife. The marking and the first cut are made on the front side. The tile is cut into a third of the depth, after which the cut slightly bends, only after that it is completed.
- Excessive adhesive smeared over the surface is removed only after the entire surface of the floor has been completed. This can be done using a fleece previously moistened with an alcohol solution.
to contents ↑Important! The use of abrasive or chlorine-containing chemicals is not allowed. The floor dries throughout the day, after which you can begin general cleaning.
Stock footage
Summing up, we can say that art vinyl is a floor coveringwhich is distinguished by practicality and versatility. Art vinyl is used to decorate floors in rooms with high humidity, as well as commercial premises with increased throughput.
- How to choose a vacuum cleaner taking into account the characteristics of the house and coatings?
- What to look for when choosing a water delivery
- How to quickly create comfort at home - tips for housewives
- How to choose the perfect TV - useful tips
- What to look for when choosing blinds
- What should be running shoes?
- What useful things can you buy in a hardware store
- Iphone 11 pro max review
- Than iPhone is better than Android smartphones
 (No ratings yet)