

How to close the junction of tiles and laminate between rooms
Different materials are used to finish the floor, and sometimes it becomes necessary to design the place of the seam so that it looks neat. You can close the joint of a laminate, tile or other type of flooring in several ways. Among them are both budgetary and costly. The choice depends on where the junction is located, whether there are sills, and what kind of appearance you want to get.
Junction
When unequal materials are used for flooring in different rooms, a difference in height is formed at the joints. This is due to the uneven thickness of the coatings. Most often, the floor is finished with laminate and tile, and it is these materials that have to be joined together.
How to make a seam exactly depends on where it is located. If you need to close the joints of the laminate between the rooms, it is worth decorating the connection with a low threshold. Inserts are not required if the two materials are combined in one room, emphasizing its division into functional zones. In this case, a beautifully flat surface will look.
The first option is complicated in execution. When the materials are different in thickness, the seam should be especially neat, and it is also necessary to ensure that it has the same width over the entire length. It is necessary to trim the laminate and lay the tiles with extreme accuracy.
The method of joining without skirting boards is simpler, and to fix the seam in this way, you do not need special skills. However, a flat surface is not so spectacular, and you need to choose a combination of shades very carefully, otherwise the floor will look messy.
Level connection
You can do without strips at the junction of tiles and laminate, only you need to make sure that the surface of both materials is at the same level. The seam is made with a gap, because the laminate with changes in humidity and temperature, although slightly, but still varies in size. If you do not leave a small gap at the docking point, the integrity of the coating will soon be violated. In order to avoid a gap, a filler is placed in the space between the laminate and the tile.
Regardless of what the joints are filled with, the edge of the laminate needs to be treated with a composition that prevents moisture absorption. Silicone sealant is excellent for this purpose, because it does not turn yellow and retains elasticity.
Materials that can close the joint between the tile and the laminate:
- cork compensator;
- grout for joints;
- cork sealant.
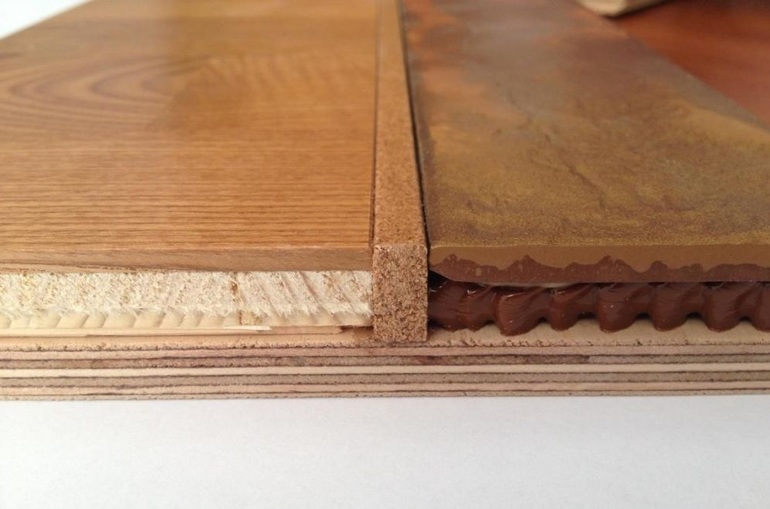
Cork Compensator Application
Auxiliary cladding material is a thin cork strip. On the one hand, the compensator has a texture resembling natural wood, and on the other, it is dyed with a suitable shade and treated with a protective varnish. Another finishing option is a thin layer of veneer, but such strips are usually used to decorate the edges of the parquet at the joints with other types of coatings. Choosing a cork connector, you need to consider the following parameters:
- The presence or absence of a chamfer.
- Type of coating (paint, veneer).
- Length. On request - 1.2-3 m, standard - 0.9 m.
- Width - 7 or 9 mm.
- Height. Ready-made options - 15, 18, 20 and 22 mm.
If the abutment is under the doorway, a standard length compensator will do. In other cases, it will have to be spliced, cut or made to order.
The cork compensator is mounted when one type of coating has already been laid.First try on the strip and cut the top, if he stands. To get an even cut, use a sharp clerical knife, and then grind the edges to smoothness with sandpaper of medium grain size. The installation of the compensator is carried out on strong glue, best of all on that which is intended for gluing of wood. Termination Sequence:
- clean and degrease surfaces;
- glue is applied in parallel lines or in a zigzag close to the laid floor covering;
- install the compensator in place and press it against the laminate or tile;
- bend the upper edge of the cork strip and apply a little sealant to the space;
- press the material back;
- the sealant squeezed out is removed with a sponge dipped in cool clean water;
- residues are removed with a dry cloth or lint-free cloth.
Laminate is mounted tightly to the cork. Its edge is necessarily treated with silicone, and in the case of tiles, this can not be done. The result is a smooth, neat and beautiful joint. So you can make straight and curved seams.
Tile Grout
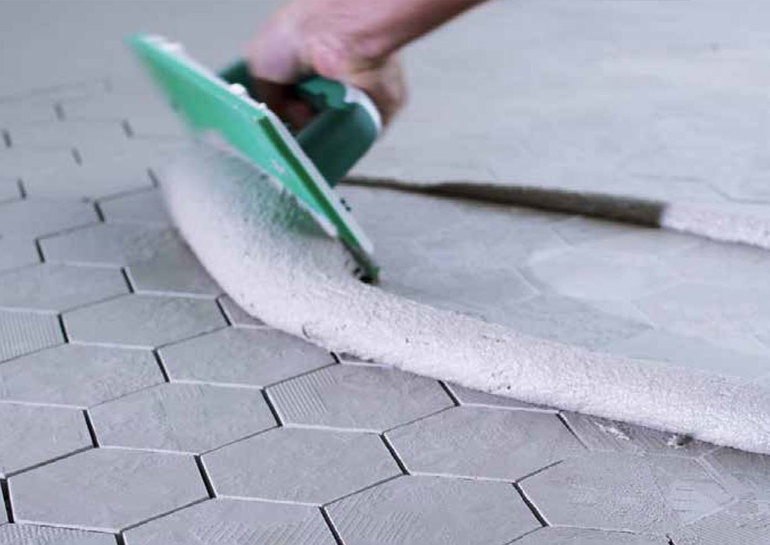
If during the laying of the tiles the joints were not designed as needed, you can close them with a connecting threshold or fill with grout for tile joints. The second option will allow you to leave the surface flat, only you need to use the material correctly. First, the edge of the laminate is treated with silicone, and it is laid in the seam at 2/3 of the height.
They wait until the material dries, then fill the joint to the top with grout for the seams. Remove excess immediately, level the surface and leave to dry. At this stage, you need to eliminate all the flaws, because after the grout hardens, it will be more difficult to remove them. To make it easier to wash the floor, the seam is treated with transparent varnish for interior use.
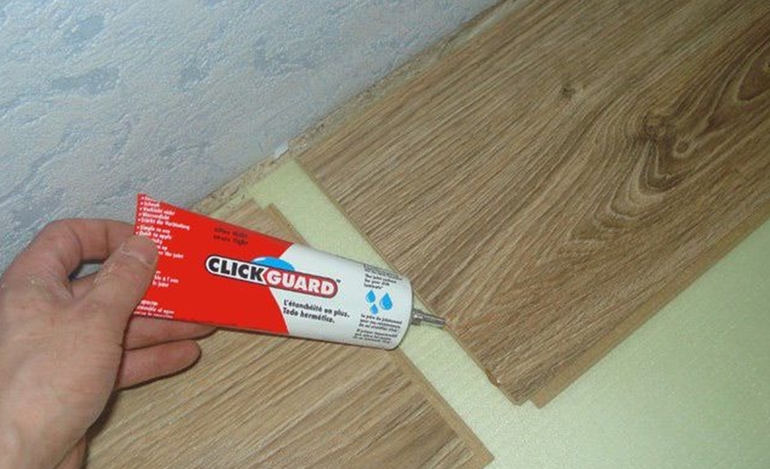
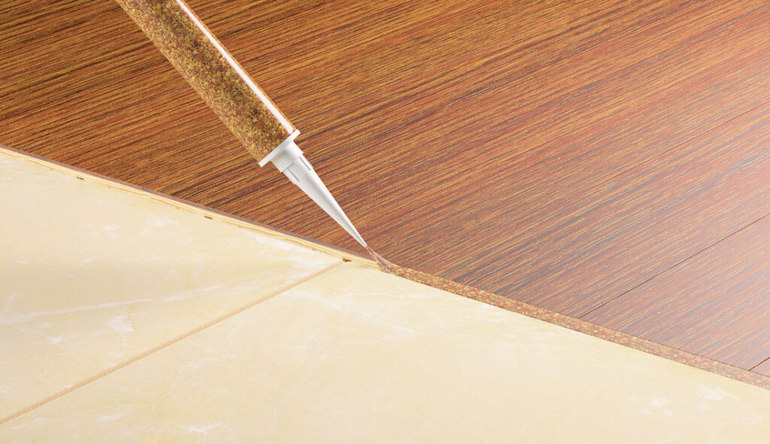
Sealant filling
Cork sealant is good because in its application it is not necessary to treat the edges of the laminate with a means that protects from moisture. The substance dries quickly, after which it acquires a pleasant light brown tint. Having processed the joint once, in the future it does not need to be painted or varnished.
The cork sealant contains a binder and cork oak bark. Since the cork has a light brown color, the sealant also becomes the same after evaporation of moisture. Various shades are available, so you can choose a sealant for any interior. Application Options:
- spatula;
- closed type pistol;
- trowel.
It is more convenient to work with a spatula, only on both sides of the seams you need to stick a masking tape. The seam is cleaned of dust, foreign particles are removed and make sure that the room temperature is above 5 degrees. Open the tube, then either make a small hole in it through which the sealant is squeezed out, or pour the substance into a shallow container. Which is more convenient - depends on the experience and skills of the master.
Fill the recess, smooth the sealant, remove masking tape and wait until it dries. Usually the material hardens within 24−48 hours. Until the residues on the floor have dried, clean them with a wet sponge or rag. The tool is well washed and wiped dry.
Using the sills
In some situations, it makes sense to arrange the connection of tiles and laminate in the form of a sill. The first case is when materials are joined between rooms exactly in the place where the door is. Powders look natural and do not violate the concept of interior design. The second situation - the materials differ in height so much that the difference cannot be masked.
The third case is when tiles and laminate are connected in the hallway. A small elevation in the place where the tile ends will trap dirt and dust, preventing them from entering the living rooms. With such a design, it is much easier to maintain order in the hallway. For the design of seams using the following materials:
- flexible metal profile;
- PVC profile, consisting of a decorative layer and a base;
- aluminum nut;
- self-adhesive docking element.
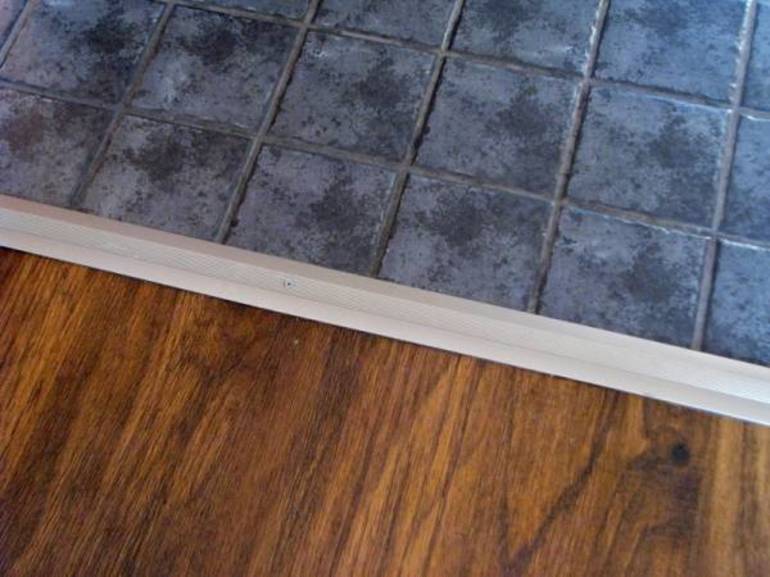
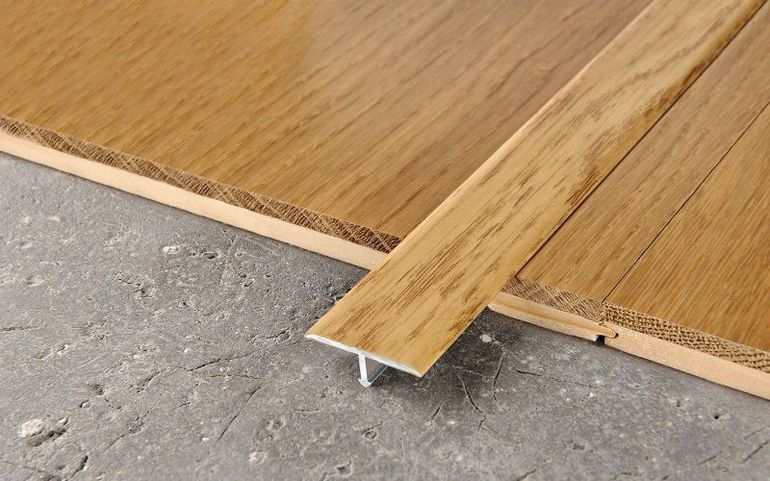
An ordinary metal profile bends a little if you make an effort. It is used to make straight and curved seams. On sale there are L-shaped and T-shaped varieties, and they are installed almost the same.
A profile in the form of the letter “G” is connected to the laminate with one edge. The tile is laid so that its edges are adjacent to the metal element. The gap is filled with glue, and after it is dried, grout for joints is applied and leveled. Metal sills are painted and uncolored. As a rule, aluminum is not coated with anything, and steel is treated with powder paint.
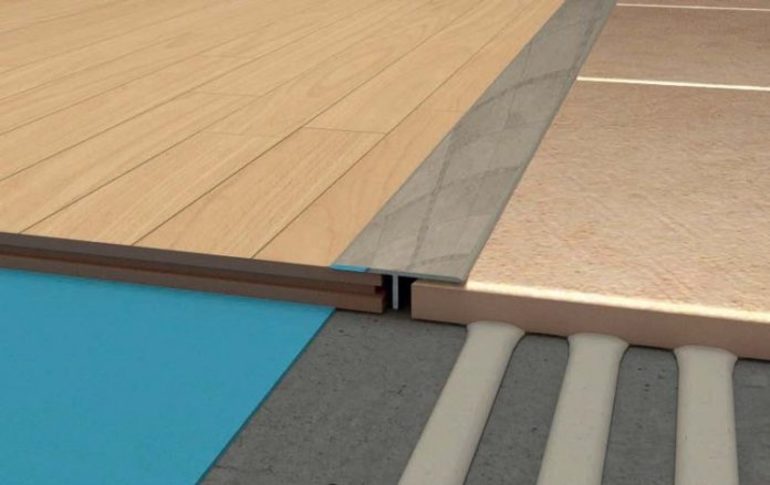
Flexible PVC sill is a two-piece product. The base is inserted into the seam, and then the decorative element is snapped. A plastic profile is produced for joints without a difference (the maximum difference is 1 mm) and for transitions between materials of different thicknesses. In the second case, the difference can be up to 1 cm.
Aluminum and self-adhesive products
Powders made of aluminum are used to design joints without bends. This is a suitable option for cases where the laminate and tile are connected under the doorway. There are 2 types of profiles on sale - H-and T-shaped. The criteria by which the models differ:
- bending radius;
- height;
- the width of the "shelf".

The product is attached to the base with dowels, which are inserted into the drilled holes. You can also use screws for fastening. Self-adhesive sills are even easier to install. Before laying the product, it can be greased at the edges with sealant, then dirt will not clog into the joint. After installation, excess sealant is removed.
Self-adhesive products are good in that they are available in different colors. It is easy to choose the sills that form a harmonious combination with both types of coating.
Installation of a flexible docking profile
The PVC profile, consisting of two layers, can be bent, so it is suitable for the design of curly joints. First you need to lay the tile, then fix the base of the nut. Installation is carried out using self-tapping screws or dowels. There will be a decorative overlay on top of the base, so the fastener caps should not protrude after screwing.
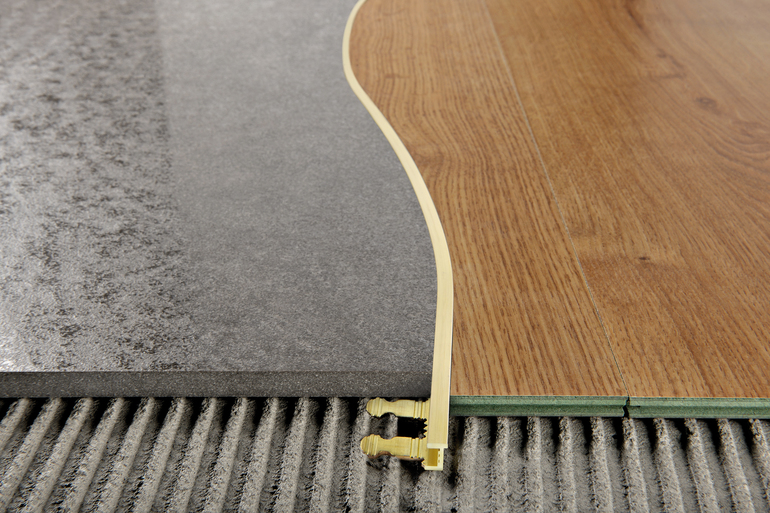
A layer of a nut is set along the edge of the laid tile, which serves as the base. It is necessary that the edges of the strip and coating are equal in height. If the laminate protrudes slightly, you can cut off the edge of the substrate. Then screw dowels or screws. The step is selected taking into account the curvature.
The next step is laying the laminate. When the flooring is in place, the decorative layer is tucked into the installed base of the nut. You will have to make an effort, otherwise the product will not stand tight. The pad does not fit well into the grooves, so you need to press it hard with the palm of your hand, and if that does not work, a rubber mallet will help.
Flexible sills are easy to install, and there are products for single and multi-level seams on sale. The colors are from simple to sophisticated, so choosing an option for a modern interior is not difficult. This method is suitable for those who want to complete the installation of flooring quickly and with minimal labor.
- How to choose a vacuum cleaner taking into account the characteristics of the house and coatings?
- What to look for when choosing a water delivery
- How to quickly create comfort at home - tips for housewives
- How to choose the perfect TV - useful tips
- What to look for when choosing blinds
- What should be running shoes?
- What useful things can you buy in a hardware store
- Iphone 11 pro max review
- Than iPhone is better than Android smartphones
 (No ratings yet)