

Tile Dismantling
During operation, even the hardest varieties of floor tiles can wear out and become damaged. It is worth noting that today the variety of building materials is constantly replenished, which is why tiles for cladding quite quickly become obsolete both physically and mentally. Manufacturers, in turn, offer all new types of ceramics more interesting and attractive. In this regard, the procedure for changing the flooring is not uncommon, even despite its durability. In this article, we will consider the most popular options for how to independently dismantle tiles.
to contents ↑Popular ways to dismantle floor ceramics
Tiles can be dismantled in two ways:
- Dismantling the material without the prospect of its use in the future. In this case, the procedure can be performed both fully and partially.
- The gentle option of disassembling the facing tiles in order to preserve the material. In this case, dismantling can be carried out in full or on a spot.
The following factors affect the choice of a specific dismantling method:
- The presence of cladding on the walls, the prospect of its further use.
- A type of adhesive that was used for the installation of tiles.
- Type and dimensions of ceramic flooring.
In fact, these circumstances strongly affect the choice of dismantling technology, which is why we will consider each option for disassembling the floor covering taking into account the above factors.
to contents ↑How to dismantle a tile without the prospect of its future use?
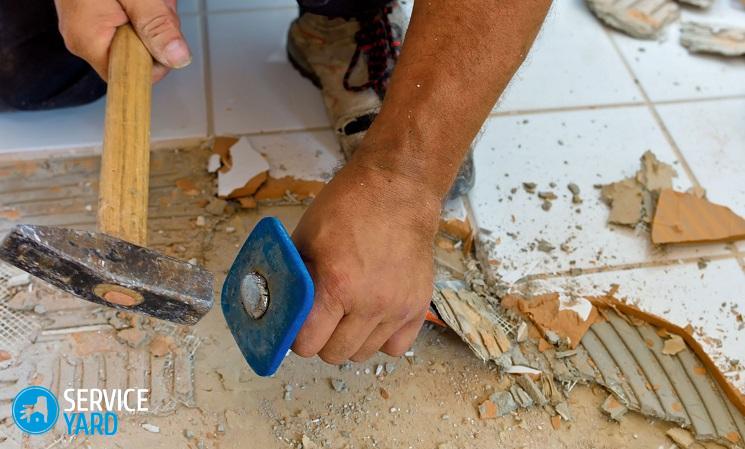
When you need to completely remove the tile from the floor, which has long served its purpose, then given its quadrature, you can perform this procedure using a hand tool, such as a chisel and hammer or punch. If, in addition, you do not plan to change the tile on the wall, then you should take all measures aimed at protecting it from damage by fragments and maintaining a sufficiently tight fastening of the material to the base.
Protective measures for dismantling floor tiles
It is recommended to perform the following work without fail:
- Remove the baseboard around the entire perimeter of the room.
- Make a notch at the junction of the floor with the walls with an incision at an angle of 45 degrees so that its depth in this case corresponds to the thickness of the tile and the layer of adhesive under it. Due to this slot, you will keep the bottom of the first row of wall trim intact.
- The walls and floor in the room should be freed from household appliances and other items.
- Then you need to take the corrugated cardboard, attach it to the base with tape to protect the wall and door trim around the perimeter to about 1 meter in height.
Do-it-yourself tile removal from the floor
The following must be done to remove the fully floor tile:
- First of all, it is necessary to destroy the tile with a hand tool or a perforator, it is better to start with one section in the middle.
- Then you should change the peak to a chisel, and you can continue to remove the tile, while placing the nozzle to the floor at an acute angle. This will reduce the detonation of the walls and avoid peeling of the cladding from them.
- It is necessary to cut down the old tile floor together with the tile in order to maintain the level of the new floor at the same level.
Important! It is recommended that all manipulations to remove the tiles with any selected tool be carried out in a respirator, goggles, gloves, special shoes and clothing.
It is better to remove ceramics from the boxes that hide the sewer and water supply manually with a hammer and a chisel to avoid sudden damage to the pipes.
to contents ↑How to remove tiles through destruction?
If you are faced with the task of dismantling the tile partially or pointwise, then it is recommended to be extremely careful, attentive and careful, but if you follow the above scheme, then everything will go without consequences.
It is necessary to do everything clearly according to this instruction:
- First, grout along the entire perimeter of the repaired area should be eliminated from the tile joints.
- If you need to remove cement-based glue, then do it better with a flat-tip scraper, and the grout to be removed must be periodically moistened.
- Glue on epoxy resin in advance to process with a special solvent. Then drill through holes in the tiles to be removed. With a chisel and a hammer, ceramics are carefully chipped, then cut down from the floor.
- After the tile is removed, all old glue should be cut out of the niche. If the facing material was mounted on tile adhesive, then the old mixture can be cut with a sharp chisel.
- The cement-sand mortar, which has outlived itself, is recommended to be incised with a grinder along the perimeter of the entire site, cut down from the surface.
How to remove a tile in a gentle way in order to preserve it as much as possible?
The gentle dismantling of old tiles in the bathroom also requires certain preparatory protective measures. In principle, everything happens the same as in the case of the destruction of the lining when removing the tiles, because after careful removal of the finish it is necessary to cut off the old glue from the base, and its fragments, as you know, are very dangerous for wall ceramics.
Tools for the gentle removal of tiles
For this option, the removal of floor ceramics using the following tools and materials:
- Wooden mallet.
- Several paint spatulas with a thin flexible working part made of steel 5-10 cm wide.
- Thin steel wire.
- Pieces of thick steel wire with curved ends.

Gentle removal of floor tiles in full
Do the following manipulations, strictly following this sequence:
- Remove the old grout from all joints to loosen the fixation of ceramics in the rows and to break the solidity of the entire lining.
- Fill the grooves between the tiles several times with water so that the tile adhesive is well saturated and weak.
- Gently tap each tile with a wooden mallet to possibly find voids under the individual elements and thus facilitate disassembly.
- Start dismantling from one of the weakened areas.
- Pry off the exfoliated tile with a spatula, insert the second spatula into the slot under it, driving it as deep as possible with a hammer.
Important! If you are unable to fully lift the sheet, then break it in parts, then delete. Due to the niche formed, you can drive a spatula directly under the products bordering on it.
- Bring a string under the departed tile, pull its ends alternately, knocking out spatulas next to them. You can also use a wire with hooks - it must be inserted into the seams on opposite sides of the tile, slowly pulling it away, knocking a putty knife under it.
Stock footage
You can’t say in advance how much tile you can keep intact, but, as practice shows, the choice of this option for dismantling is justified due to the strength of porcelain. But to disassemble the tile, which is laid with a cement-sand mortar, is an unpromising undertaking. The main thing is to know exactly how to carefully remove the tiles from the floor, adhere to the scheme, clearly perform each action.
- How to choose a vacuum cleaner taking into account the characteristics of the house and coatings?
- What to look for when choosing a water delivery
- How to quickly create comfort at home - tips for housewives
- How to choose the perfect TV - useful tips
- What to look for when choosing blinds
- What should be running shoes?
- What useful things can you buy in a hardware store
- Iphone 11 pro max review
- Than iPhone is better than Android smartphones
 (No ratings yet)