

Chipboard for floor
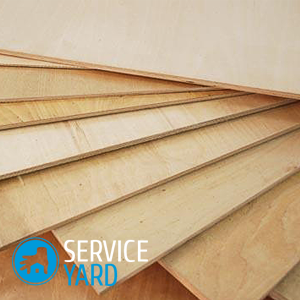
Laying chipboard is the formation of a rough floor for insulation or floor leveling. The properties of the material to absorb moisture with ease limits its use and requires accurate execution of its laying technology. In this article, we propose to learn about the rules for choosing chipboard for the floor and arranging flooring with it.
to contents ↑Advantages and disadvantages of particleboard flooring:
- The cost of flooring from chipboard is much lower than the price of laying flooring from boards.
- The plates have a flat surface that does not need to be aligned during installation.
- The material has good rigidity and is able to withstand differences of up to 5 mm vertically.
- It is possible to lay the canvas on the logs.
- The compressive strength of particleboard is not much less than the strength of wood, which provides high reliability to the floor covering.
- Plates are excellent sound and heat insulators.
- The material has good adhesion to glue.
- Installing chipboard on the floor is a simple job - even inexperienced users will be able to lay it on their own.
- Plates are resistant to fungus, rot and mold.
- The material is designed for a long period of use.
- In the design of the plates there is a special compensation layer that prevents the destruction of the product at the joints at some adverse conditions.
- The material is a universal base on which you can lay any floor covering - tiles, laminate, parquet.
But, despite all the obvious advantages of particleboard for the floor, there are disadvantages:
- Plates contain a large percentage of formaldehyde, which is harmful to human health.
- Ordinary sheets of chipboard are afraid of moisture, so they can not be laid in rooms with high humidity. After wetting, the material is destroyed too quickly. Even moisture-resistant chipboard variations are not able to withstand moisture for a long time and are destroyed after 5 wetting cycles.
- The edges of the product are quite fragile, quickly crack and break.
- Particleboard - fire hazard. Domestic manufacturers of this material do not add flame retardant to it to reduce flammability.
- Due to its low density, the material does not hold nails well.
- It has a low abrasion resistance, which makes it impossible to use plates without additional coating.
to contents ↑
Features of using chipboard for flooring
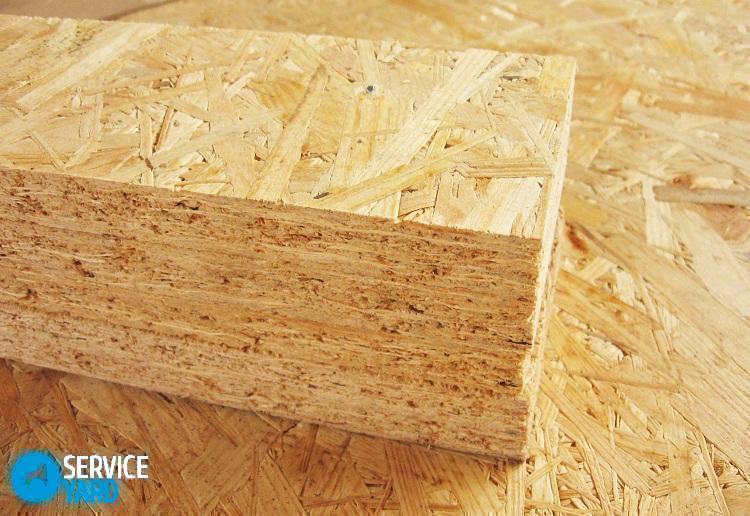
Particleboard for the floor is made by pressing a mixture of wood chips and resin. The resulting material has good performance, however, there are some restrictions on its use:
- Particleboard flooring is used only in dry rooms with low attendance. In rooms with such a floor no more than 55% humidity is allowed, while the air temperature should be above 8 degrees. It is undesirable to use this coating in the bathroom, steam room.
- Sheets do not stack in places where they can be subjected to significant mechanical stress, for example, in warehouses, shops. Under serious weight, the floor can deform and collapse.
- Particleboard is rarely used as a finishing floor, more often as a rough one. Laminate, parquet and other coatings lie perfectly on it. Also, such sheets are insulated and leveled floors.
- If floor insulation is planned in the room, then chipboard is mounted on the logs. The presence of high supports makes it possible to fill the gap between the floor and the sheets with insulating materials.
- Sometimes chipboard is used to restore old wood floors, and is also placed on top of an existing flooring.
Important! A wider area of use for water-resistant sheet piling, superior in some properties to ordinary sheets. In the manufacture of water-resistant types of chipboard, instead of formaldehyde, urea-melamine resins are used, which are more resistant to moisture. These products have a green color, they do not have harmful fumes, which allows them to be used in living rooms.
How to choose the right chipboard for the floor?
If you want to make a floor from chipboard, then you need to carefully study the characteristics of this material, as well as its marking:
- For convenience, all chipboards are divided into strength classes. For the floor should use chipboard brand PA (they are more durable). Sheets can be unprotected or coated with a plastic film.
- To create a rough coating or insulation of the floor, low-quality sheets are suitable - loose, not polished with a density of up to 550 kg / m3.
- The basis for the finish coating can serve as sheets with a density of 550-750 kg / m3.
- In living rooms it is allowed to use chipboard with safety class E-1 or E-2, which corresponds to formaldehyde emission of not more than 30 mg. It is undesirable to lay sheets with a lot of formaldehyde for the finishing flooring, only as a rough coating.
- Particleboard strongly absorbs moisture, so it is worth buying sheets with a density of 750 kg / m3, which differ in small indicators of humidity, moisture absorption and swelling.
Important! Manufacturers claim that medium-quality chipboard can withstand 3-5 layers of wet cycles without much damage to the material layers.
- When buying particleboard for the floor, always check the moisture protection class of the material. Plates of class P6 are preferably laid in rooms with a low level of humidity. P5 class boards can withstand moisture for a long time and are used in damp rooms.
Important! If you wet the chipboard and leave it for a day, then such material will swell by less than 10%.
- The thickness of the material should be chosen, depending on the base on which it will lay - 16-24 mm. With a material thickness of 1.6 cm, the beams should be located between themselves at a distance of about 40-60 cm.
- Sheets up to 1.6 cm thick can only be laid on a solid, even base (old floor or concrete screed). Differences in height of 5 mm or more they will not withstand.
- For the floor, the most convenient sizes will be - 3500x1750 and 2500x1850 mm (Euro format).
Important! Sometimes there are fakes on the market, therefore, in order to confirm the claimed characteristics, it is worthwhile to require a quality certificate from the seller.

How to lay chipboard on a wooden floor?
To lay chipboard on an old wooden floor, follow this sequence:
- Free the floor from furniture and look around.
- Replace creaking and rotten boards, knock out the shattered.
- Treat old boards with antibacterial liquid to prevent fungal diseases of the wood.
- Open the sheets of chipboard and lay them on the floor, leaving gaps on the walls of at least 1-1.5 cm.
- Use the plane level to check the layout of the plates.
- Put the chipboard sheets on the screws, screwing them to the wooden floor.
- Putty the joints and places for deepening the screws in the plates, and then, after waiting for the putty to dry, go over the plates with a grinder or carefully grind by hand.
- Lay along the perimeter and secure the skirting boards.
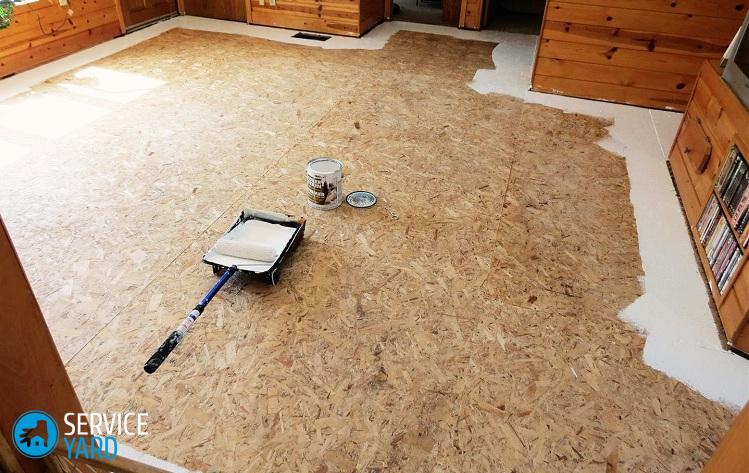
- Coat the surface of the chipboard sheets with varnish in several layers to prevent moisture from getting inside the material and give it an attractive appearance.

How to lay chipboard on concrete?
Particleboard can be laid directly on a concrete base. Before starting this work, the concrete floor must be cleaned of debris, leveled and dried. In the event that the base is uneven, you should first make a screed and, after waiting for its residual drying, start laying chipboard on the floor:
- Pre-cut the sheets of material.
- Treat them on the reverse side with drying oil, preferably in two layers.
- For greater reliability, coat under sheets with special mastic or glue.
- Lay them away from the threshold and finish laying in inconspicuous places, and use trimmings where the furniture will be.
- After gluing the sheets, fasten them with self-tapping screws with dowels, starting to drill from the center of the sheet and then fixing along the perimeter.
- Drown the self-tapping hats in the plate, and plaster the holes.
Important! Between the edge of the chipboard sheet and the wall, maintain a clearance of at least 1 cm.

How to lay chipboard on the logs?
If you have carpentry skills, then you can use a very convenient option for installing chipboard in logs - this can be done quite quickly, without difficulties with a screed, relatively inexpensive, and also with additional insulation. In addition, this method is more environmentally friendly.
Here, the same principle of sheet arrangement is used as when working on concrete - it is worth starting from the threshold, and you can use any plates, including laminated, simple and veneered.
Important! Logs need to be laid quite often, since chipboard is not a very durable material. The step width can be a maximum of 40 cm.

The work process is as follows:
- Lay polyethylene on the base (this is optional, but desirable).
- Install the bars at a distance of 20 cm from the wall and then in increments of about 30-40 cm.
- Put on the bars logs.
- Fix the frame with self-tapping screws, check it horizontally using a level.
- If cavities remain under the timber, then knock them out with wedges.
- Having achieved a horizontal surface, secure the frame with anchors.
- If the floor is made in a private house, where there is a cold underground, then the distance between the lags must be additionally insulated. To do this, put minvata sheets in the cells or fill in expanded clay.
- Mount the plates with a gap of at least 1 cm from the walls.
- The joints of the edges of the chipboard sheet should be placed exactly in the center of the log.
- Next, fix the sheets on the logs with the help of self-tapping screws, while slightly screw the hats of the screws into the plate.
- Seal the holes from the hats with putty, joints and seams also process with putty.
- After drying, grind the surface with a grinder, and then paint the surface with paint or varnish in two or three layers.
to contents ↑Important! If it is planned to lay a topcoat such as carpet or linoleum on top of a chipboard sheet, then sanding is not necessary.
Stock footage
Even with a number of shortcomings of particleboard for the floor, for many decades it remains for consumers one of the most popular, affordable and sought-after materials. It is only important to know where and how to use it correctly, so that the coating serves for a long time and pleases with quality.
- How to choose a vacuum cleaner taking into account the characteristics of the house and coatings?
- What to look for when choosing a water delivery
- How to quickly create comfort at home - tips for housewives
- How to choose the perfect TV - useful tips
- What to look for when choosing blinds
- What should be running shoes?
- What useful things can you buy in a hardware store
- Iphone 11 pro max review
- Than iPhone is better than Android smartphones
 (No ratings yet)