

Finishing putty

Finishing putty is one of the obligatory stages of preparing walls for finishing work (painting, gluing wallpaper or other material). Previously, this stage was overlooked, since the building materials market was not so diverse. Now modern materials allow you to make perfect repairs to any budget. High-quality repair, first of all, assumes smooth walls without flaws on the surface. It is this result that the finishing puttying of walls helps to achieve. How to perform it - we will consider in detail in this article.
to contents ↑What is a finishing putty?
Finishing puttying of walls is the last stage of rough preparation of surfaces. Before applying it, the walls are treated with a starting mixture. It is coarse-grained, has a rough structure. Starting putty fills all seams, cracks, pits and other flaws. Finishing putty, in contrast to it, is plastic, fine-grained (it contains up to 0.5 mm fractions) and homogeneous. It brings the surface of the wall to perfection, smoothing out small and subtle irregularities. Putty does not absorb moisture, which subsequently allows high-quality gluing on the walls of the wallpaper or painting them.
to contents ↑Types of finishing putty
Putties can be divided into groups according to various criteria.
Consistency:
- Dry ones are cheaper. They must be diluted with water or a solvent.
- Finished ones are more expensive, but they are already ready for application. Their proportions are observed by the manufacturer.
By destination:
- Universal - for any surface.
- Facade - for outdoor work, withstand any weather.
- Moisture resistant - for surfaces exposed to high humidity.
By composition:
- Gypsum.
- Cement
- Polymer.
The composition of the finishing putty, as you see, can be different. Let us dwell on this in more detail.
to contents ↑Plaster putty finish
The gypsum-based mixture is designed for dry rooms. Gypsum does not tolerate moisture, so this putty is not suitable for a bathroom, toilet, kitchen, but for other rooms - please.
She has many positive qualities:
- gypsum putty inexpensive, environmentally friendly;
- does not shrink (suitable for bricks, drywall, concrete;
- It requires only light sanding and gives a smooth white surface, which is especially important if you are going to paste the walls with light or thin wallpaper.
to contents ↑Important! The mixture is applied with a layer of about 2 mm, it dries for 2-3 hours.
Cement
This putty is also inexpensive, easy to use. The basis may be white or gray cement.
It is good because it is suitable for rooms with high humidity. Therefore, it can align the walls in the bathroom, kitchen, pantry and even the entrance.
Important! Such a mixture equalizes differences up to 15 mm. Sometimes cement finishing putty is used on facades.
It can give a slight shrinkage, microcracks can occur, so you need to apply it in several layers. Grinding a cement layer is a very time-consuming process. But, unlike gypsum, the cement mixture is durable and resistant to external influences.
to contents ↑Polymer
This type is very convenient for self-repair, because it is packed up ready-made. The basis may be silicone or acrylic.
The mixture is applied to the walls with a thin layer and creates a high-quality smooth surface.
Important! The plastic mass is plastic, it is convenient to apply with a spatula.
In addition, its advantages are that it does not shrink (cracks are excluded), reliably adheres to the surface and is quite moisture resistant. The service life of polymer putty is quite long.
to contents ↑Important! There are also superfinishing putties in which the caliber of fractions is up to 0.15 mm, this allows you to achieve almost a mirror surface. It is no longer necessary to grind it.
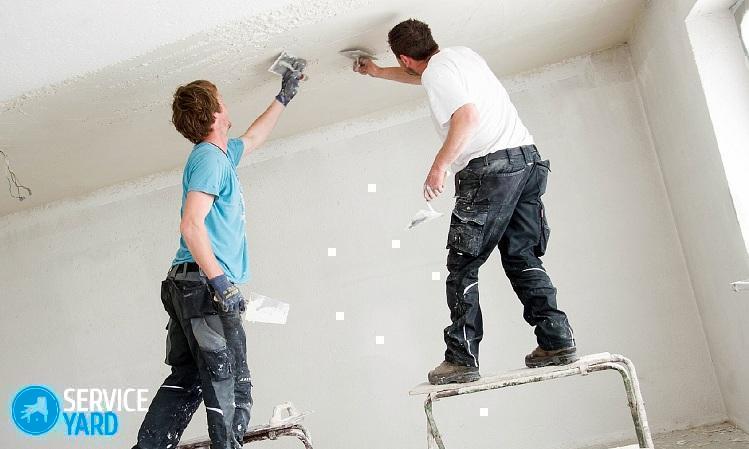
Technology for applying putty
Before you figure out how to properly put the finishing putty on the walls, you should look at the list of necessary tools and prepare them so that everything is at hand.
Required Tools:
- A bucket or other container for diluting the mixture (provided that the putty is dry).
- Drill with a whisk (mixer).
- Spatulas - wide (about 40 cm), narrow (8-10 cm) and angular.
- Primer brushes.
- Rule and level.
- Diamond bar and masking net.
- Brush.
- Powerful carrying lamp.
- Respirator.
Preparatory phase of work:
- Finishing putty on the walls begins with the preparation of the surface. In order for the mixture to lie evenly and not peel off, you need to thoroughly clean the surface of dust and debris.
- The metal spatula should remove the remnants of old wallpaper, old plaster and other things. You can also use a brush with steel bristles.
- When closing large cracks, use a masking net. The walls are leveled with a starting mixture.
Important! You can do without starting putty only if the wall has been leveled during the previous repair.
- After this, it is advisable to prime the wall with a fleecy roller or a wide paint brush.
Important! The primer will additionally strengthen the wall, increase adhesion and prevent the penetration of moisture.
How to apply finishing putty?
- If you purchased the mixture not ready-made, first dilute it in a bucket according to the instructions.
Important! It is better to take the container clean and plastic so that foreign particles do not get into the mixture.
- Pour the powder in portions, gradually stirring. Strictly observe proportions.
Important! Putty should be prepared before application and used within half an hour. Therefore, if the volume of work is large, do not mix the dry mixture all at once. Prepare the amount of finished putty that you can use in 30 minutes.
- Stir the prepared finished putty until smooth.
- While the mixture is infusing (about 5 minutes), check the walls with a level and rule.
Important! As we wrote above, finishing putty is not used to level the walls (this is done using the starting mixture). It only brings the walls to perfection, smoothing out small errors.
- For convenience, take a small pallet in which putty putty in small portions - so you will not need to carry a heavy bucket in your hands.
Important! In the process of applying finishing putty on the walls, a small spatula is usually used to take the mixture, wide - to distribute the putty on the surface and in the right places - angular.
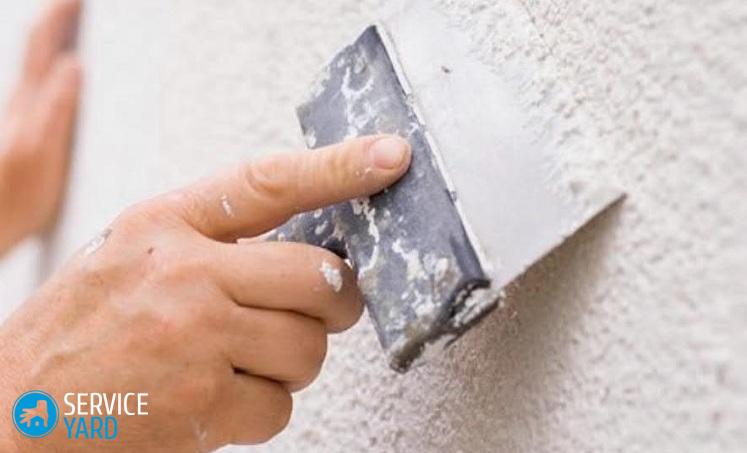
- With a small spatula, apply a strip of 2-3 cm mixture on the edge of the large spatula. Bring it to the surface at an angle of 20-30 degrees and smoothly apply a strip on the wall. Remove the mixture with a small spatula from a large spatula and mix into a bucket.
Important! By changing the angle of the trowel, you can adjust the thickness of the putty layer on the wall. The sharper the angle, the thicker the layer, and vice versa. The optimum thickness is 1.5 mm.
- Movements are made from bottom to top, strokes are overlapped, so transitions will be less visible.
Important! For the subsequent gluing of wallpaper, one layer is enough; for painting, a second layer is usually applied.
- As a rule, adjust the evenness of the layer, also remembering to check the work level. Small irregularities formed at the joints of the strips can be easily removed by grinding.
Important! During operation, periodically remove residual particles of the hardened mixture with a damp sponge from the spatula.
- Use a spatula to work at the junction of the walls, the junction of the wall and the ceiling.
- Thus you process all surfaces.
- Next, let the finish layer dry.
- It remains only to remove the small errors. They will be clearly visible if you use a powerful lamp. Direct light parallel to the wall. Grind flaws with the help of a paint bar with a diamond mesh fixed to it.
- Perform circular movements evenly, without strong pressure.
Important! Do not forget to wear a respirator during grinding.
- At the end of this step, dust the walls.
How to apply the finishing putty with a roller?
Masters use another method of applying putty - using a roller. To do this, you need to have some skill. The advantage of this method is that work is faster. To do this, you need a velor roller and a paint bath. The mixture should have a liquid consistency, that is, be fluid and homogeneous:
- Immerse the roller completely in the mixture, apply it on the wall with a strip of width of 50-60 cm.
Important! Do not putty the entire wall at once. It is necessary to divide it into sections about 3 m in length. During operation, it is necessary to direct the light of a powerful lamp to this area.
- Next, with a wide spatula, pull the mixture towards the untreated wall.
- Similarly, putty the adjacent area, hiding the transitions and so on until the entire wall is ready.
- At the end of this step, grind the walls.
to contents ↑Important! Putty dries of 4 hours or more. It all depends on its type and layer thickness.
How to work with finishing putty? Useful recommendations:
- Finishing puttying of the walls is carried out only after the complete drying of the starting layer and primer.
- After drying, it is necessary to grind gypsum and polymer putty. Cement should be processed until completely dry.
Important! Dry cement is practically impossible to grind.
- Finishing the walls is done at a plus temperature on a dry, clean wall.
- Do not put heaters in the room to speed up the drying process - this can impair the strength of the coating.
Stock footage
Many do not know why finishing putty is needed, however, it is one of the important stages of the ideal wall repair. The mixture for this purpose can be used differently, but in order not to make a mistake and choose the right option, first understand this issue. Information from the article will help to highlight the important nuances of using putty finish in places, and make your home or office more presentable.
- How to choose a vacuum cleaner taking into account the characteristics of the house and coatings?
- What to look for when choosing a water delivery
- How to quickly create comfort at home - tips for housewives
- How to choose the perfect TV - useful tips
- What to look for when choosing blinds
- What should be running shoes?
- What useful things can you buy in a hardware store
- Iphone 11 pro max review
- Than iPhone is better than Android smartphones
 (No ratings yet)