

How to glue baguettes?
Good and old ideas about quality repairs have been changing rapidly in recent years due to the constant emergence of new modern design techniques and more and more advanced ideas. Not so long ago, the true color craftsmanship was considered to be a color edging made of paper or tape from a tape recorder. Today, the classic ceiling decoration is no longer imaginable without the use of baguettes. Correctly connected two small planes that make up a single whole are a guarantee of comfort and coziness of your room. Below we will tell and show how to glue baguettes correctly.
to contents ↑Using baguettes for the interior
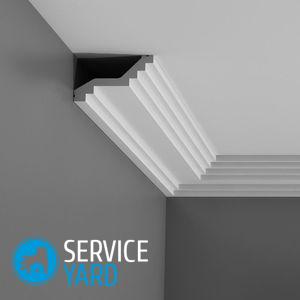
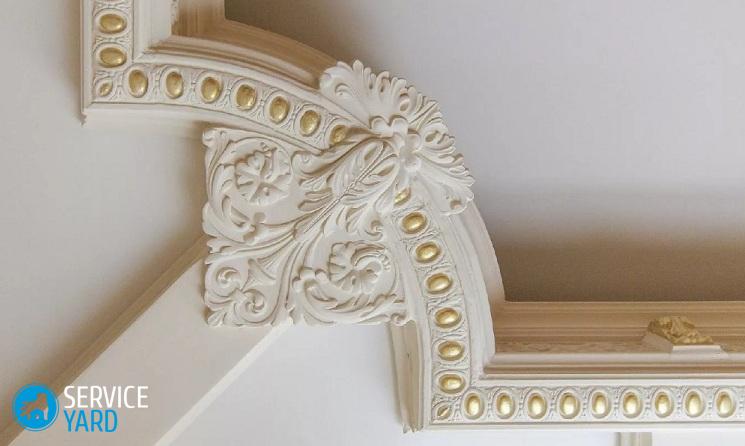
First, let's see: what is a baguette? This is a ceiling plinth with which you can give the room a beautiful look and a pronounced design. It is easy to color, so it can be matched to the color of any room. Baguettes come in a variety of structures and shapes. Some of them carry an intricate design, while others are produced without it, in a strict classical style. Such diversity and wide availability makes the fillet (this is another name for the part) indispensable in the repair of rooms and allows you to select, depending on the style and interior design.
Understanding correctly what pronounced advantages this material has, you can successfully use baguettes when repairing your home. A more complete list of what can be allowed with baguettes, we provide here. So, with its help it is possible:
- hide existing visual defects of the ceiling and the upper part of the walls, as well as various roughnesses, bulges, irregularities and differences;
- apply ideas rich in design experience;
- close joints;
- quick and easy to install, as this does not require any special skills;
- save significantly due to favorable prices.
to contents ↑Important! Having decided once to use a baguette to repair your home, you also need to pay attention to such a moment as the fact that this material is made from many components, and also varies in width and texture. In addition, it can be absolutely smooth or with patterns on the surface. Its cost and purpose will depend on its specification. The baguette is made of polyurethane, conventional polystyrene, gypsum, and sometimes wood. The most commonly used fillets are made of foam and polyurethane. Ceiling plinths made of plastic are mainly used for finishing ceilings.
Preliminary preparation of the tool and work surface
In order to be sure that the baguette is firmly stuck, it is necessary to properly prepare the glue and work surface. The information provided here will help you understand how to properly stick baguettes.
Real professionals believe that the ceiling plinth is best glued in one of two well-known ways:
- The most tested of them is the one in which baguettes are first glued, and after them wallpaper is glued.
- Some experts, on the contrary, advise to glue the wallpaper first, and then the baguettes themselves on top of them. We do not recommend this, as in this case it will not be possible to close all the grooves and irregularities.
To securely fasten the ceiling baseboard, you will need a carefully prepared surface, from which you must first remove all uneven places with large and fine sanding paper, and then, after cleaning from dirt and dust, apply the prepared primer.
Important! The subsequent success of installing baguettes will depend on the quality of these works. If the surface was cleaned carelessly or there were still a number of uneven places on it, then when applying the plinth to this place, an ugly bulge will appear, and the stress that can be created in this place can later lead to a crack or even complete rupture of the baguette. Therefore, the preparatory work of the surface is so important.
Instruments
Experienced craftsmen recommend the following tools for work:
- Sharp blade knife.
- Medium sized spatula.
- A simple pencil.
- Miter box.
- Glue roller.
- Paint brush.
In addition, for work, you will need: a mixture of glue, a foam sponge and finishing putty. Having this whole list on hand, you can safely start gluing ceiling skirting boards to the ceiling.
Detailed instructions for working with baguettes
Before you start deciding on the ceiling skirting boards, you need to calculate their required number, otherwise - later you may run the risk of lack of material or, on the contrary, with its excess. This calculation is not difficult:
- We determine the parameters of the room.
- We immediately divide the obtained data in half, as this should correspond to the length of the baguettes.
- Taking into account possible marriage and expenses for corners, we add several bars.
Important! It is also necessary to take into account the fact that in all prominent places it is better not to use pieces of the ceiling plinth, but its integral length. This is required to maintain a beautiful view of the interior.
After completing all these steps, you yourself can correctly glue baguettes for any ceilings. Just do not forget that the material must be correctly sized and cut. This is important, otherwise - most of it can simply fall into the trash, and not onto the ceiling.
Important! For proper cutting, it is recommended to use a device such as a wort. It will help make the corner junction almost perfect. It will look very beautiful, since in apartments there are practically no completely even walls or ceilings.
If you do not have this device, then do not despair, for this there is a very detailed instruction for working with baguettes in the absence of a miter box. And it consists in the following:
- First of all, we attach a baguette to the left corner.
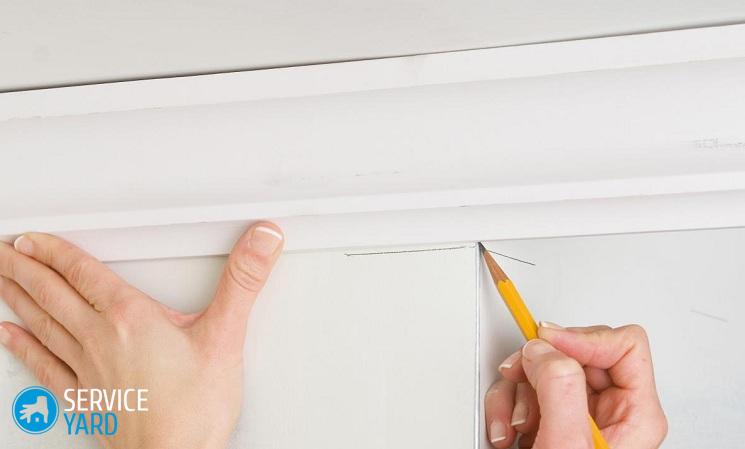
- Then, along the ceiling, right along the ceiling of the skirting board, draw a small line of 10 cm with a pencil.
- We draw exactly the same line of 10 cm in the right corner.
- The point where these lines intersect is the beginning of the cut.
- Now mark the intersection point on both baguettes.
- From this place to the corner located on the opposite side of both planks, we begin a straight cut with an acute angle of 45 degrees.
After the cut, it remains only to put the prepared skirting boards to the corner and check how much a completely new joint between them has turned out.
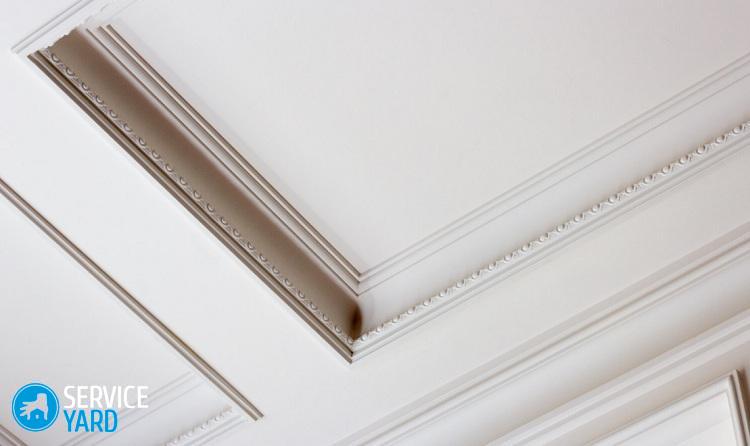
How to glue baguettes on the ceiling?
Usually baguettes are glued using special glue or using special putty.
Putty
If you decide to use a finishing putty, in this case you will need to first prepare a mixture based on it. This procedure is simple:
- Pour some water into the container and add as much putty as you really need to work.
- Then mix thoroughly with a mixer.
- To obtain increased strength of the mixture, you can add a small amount of PVA glue.
- Now, using a spatula, apply the finished mixture to the edge of the baseboard.
- Put the baguette between the wall and the ceiling, then press firmly.
- After that, take a sponge and remove the putty remaining on the sides, cover it with joints and crevices.
After completing all work with ceiling cornices, it is necessary to give some time to completely dry the mixture and putty, and only after that it will be possible to start painting work. We hope that this information will help you better understand what to stick baguettes on the ceiling.
Adhesive mixtures
Especially often for gluing ceiling skirting boards use “liquid nails” or a number of polymer adhesives such as “Moment”. The disadvantages of these adhesives is an unpleasant chemical smell and their fear of moisture. In addition, so that the baseboard is firmly fixed in place, you will need to hold it in place for several minutes.
Of course, the glue will then hold the baguette for a long time, however, when applying it, it will not be possible to close all the cracks and joints, you will still have to take putty and go through all the walls again in order to level the remaining defects. Therefore, the preferred option is the use of putty. With its help, you immediately achieve two goals - glue the skirting board and at the same time mask the existing flaws.
to contents ↑Stretch ceiling
Many apartment owners before renovation are wondering how to glue baguettes on a suspended ceiling. And the answer to them causes certain difficulties. However, as they say, they are afraid of wolves - do not go to the forest! Of course, this procedure has a number of features, but we will now talk about them in detail. So, these features are as follows:
- all cuts must be done only on the floor to avoid any damage to the film;
- on the baguette, the adhesive is applied only on one side, because it is glued only to the wall;
- after installation, a small piece of paper is inserted between the ceiling and the baseboard, which will protect the ceiling during the painting of the baguette.
As you can see, the answer to the question whether it is possible to glue a baguette on a stretch ceiling is positive. You should not be afraid that you will spoil the stretch ceiling during the installation of baguettes, just follow the recommendations provided to you, and we are sure that you will succeed!
to contents ↑Preparation of baguettes for installation on the ceiling and walls with wallpaper
The process of installing a ceiling plinth on walls with wallpaper is fundamentally different from the procedure for installing baguettes on ordinary walls and suspended ceilings. One of the main such differences is the need for adhesion of both sides of the plinth with the surface, and not just one side, as is the case with a stretch ceiling. The difference seems to be not so significant, however, it very often leads to negative consequences and negative work results.
In this section, we will tell you how to properly stick baguettes on the wallpaper, what tool you might need for this:
- First, with a pencil, note the size of the baguette on the walls and on the ceiling.
- Next - with a thin cord, we will beat off the lines along which the ceiling baseboard will later lie. In this case, a baguette is used, which is made of polystyrene foam having small longitudinal patterns. He is very light and with him not so much fuss.
- Now let's get started with the corners. We cut the end face with an angle of 45 degrees, first on one strip, and then on the other. To obtain the required sharp angle we use a miter box.
- In the event that the room is large, the standard strip length may not be enough, so immediately cut the second end. This joint is then better preserved and does not crack at all if it is cut not directly, but at a small angle. Thus, we increase the resistance to deformation processes and the glued plane.
Glue baguettes on the wallpaper
When all the preparatory work is completed, you can proceed to the direct installation of baguettes:
- We take the cut strip and apply the adhesive solution immediately along its two planes.
Important! As an adhesive mixture, you can use sealant and putty, and for ceiling skirting boards made of foam, mounting glue is best suited. This is due to the fact that this glue was specially designed for foam products and interacts well with it.
- Now let’s check how correctly the cutting of the baguette corners was done, after putting them dry on the future workplace. If everything was done correctly, then you can also start gluing them.
- After applying the adhesive mixture, carefully apply them to the ceiling and wall, trying to do this as evenly as possible. Pre-installed lines will help you with this, so there should not be any problems with the smooth installation of skirting boards.
- After exposing the baguette, we press it slightly along the entire length.
- Then we do the same with the next one, and so on, until we finish the whole room.
- The next stage of the work will require finding and removing with the spatula all the remaining excess adhesive mixture. Then we take a foam sponge and wipe the baseboard with it, at the same time removing all the excess with warm water. This must be done immediately after completion of the work, since then the glue will dry out and it will be extremely difficult to tear it off.
Stock footage
In this article, we examined all the variations regarding the possible ways to install fillets to complete the repair. We hope this information helped you find the right technology for your interior design and handle it perfectly.
- How to choose a vacuum cleaner taking into account the characteristics of the house and coatings?
- What to look for when choosing a water delivery
- How to quickly create comfort at home - tips for housewives
- How to choose the perfect TV - useful tips
- What to look for when choosing blinds
- What should be running shoes?
- What useful things can you buy in a hardware store
- Iphone 11 pro max review
- Than iPhone is better than Android smartphones
 (No ratings yet)