

How to glue polyfoam ceiling tiles?
If you decide to make cosmetic repairs, then foam tile will be an excellent option for you. This material has several advantages, which is why it is so widely used for finishing ceilings. Foam sheets are glued quickly and simply, the most important thing is to adhere to step-by-step instructions and to listen to our recommendations. Today we will tell you all about this wonderful finishing material, get acquainted with its main advantages and disadvantages, and also look at an example of a master class on how to glue foam ceiling tiles. You will find a lot of interesting, and most importantly useful information, in this article.
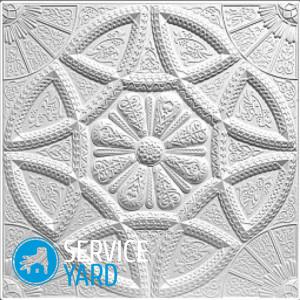
to contents ↑Features of foam tiles. Her views
Most often, ceiling panels are installed in the bathroom, but the living room is no exception. Many consumers have long moved from stretch ceilings to a more profitable and no less durable option - foam polished ceiling. Different types of foam boards have a characteristic distinguishing feature, which is expressed in the advantages of a particular model over others.
In shape:
- Rectangular
- Square.
- Diamond shaped.
- Hexagonal.
Important! The most popular and widely used is, of course, square ceiling tiles.
By surface type:
- Simple.
- Laminated.
- Smooth.
- Embossed.
- Coated to the texture of wood, stone, fabric.
- With imitation wood carving.
Important! As a ceiling decoration material in the kitchen, you can safely use laminated panels, but waterproof shields are best for a bathroom.
By thickness:
- Engineering (thickness 9-14 m). It is made by pouring and preparing raw materials in a special mold.
- Pressed (stamped). Has a wall thickness of 6-7 mm.
- Extruded. It is formed from extruded raw materials and painted or covered with a film of standard size 50x50 cm for a square shape and 100x16.5 cm for a rectangular tile.
Advantages and disadvantages
Before sticking the ceiling with foam tiles, you need to choose the right material. And in order not to be mistaken in the choice, get acquainted with the strengths and weaknesses of this finishing material, which we will do now.
Pros:
- Foam tiles can be used as finishes on almost any ceiling surface, from ordinary concrete to wood-based panels.
- It is possible to install foam sheets near batteries or radiators, the temperature of which does not exceed 80 degrees.
- In favorable conditions, the service life of this material is very long and is calculated not for years, but for whole decades due to the fact that the tile is not at all afraid of dampness.
- Textured foam boards have excellent thermal and sound insulation properties.
- The lightness of the material allows the use of adhesives that do not have increased strength, and therefore are inexpensive.
- Ceiling panels are easy enough to cut and adjust.
- Installation does not take a lot of time.
- The reasonable price will pleasantly please you, plus you can save a lot on calling a specialist by doing this kind of work yourself.
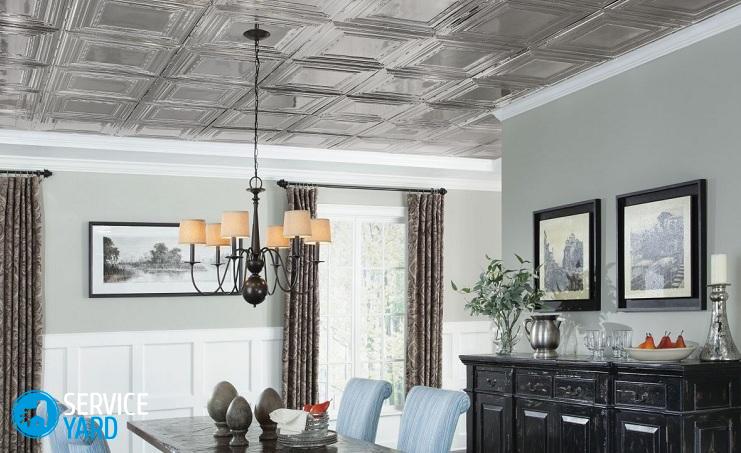
- Foam sheets are able to give the room a more attractive appearance, in some cases - even visually increase it.
- A large selection of shapes, textures and three-dimensional patterns of ceiling tiles allows you to choose the finishing material that you like best. With such a variety, you can make any design decision a reality.
- Cloths can be glued in two directions: rectilinearly and diagonally.
- At the joints, bumps and small flaws will not be visible, since there is the possibility of painting the plates and seams with acrylic paint.
- Caring for the material is quite easy and simple. To do this, you need an ordinary sponge and water.
Important! The only thing to remember is that wet cleaning is only suitable for laminated panels, and ordinary foam panels must be wiped with a dry cloth or vacuum cleaned.
Disadvantages:
- Budget ceiling paintings are considered to be short-lived, quickly turn yellow from exposure to sunlight.
- Some versions of foam boards do not tolerate dampness at all. The only thing that can be done in such a situation is to paint the surface with water-based paint.
- Vapor permeability is one of the main disadvantages of this material. The feedstock has the ability to create a greenhouse effect in the room, depriving the walls and ceiling of the ability to absorb excess moisture. So, for example, when using vinyl wallpaper with panels, there is a risk of the formation of fungus and other harmful microorganisms.
- Expanded polystyrene is easy enough to melt. It can coexist with hot water pipes, but when the boards come in contact with powerful lamps, there may be a risk of material damage. That is why it is necessary to insure yourself and install the ceiling finish at a distance of 30 cm from the light source.
- Foam sheets can easily be deformed even with a blunt object, not to mention contact with sharp objects.
to contents ↑Important! It is necessary to transport such material with special care so as not to break the plates, some of which will no longer be suitable for installation on the ceiling surface.
How to glue foam tiles on the ceiling?
Let's see what stages the whole process consists of choosing and installing foam ceiling panels.
Calculations:
- We measure the length and width of the room, and then multiply the obtained indicators. This figure will be the area of the ceiling, but it is impossible to acquire tiles equal to this coefficient.
Important! When cutting, material destruction can occur, and its overuse will be inevitable. Not all ceilings have the correct geometric shape and a flat surface without chips and dents.
- We make a small safety net - we add another 10-15% of its total area to the resulting final figure of the ceiling.
Feel free to go to the store for a purchase!
Glue selection
Without glue, not a single ceiling tile will grasp, so we need to purchase glue to complete the installation of the panels. Let's think about what to look for when choosing an adhesive for such a finishing material:
- On the consistency of glue.
- At gluing speed.
- For the drying period.
- On the consumption of adhesive mass.
We recommend using “liquid nails” to install foam boards. Such glue sets quickly enough (within 10-15 minutes), and you do not have to keep the tile on outstretched hands all this time. And the consumption of this substance is very impressive: per 1 sq. M. or 4 panels 50x50 cm, you need 6 ml. For pasting a room with a size of 24 m2, you will need only 400 ml of glue, which is better to take with a small margin (450 ml) to glue and the ceiling baseboard.
Important! Polish glue "TITAN" has proven itself from the best side. It has high strength and fast setting speed. To work with such glue, you need to use a special technology: apply the composition to the tile, attach it to the ceiling, then remove it from the surface and hold for a minute pause to finally glue the foam finish.
Budget adhesives for setting this tile include:
- “Dragon.”
- “Power”.
Important! The above brands are Chinese-made, therefore more liquid. In order to stick the ceiling tiles and polystyrene, you have to stand for a long time with outstretched arm in an uncomfortable position.
Ceiling preparation
Before gluing the ceiling with finishing panels, the surface must first be prepared. To perform these steps, we have developed for you a similar instruction with recommendations:
- If the ceiling is whitewashed. We wash off the whitewash to the concrete ceiling with a warm soapy solution, a wide brush and a spatula. We give the ceiling time to dry. To speed up this process, use a draft (in the warm season) or install a heater (in the cold season).
- If the ceiling is coated with oil paint. Wash it with a soapy solution with a fat-free sponge. Remove with a spatula the swelling of the old paint.
- If the ceiling is painted with a water-based composition. Wet the ceiling with plenty of water. We create a draft in the room. Remove the peeled coating with a spatula after 30 minutes.
Ceiling marking
Before gluing a ceiling tile made of polystyrene foam, you need to determine the method of gluing panels, which can be of two types:
- Traditional. In this way, a square tile is glued. First, a mark is made of the center of the ceiling, from where intersecting lines to the walls are noted. Foam boards begin to be fastened by gluing the first in the center of the ceiling, and all the rest in the following order.
Important! It is necessary to do the gluing in this way due to the fact that the extreme canvases can be cut off, but the central square should be solid.
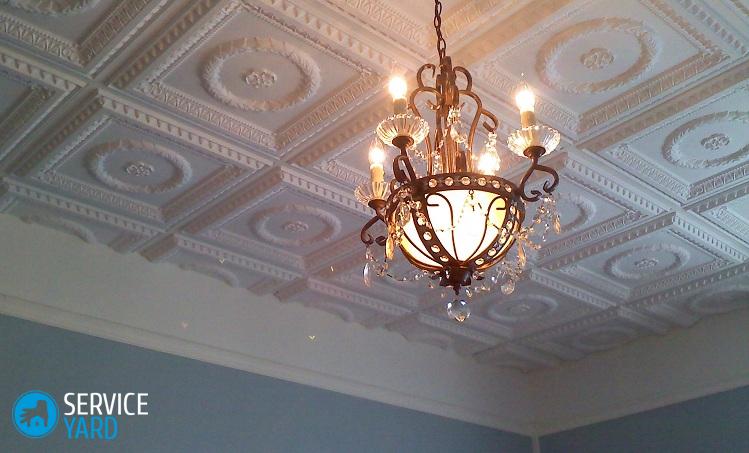
- Diagonal. If you chose this option, then you need to draw lines at an angle of 45 degrees from the intersection point of the central circles. These lines should divide the ceiling into two equal parts. So that the chandelier is in the center of the decoration material, the tile is glued with a rhombus, the center of which should be located at the intersection of the axis. In all other cases, the panels are installed diagonally strictly diagonally.
Bonding:
- We glue four panels. Apply a thin layer of glue in the center and along the edge of the finishing material. At will and opportunity it is possible to put glue on other sites of a tile.
- Press the ceiling shield to the ceiling, holding it in this position for 20-30 seconds.
- After we are convinced of the reliability of gluing, we proceed to gluing the second shield according to the same scheme.
- We remove excess glue with a plastic spatula.
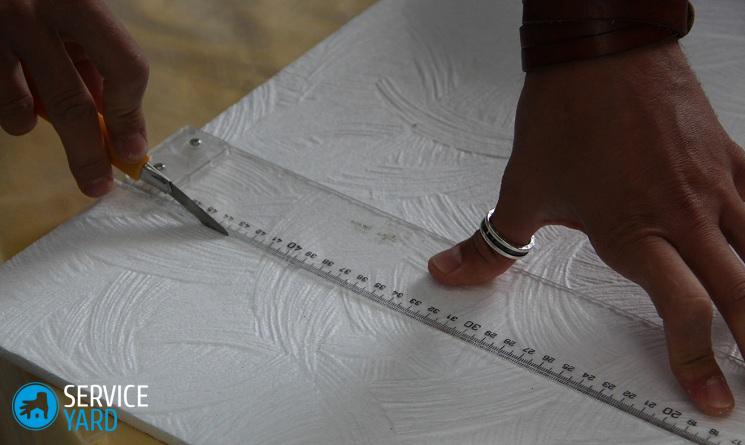
- We cut the tile with a sharp knife when approaching the walls. Such actions should be performed with extreme caution so as not to accidentally break off sufficiently fragile material.
- We close the cracks in the joints of the paintings with the help of acrylic sealant.
- Waiting for the surface to dry completely, about 24 hours.
- We cover foam plates with water-based paint, which will give the appearance of historical stucco.
Stock footage
Now you are a specialist in the field of how to glue foam ceiling tiles, because you know all the step-by-step steps of installing this material. The most important thing to consider is that the final result depends on accurate calculations and care during the installation of foam sheets. Quick and successful repair!
- How to choose a vacuum cleaner taking into account the characteristics of the house and coatings?
- What to look for when choosing a water delivery
- How to quickly create comfort at home - tips for housewives
- How to choose the perfect TV - useful tips
- What to look for when choosing blinds
- What should be running shoes?
- What useful things can you buy in a hardware store
- Iphone 11 pro max review
- Than iPhone is better than Android smartphones
 (No ratings yet)