

How to paint the ceiling with a water-based paint without stains?
Painting is the easiest and fastest way to repair. Using it, you solve two problems at the same time: add novelty to the room and save your money. But everything is not so simple as it seems at first glance. In fact, painting walls and ceilings is fraught with secrets, which we will talk about in our article. Perfectly even ceiling should have a smooth coating, without spots, stripes and stains. Today we will understand the question of how to paint the ceiling with water-based paint without stains. To do this, we will get acquainted with the features of different types of coatings for water-based emulsion dyes. And following our recommendations, you will achieve the result that you have long dreamed about.
to contents ↑Types of water emulsion formulations
Water-based paints are different. Therefore, you need to choose the right composition, based on which particular requirements and characteristics are priority for you:
- Silicate. The basis of this dye is silicate glue. Such a composition is relatively inexpensive, it holds well even on damp surfaces, but is prone to abrasion.
Important! Ceilings and walls painted with silicone emulsion, it is strictly forbidden to clean with water.
- Polyvinyl Acetate. Abrasion resistant than the previous version, but wet cleaning is still undesirable. A surface painted with polyvinyl acetate paint does not like moisture: increased humidity, leaks or simple splashes of water will leave ugly marks on the ceiling.
- Mineral Cement or slaked lime are the components of this dye. Mineral paints are intended for coating brick and concrete surfaces. They are not very durable, so you will have to periodically update the coverage.
- Acrylic Based on acrylic resins, which make the composition resistant to abrasion and resistant to moisture and temperature. Acrylic paint with a latex component can be safely used to paint the ceiling surface in the bathroom due to the increased moisture resistance of the composition. Of course, such paint will cost you dearly.
Important! Such a dye can achieve both a glossy and a matte surface: the higher the index on the marking, the more shiny the surface you will get. Do not forget that the glossy coating has increased resistance to abrasion, but with a careless attitude emphasizes even the smallest ceiling defect.
- Silicone As you already understood, silicone resins are the main components of this type of dye. The main advantages are resistance, durability and the ability to mask even the smallest surface defects: scratches, cracks and others. Silicone paint has increased antiseptic properties, so it is well suited for damp rooms. If you are a beginner, then painting the ceiling area with this type of dye will not be difficult for you. As a result, you get a perfectly flat surface without any stains. The cost of silicone dye exceeds all of the above types.
How to paint the ceiling with a water-based paint without stains with a roller?
So, we have come to the most important thing - painting the ceiling with water-based paint.The whole process consists of several stages, which we will now consider.
Tools and materials
In order to qualitatively paint the ceiling surface, you need to prepare the following list:
- Water based paint.
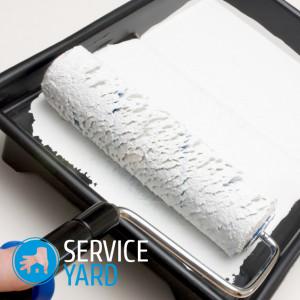
- Rollers with different pile (medium and long).
- Paint brushes (size 150 and 50 mm for hard-to-reach spots).
- Paint tray.
- Protective clothing, hat, glasses, gloves.
- Metal spatula.
- Fine mesh grater.
- Brush.
- Roller.
- Putty.
- Primer.
- Construction tray.
- Antiseptic.
- Masking tape.
Preparatory work:
- Carefully inspect the ceiling. If we notice black mold on it, then we wash the affected area with a chlorine-containing agent, for example, “White”. To eliminate fungus and mold, you can use a special composition, which can be purchased at a hardware store.
Important! Do not forget to look at the purpose of this mixture - we need an antiseptic to treat the ceiling and walls. And for rooms with high humidity (bath, balcony) it is better to apply antifungal impregnation.
- We clean the base ceiling with a spatula, thereby getting rid of traces of the previous solution and debris.
- Primer the surface with a deep penetration solution. We are waiting for the primer to dry completely.
- Apply a base coat of pre-prepared putty, filling it with all the cracks and depressions. We pick up a synthetic reinforcing mesh in order to hide deep cracks and seams. We wipe the dried surface with granular sandpaper, primer and apply a fixing layer of putty, which we then grind with a grater and primer directly under the paint.
- We paste masking tape on the places we want to protect from paint. We cover the furniture and the floor with a film or newspaper in order to maintain cleanliness.
- We free the room from extraneous furniture (if it can be removed) and objects.

How to paint the ceiling with a roller without streaks?
- We dilute the coloring composition according to the instructions. If you want to dilute the paint with a different color to achieve a certain shade, perform a combination of dyes.
- Thin the paint with a solvent. This is necessary in order to apply the very first layer with a more fluid consistency. The rest of the layers we will perform water-based usual consistency. Do not forget to dilute the paint in the construction tray to use only the right part without cost overruns.
- If we suddenly forgot to prime the ceiling at the preparatory stage, then we are now performing this action. We have a fairly clean and even surface, so we ground it in one layer. In the case of a ceiling with spots, chips and other visible defects, it is better to apply a primer in two layers, and then a third, fixing. The above steps will help to hide all the flaws and prepare the surface for direct painting. Leave the surface to dry.
- We paint the ceiling surface along the perimeter with a brush, painting hard-to-reach spots (corners and joints) with a small narrow brush. Brush the upper part of the wall (up to 20 cm) in the case of designer finishes.
- We put on the ceiling the first coat of paint parallel to the window. We place the roller as close to the surface as possible, and then apply the paint to the strips, moving from the edge to the center. The length of one strip should be about 1 meter, and the joints of the stripes should be completely invisible.
- We look from the side at the already painted ceiling, checking the quality of painting. If you saw unstained places or other flaws, then in no case do not use a brush or roller to partially correct them. We remove defects by painting the ceiling with a second layer, applying strips in the opposite direction (perpendicular) relative to the first.
Important! If after applying the second layer you will still see flaws of the painted surface, then apply a third parallel layer perpendicular to the window.
- We remove the construction grater strip, which turned out due to the influx of the dye.
to contents ↑Important! If you unsuccessfully painted the ceiling, then this is easy to fix. To do this, you will need to grind it again and paint according to the above scheme.
General recommendations:
- As you already understood, the layers are applied perpendicular to each other. The most important thing to consider is one rule - the last layer should be located towards the window. This is necessary so that the remaining bumps are not so noticeable in daylight.
- It is extremely important to paint the entire ceiling surface in one go, without pauses for rest and lunch. If the dye on the painted area of the ceiling has time to dry well, the transition of the next layer will be very noticeable.
- Do not try to partially gloss over unpainted areas - you will only make it worse. In this case, you need to wait for the layer to dry to apply a new, more uniform one.
- It is advisable to buy a water-based paint, primer and putty from one manufacturer. So you will ensure 100% compliance with all the funds necessary for painting the ceiling. If for some reason you did not buy ready-made soil, then prepare it yourself with your own hands according to this scheme: dilute 1 part of the composition with 5 parts of water.
- Do not apply thick layers of paint, thinking that in this way you will well hide all visible defects. This opinion is erroneous. It is better to cover the ceiling with three thin layers to get a perfectly even, well-painted surface.
- Do not use rollers made of foam rubber with a short nap, as the first ones leave bubbles, and the second ones are not able to collect the required amount of paint.
- Before the preparatory work, take care of the safety of your workplace. The best option is to install a high stepladder, a construction “goat” or an ordinary table that can support your weight and tools for work.
- The ceiling with existing finishes is painted in the same way as in our master class. To do this, you will need to remove the ceiling paintings or wallpaper from the surface together with the adhesive base, clean off the still covered areas, sand the ceiling with a construction grater and primer 2 times. Do not forget to completely remove the old plaster or putty. In a word, prepare the surface “from scratch”.
- If you bought an apartment with a flat ceiling that has not yet been treated, then you will be well primed enough to safely apply further layers of paint.
- To remove whitewash from the ceiling, you first need to wet the surface by treating small areas with a wet brush. Do not try to wet the entire ceiling immediately, as the surface will dry quickly and you will have to do it again. Work should be done according to this instruction: wetted areas, waited, removed a layer of soaked whitewash with a spatula.
Stock footage
Now you know how to paint the ceiling with water-based paint without stains quickly and easily. You only need to choose the right paint and follow the step-by-step instructions, observing the recommendations presented. Easy repair for you!
- How to choose a vacuum cleaner taking into account the characteristics of the house and coatings?
- What to look for when choosing a water delivery
- How to quickly create comfort at home - tips for housewives
- How to choose the perfect TV - useful tips
- What to look for when choosing blinds
- What should be running shoes?
- What useful things can you buy in a hardware store
- Iphone 11 pro max review
- Than iPhone is better than Android smartphones
 (No ratings yet)