

How to make a niche from drywall?
The appearance of any, even the smallest room, can be transformed using a niche in the wall. Such a deepening, and even complemented by lighting, will visually increase the space and create an atmosphere of comfort. Fashionable and stylish similar designs will look in any interior, because there are a huge number of them - rectangular, narrow, wide, vertical, horizontal. The most popular today is the traditional arrow shape, which resembles a small closed window with a rounded top. Why is it needed, what and how to make a niche out of drywall - the answers to these and other questions can be found in this article.
to contents ↑What are niches?
Wall niches began to be used in architecture since the time when a person began to build housing from stone. As a rule, in modest houses, such structures performed the function of shelves for storing various household items. During the construction of mansions or castles, wall niches were used either to place decorative sculptures in them, or they served as secret rooms.
To date, the functionality of such an element of the interior has not changed much and is also in demand among owners of residential premises:
- Decorative niches in the wall made of drywall give the room an interesting geometry, which allows for the implementation of various design decisions and ideas.
- The construction of lightweight building material is very suitable for hiding radiators.
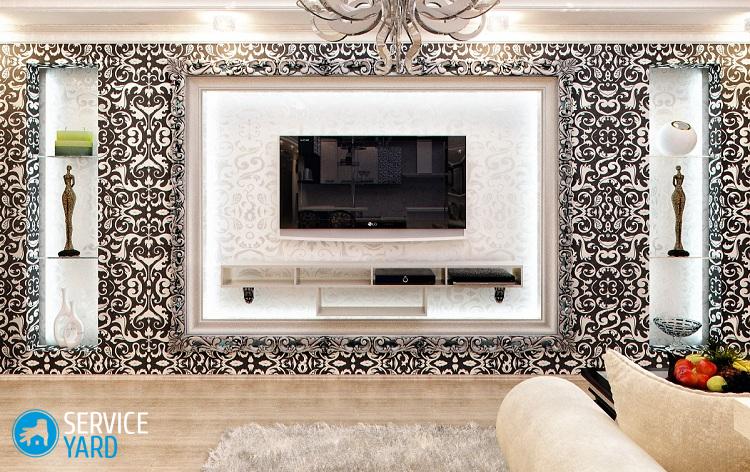
- Such a wall structure is capable of zoning space, for example, dividing a large living room into a zone for watching TV and the dining part.
- A drywall wall with niches, although it takes away part of the room, but at the same time it visually expands the space, can serve as an additional source of lighting.
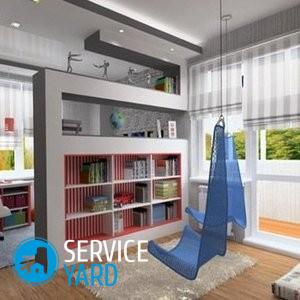
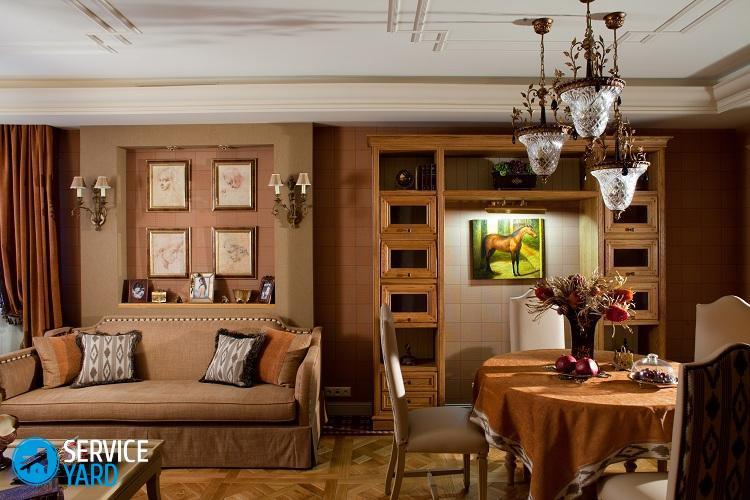
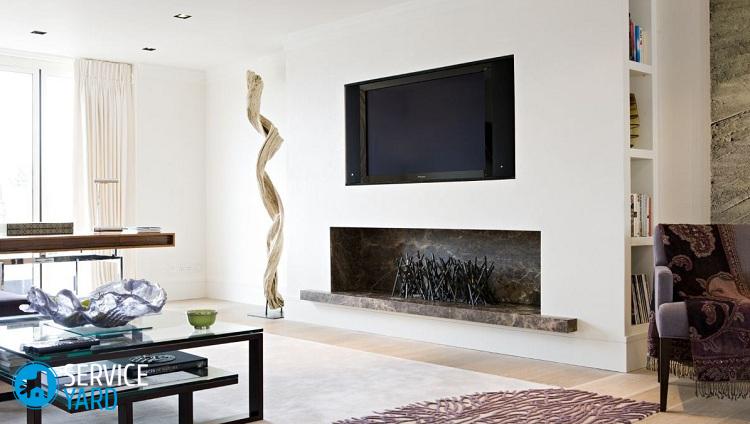
- The functionality of such a solution is difficult to overestimate. In the niche you can arrange various souvenirs or an interior composition, you can install a TV there and even mount a fireplace. The plasterboard structure makes an excellent library.
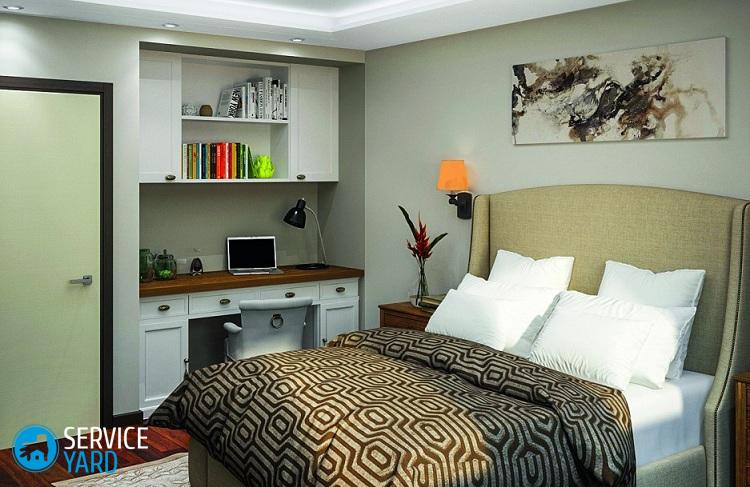
- Another distinctive feature of the niches is that they allow you to get rid of excess furniture, such as shelves, shelves, and even cabinets. You can make a closed structure and use it to store clothes.
The niches in the wall made of drywall with your own hands can be both horizontal and vertical:
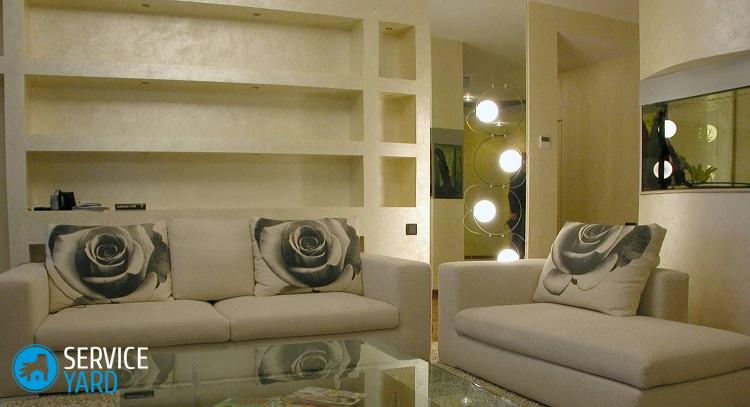
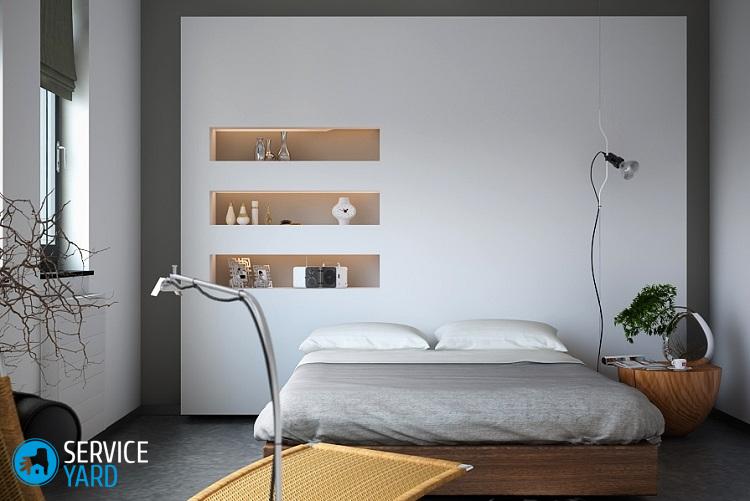
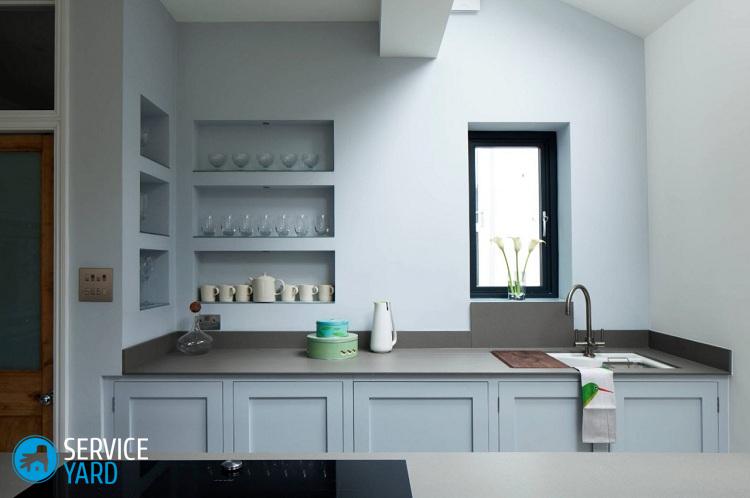
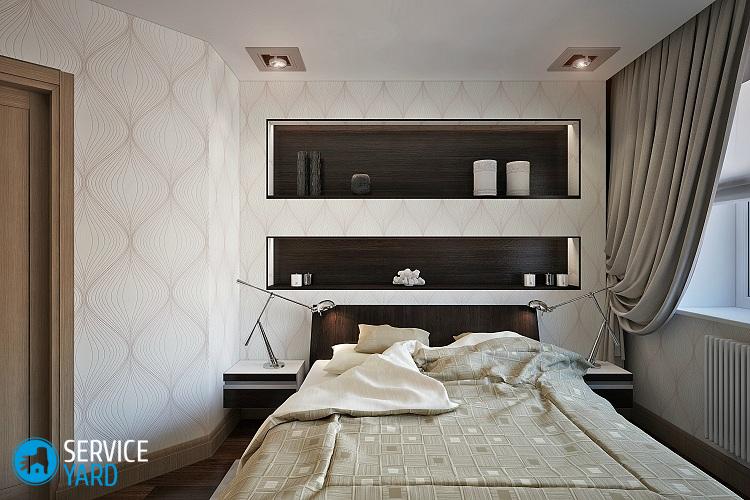
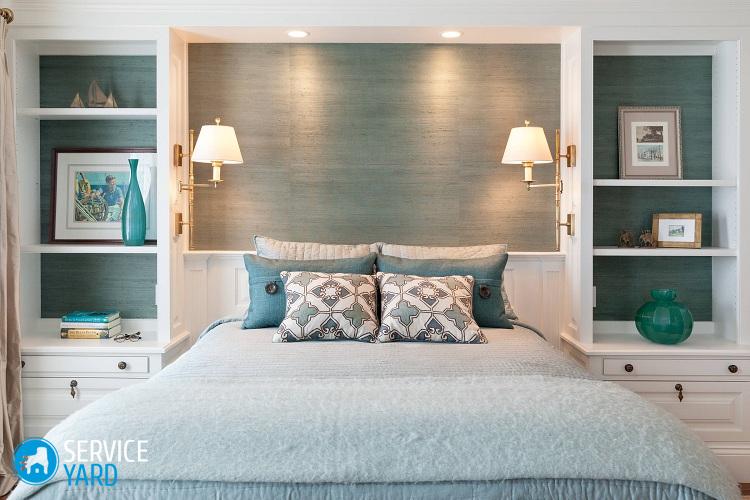
- Horizontal, as a rule, have the shape of a rectangle elongated in length. They are usually located one under the other. Good for storing books and various souvenirs. Often used in modern interiors of the living room and bedroom.
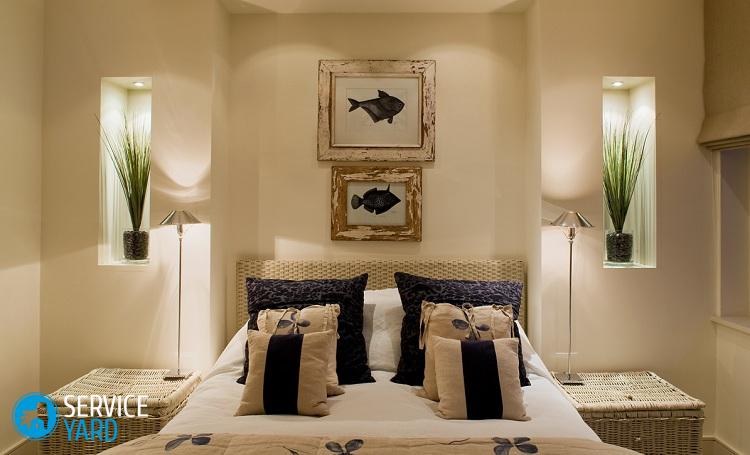
- Vertical niches in the wall of drywall can be in any room, for example, in the corridor you can place a clothes hanger in it, in the living room - an interior composition. They are placed both one by one on the wall, and several times in a row. Only here you need to take into account one nuance: a narrow, elongated up design will visually increase the ceilings, so it will not work for rooms with non-standard parameters.
to contents ↑Important! A combination of these two types can also be an excellent option. For example, along the edges you can equip elongated structures throughout the wall and break them into shelves. And in the middle place a horizontal niche. This design will successfully replace the furniture wall.
Drawing creation
Before you make a niche in the wall from drywall with your own hands, we advise you to draw a drawing. This is better than working blindly, because step-by-step instructions will help you get to the goal - a beautiful and neat niche made of drywall, which can become an ornament of any design.
Here you need to consider the following nuances:
- The depth of your future niche in the wall of drywall for installing a TV will be equal to the thickness of this TV, plus a few centimeters, which will be needed for laying wires and sockets. Moreover, the space must be calculated so that the screen is in the same plane with the surface of the niche.
- The same calculations must be done for any other equipment. The basis is the thickness of the equipment, for example, a microwave for installation in the kitchen, plus additional centimeters for electricians. Each time, keep in mind that only the front of the equipment should be visible.
- Along the edges of the niche in the drywall wall, carefully pave small gaps under your arm. They will be needed in order to install the equipment and continue the wires. In addition, this technique will help to avoid overheating of the equipment.
- If you create a wall from drywall with niches with your own hands, then it is imperative to calculate the load. It is one thing when the metal profile has to withstand a vase of flowers, another thing is an aquarium with fish with a capacity of 100 liters.
- Are you planning to make niches with lighting or install a TV in it? Think about where the wires will go and make exits for the electrician.
Of course, do not forget to specify the main parameters - the length, width and depth of your niche, especially when it comes to creating a built-in recess. When a detailed drawing is completed, you can calculate how much material and fasteners you need.
Material selection
Do-it-yourself niches in the wall made of drywall are a great option. It does not require the involvement of employees and large financial investments. Everything can be done independently, because the material to be worked with is light and pliable, and it is also quite inexpensive. The main thing is to choose a material with a suitable variety.
Drywall:
- Standard sheets are gray. Usually used for interior partitions, they are also suitable for creating drywall walls with niches with their own hands.
Important! Such material is quite dense, therefore it is able to withstand the weight of household appliances.
- Restoration drywall has a smaller thickness, so it bends well and is great for making curly elements.
- The arched sheet is the thinnest, its thickness does not exceed 7 centimeters, so it takes any shape and is ideal for creating arches and rounding the top of the niche.
- Laminated or vinyl material is a regular sheet coated on top with a PVC film, the color may be different. This drywall is suitable for finishing work.
- If you plan to make niches in the wall from drywall in the bathroom or in the kitchen, then purchase material that is not afraid of humidity in the premises. Sheets with such characteristics are painted green - it is obtained due to special hydrophobic additives that protect the surface from moisture.
Profiles
It is no less thorough to approach the choice of profile for creating a niche in the wall from drywall:
- It is better not to take into account the option of the crate of the bars immediately, especially for the kitchen, due to the fact that the tree is rapidly gaining moisture.
- But the metal profile is worth considering, because its moisture does not matter to him. In addition, such a crate can be mounted quite quickly and simply.
When buying a profile, also pay attention to its thickness. Choose this parameter based on what strength and stiffness the structure needs. If you plan to make only arches, do not waste money on expensive and durable material, and vice versa - do not spare money on creating a solid partition:
- A 4 mm thick profile is considered the weakest, as it does not withstand heavy loads. Most often used to create decorative elements. When fastening such profiles, the screws in them often scroll.
- The thickness of 0.45 cm is the golden mean. It bends, but does not break. Ideal for creating a wall and ceiling lathing and for further installation of drywall on it.
- The most expensive profile has a thickness of 0.55 cm. It is used to install complex wall devices, as well as to assemble a structure that is expected to be heavily loaded.
Fasteners
Together with the profile, as a rule, fasteners are also purchased, which is fixed on self-tapping screws and dowels:
- Direct universal suspension, which is popularly nicknamed the "toad." It is used to connect the wall and the lathing. It is screwed with screws to the wall, flexible tabs are fixed on the profile and the excess is simply bent into the structure.
- The purpose of profile extensions is clear from their name.
- A single-level crab connector secures the frame elements at right angles.
- A two-level crab forms a T-shaped mount.
Important! Understanding where and what type of fastening you need to use, you can easily choose not only a fastening system, but also a metal profile to create gypsum plasterboards of any complexity.

Instruments
Before you make a niche in the wall from drywall with your own hands, it is worth not only purchasing materials, but also preparing the necessary tools:
- screwdriver;
- drill;
- building level;
- roulette;
- plumb.
We will talk about how tools will be needed to work with drywall a little later, as well as about the features of its cutting.
Creating a Wall Niche
Now step by step we consider the entire scope of the upcoming work.
Training
After everything is ready for the installation of a wall made of drywall with niches with your own hands, you need to prepare the surface for installing the crate. For this:
- Remove any wall covering, wallpaper, or other decoration material.
- Sand the surface with a grinder or sandpaper.
- Apply a primer to the wall - it is better to choose a composition with antiseptic additives.
- After - transfer your drawing to the wall. Mark all sizes, installation locations of profiles, places of wiring.
Important! Be sure to apply a level at this stage, otherwise the niche device may turn out to be curved and uneven.
Installation of the lathing
Before creating a crate for a niche in a wall from drywall, do not forget to prepare a polyurethane tape to lay it between the wall and the profiles:
- Position the guide profiles according to the marking and fasten them with dowels. The installation step of the clamps should not exceed 40 cm.
- If the design of the niche provides for curved lines, then carefully cut the metal at the bend to give it the desired direction.
- Now give scope to the future design. We attach profiles to the ceiling and floor, we make sure that they are strictly vertical.
- For the front of the metal rails bend at a right angle. After - they need to be fixed with self-tapping screws on vertical guides.
- If the niche in the wall of drywall is not deep and without curly elements, then collect the profile on the floor, and only after that - fix it on the wall.
Important! When working at each stage, use a level to achieve perfectly smooth surfaces. This is an important point when installing profiles that will become the basis of the design decision.
Here are some more nuances to consider:
- If it is planned to make shelves inside the niche in the wall from drywall, then install additional profiles.
- If the shelves will have a purely decorative function, then you can choose not drywall, but ordinary plywood. In this case, medium-sized profiles are suitable.
- In the case of installation in a niche of a television set or any other large objects, only load-bearing profiles should be used to give rigidity and stability.
- If the shelves in the design are not provided at all, then consider installing stiffeners.They can be made both from a profile, and from a tree. This point is especially relevant if the niche is from the ceiling to the floor.
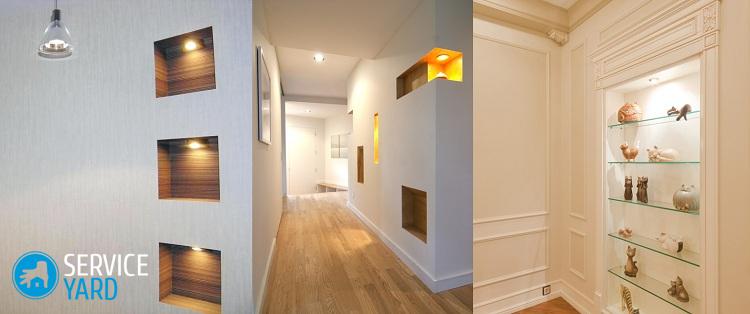
Backlight
If your niche will have lighting inside, then you need to take care of it even at this stage of creating a niche in the wall from drywall with your own hands. After the frame is sewn up, it will be quite problematic to do this:
- Halogen spotlights should be located at the same distance from each other. You determine the step yourself, based on how powerful the backlight should be. Connect the wires using the terminal blocks. From one end, insert stripped wires from the fixtures, from the other - electrical wiring.
- LED strip costs more, but heats up less. To install it, you will need a power supply. Fasten the tapes using ordinary double-sided tape, then connect to the power source. In this case, it is important not to confuse the polarity, otherwise - the lamps simply burn out. The power supply needs to be brought out so that there is access to it.
- If the niche in the wall of drywall is illuminated by an overhead lamp, then for its installation it will be necessary to provide embedded profiles to which the lamp frame will be attached.
Important! All cables must be laid in corrugated hoses in order to avoid short circuit and fire. And the corrugations themselves must be fixed with clips and dowels to the ceiling or base wall.
Drywall Cutting
To create masterpieces that will decorate any home, you should familiarize yourself with the rules that are mandatory when cutting drywall. This material is a “sandwich” or gypsum core and two layers of cardboard, so its structure is loose and brittle.
To work with it, you will need the following tools:
- pencil - its traces are not visible after puttying, which can not be said about the marker or pen;
- tape measure and ruler-corner;
- a planer to align the curved edges of the sheet;
- a special knife or a regular stationery knife with the ability to adjust the length of the blade.
Important! The blades of all tools should be sharp and well sharpened. They must be kept strictly perpendicular to the cut surface, only in this case the cut will turn out to be even and smooth.
Before cutting the sheet, we mark it. Then:
- Without removing the ruler, we cut drywall in the intended line. The depth should be small so that the blade does not touch the second layer of cardboard.
- We move the sheet to the edge of the table or chair on which the cutting is performed.
- We lightly tap the surface and gently bend - we see that the gypsum core breaks easily.
- We cut off the bottom layer of cardboard and clean the cut with a plane.
To create a niche in the wall from drywall with your own hands, you will need to cut the cardboard not only in a straight line. To give different forms to the material, different techniques and tools will be required:
- For crooked lines, the knife is suitable, but the cuts will be rough and require long processing. Therefore, it is better to use a jigsaw. The main thing is that the material should be on weight, for example, between two stools.
- To create perfectly round shapes - for a hole for a socket or fixtures, it is better to purchase a crown in a hardware store that is mounted in an electric drill cartridge.
- Rectangular openings will require the use of a hacksaw. Here it is better to choose a tool for working with metal, then the cut will be even.

Lathing
All the work of plasting a future niche in a drywall wall can be divided into several simple steps. Here are some tips you can use here:
- The installation of sheets should begin with geometrically incorrect or small fragments. We cut, try on, customize.
- When fixing the sheets, make sure that the screws fully enter the drywall, the head needs to be drowned in the material.
- It is better to create the inner part of the niche from one continuous sheet to give the structure more rigidity.
- The front of the crate closes last.
Important! During operation, make sure that the joints of the sheets fall on the profile and do not fall on the opening, otherwise they will simply fall into the structure.
Finish finish
It would seem that sheets of drywall should form a flat surface. But it also requires finishing. These works are simple and are carried out in the following order:
- First, the joints between the sheets and the fixation points are fixed. The surface is primed, and after drying it is processed with putty.
- Until the composition has finally dried up, a sickle tape is applied on top of the seams, acting as a reinforcing frame.
- Next - another layer of putty is applied. Now you need to wait for the putty to dry well.
- Then the entire surface is primed and the walls can be painted, glued on them wallpaper and other finishing materials.
Advice
In order for a wall made of drywall with niches to fit correctly into the interior, you should follow the advice of designers:
- Asymmetrically located niches will give the interior dynamics and style. One - make a rectangular shape and give it a place in the center of the wall, the rest - a little smaller, arrange along the edges.
- Geometrically smooth recesses create a sense of accuracy. To create this effect, place the niches in two rows, three niches in a row.
- The vertical design fits perfectly into the space between the two windows.
- A niche with a rounded top will look great in the middle of the wall. This design looks spectacular in the amount of three pieces located in one row.
to contents ↑Important! Before mounting a niche in a wall made of drywall with your own hands, clearly plan the space. The recesses should be either above the furniture, or next to it. They should not interfere with the installation of a cabinet or bed. Ideally, if the niche is on an empty wall
Stock footage
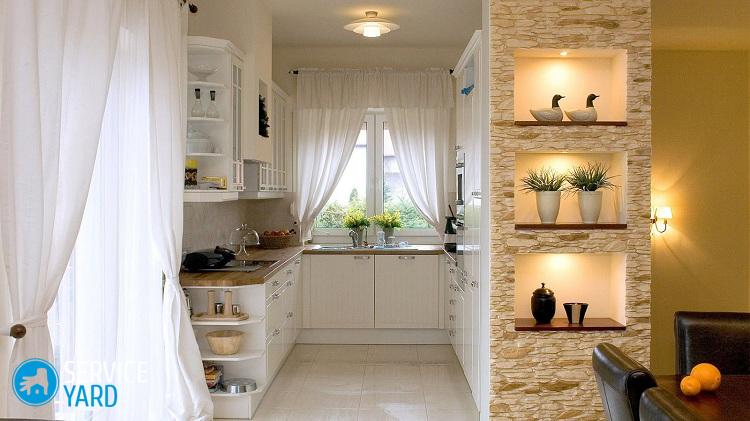
The niches in the wall made of drywall can be supplemented with a variety of materials - transparent or colored glass, decorative plaster, artificial or natural stone. They can be covered with fabric or painted in a contrasting basic tone color. A fashionable accent is to clad a wall inside a niche with imitation of brickwork. There are a lot of options for creating a stylish design, and you will definitely find a suitable one for your apartment. And how to do the work yourself - now you know.
- How to choose a vacuum cleaner taking into account the characteristics of the house and coatings?
- What to look for when choosing a water delivery
- How to quickly create comfort at home - tips for housewives
- How to choose the perfect TV - useful tips
- What to look for when choosing blinds
- What should be running shoes?
- What useful things can you buy in a hardware store
- Iphone 11 pro max review
- Than iPhone is better than Android smartphones
 (No ratings yet)