
How to tile a bath with your own hands
The restroom is the main room in the living room, because in it people bathe and put themselves in order.
It is for this reason that it should have the appropriate form.
A suitable facing material is tile. But before laying it, you need to know all the nuances of how to tile the bathtub with your own hands to look beautiful and aesthetically pleasing to the owner’s eye.
Tile Benefits
This material takes advantage of the reason that it can be laid both on the floor and on the walls. You can cover plumbing, but before that, you need to properly prepare it (build a facing screen). Of course, specialists can do this, whose services will cost several times more than self-lining.
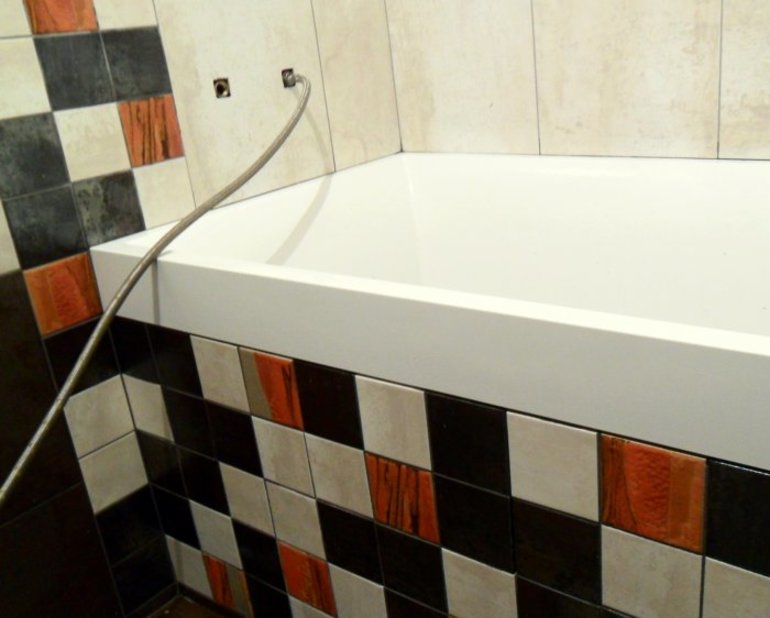
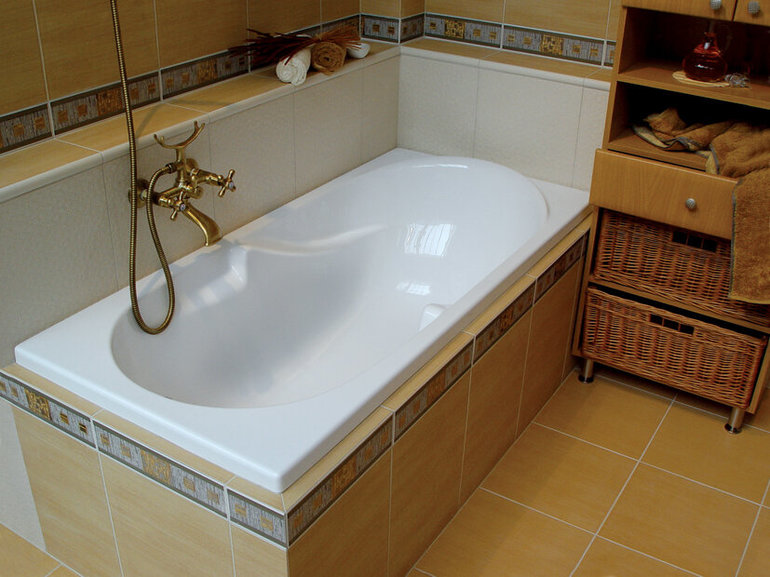
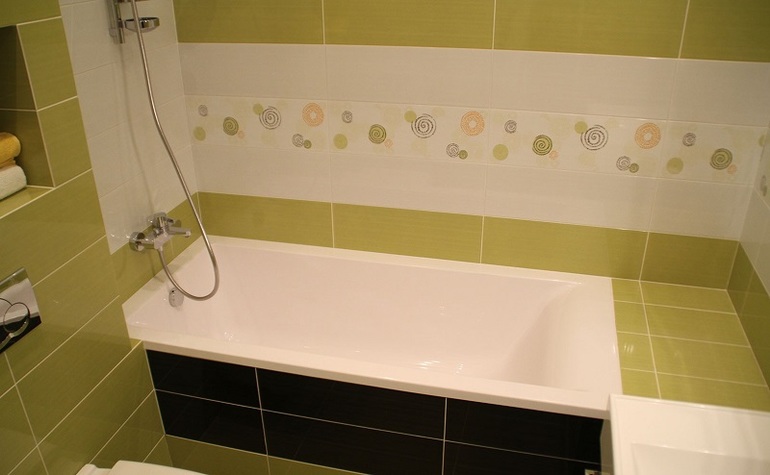
You can screw up a bathtub of any shape and material. Thanks to this method of facing, the room will turn out elegant and beautiful. In addition, the bath will last a longer period, as it will be more stable.
In the case when the bath is mounted on the frame, under the plumbing there is a space that does not look very attractive. It is in this situation that tiling comes to the rescue. All defects are hidden under the decorative screen.
The main advantages of the method are:
- Durability and practicality of the material.
- Aesthetic look.
- Safety from an environmental point of view.
- Ease of care.
But there are some nuances that any master should know. The main ones include:
- The screen is recommended to be made of the material with which the walls are covered.
- The presence of a revision hatch and a ventilation system must be foreseen.
- Tile fastening is made on the basis. It can be a brick, drywall or foam concrete.

Preparatory Activities
Before tiling the bathroom, it is necessary to properly and thoroughly prepare the surface. Most often you can find a screen made of brickwork. But some owners prefer drywall, which costs several times cheaper than brick.
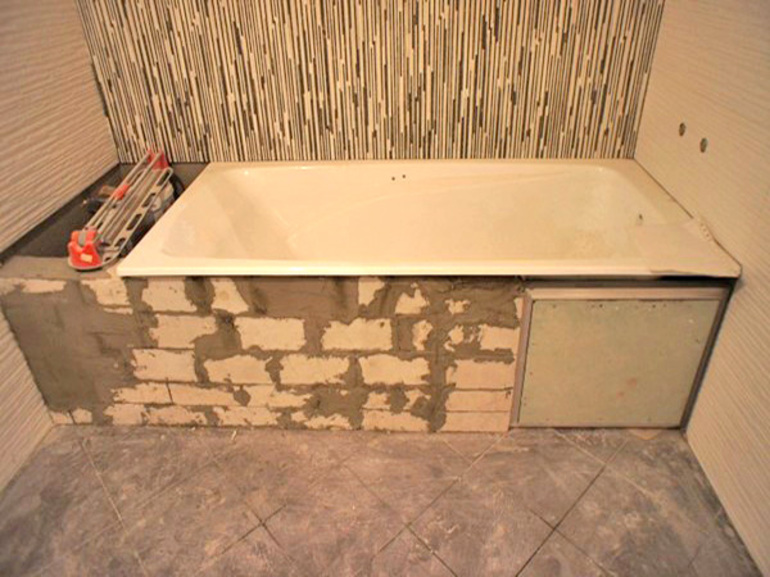
At the beginning of the process there are no particular nuances. A plumbing item (acrylic, cast-iron, metal) is placed in the place prepared for it and connected to the sewer system. So that there is no bias towards the drain, the bath must be set according to the level.
Brick is laid out around the perimeter of plumbing. But there are situations when, in order to sew up free space, you need to lay out the material only at the ends and the long side, or only along an elongated line. This directly depends on how the plumbing item was displayed and on its size.
For convenience, you must first mark the perimeter. The partition should be 2 cm deeper than the protruding side. There is a small annoying nuance: small bricks are not available for sale. The master needs to split each product on his own. This is easiest to do with diamond wheels or a grinder.
In the event that small debris appears, they do not need to be thrown away. Typically, these are the pieces laid out a closed screen.

Screen layout
Before tiling the bathtub with a tile and making a screen, it is worth making a markup. For this, vertical marks are marked strictly by level. This is done along the edge close to the bathroom. Labels are put on the floor. Such manipulations are carried out in order to make it clearly visible where the border will be present in finished form.The marking line is slightly shifted inward so that the tile does not protrude forward.
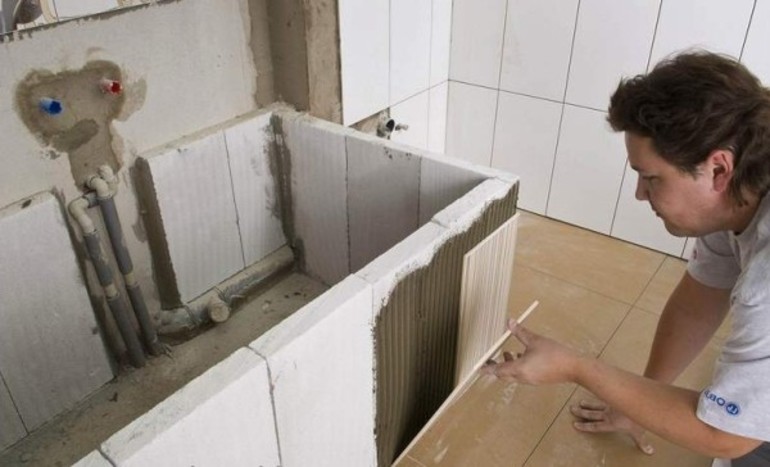
For an accurate calculation the thickness of the adhesive, tile and drywall sheet is taken into accountwhich will serve as the basis of the screen. All parameters are added up, and the resulting number is the same distance for the indent.
Then you need to draw another line. That it will be the indicator on which the outer edge of the UD profile will lie. It should be perfectly attached to the floor and walls. For reliability, a dowel is used.
After the manipulation, a CD profile is installed. From it you need to cut off the desired number of centimeters and insert into UD. After fasten using self-tapping screws.
Only after the frame is completely constructed can it be trimmed with plasterboard sheets. They must be moisture resistant. Otherwise, the design will soon fall apart and all efforts will be in vain, and the money wasted.
The ends should be treated with water-repellent mastic.
It is worth remembering that for the manufacture of a screen for finishing the bath, it is allowed to use other suitable materials.

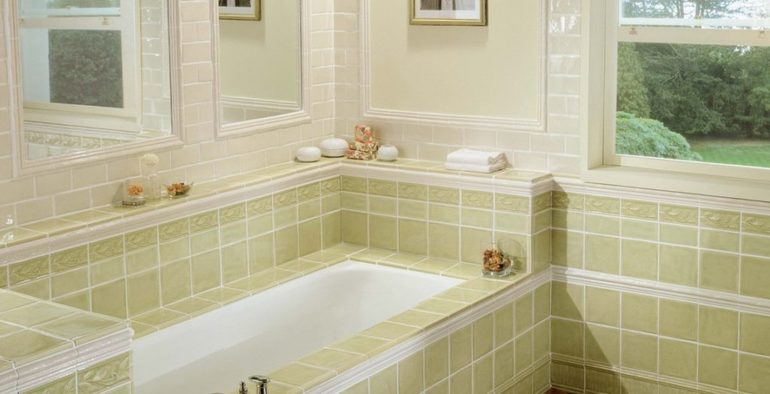
Facing work
Before pasting a room, it is worth deciding on the type of tile. It is recommended that the material on the walls and the plumbing itself be the same.
To prepare the surface carry out the following manipulations:
- It is imperative to install a reinforcing mesh, and then cover it with adhesive, if the tile will be laid on chipboard.
- In a situation with a drywall sheet, you can immediately begin to prime the surface. In this case, only material having water-repellent properties is used.
- When the screen is made of brick, it needs to be plastered a little. After the layer has dried, a primer can be applied.
The ideal option for tiling the bathtub with a tile is a screen size that is a multiple of the dimensions of the tile. In this situation, the arrangement is quite simple. But this does not happen as often as many wish. And then, to make room, you have to cut the material. But no need to worry about it. In this situation, you can embed the tile so that there are no visible defects. The horizontal row will ideally lie below.
But the vertical one is selected in accordance with the obtained distance of the gaps. Pieces are recommended to be placed in corners where they will be less noticeable.

Step-by-step instruction
There are a number of manipulations to tile a bathtub.
To do this, it is worth doing the following:
- To begin with, an adhesive composition is prepared, which is designed specifically for tiles. On sale it can be found in powder form. After that, it is worth diluting this mass with water having a room temperature indicator. Proportions are indicated on the package. For this reason, it is worth paying special attention to the package. Letters should not be erased. If the instruction is poorly legible, it is better to buy another package or ask the seller for recommendations.
- With gentle movements, the finished adhesive is applied to the surface of the screen. To properly lay it, you need to perform all the actions strictly according to the markup. It is better to work gradually, dividing the entire perimeter into parts of a certain size. The adhesive composition on the surface is leveled with a specially designed spatula with the presence of teeth.
- On the prepared area you need to place the tile. In the case when it is seen that it is installed correctly, you can pin it down a little. Further facing is carried out in the same sequence.
- Tile glue should dry well for several days. Only after this is the grouting done. The procedure is carried out for greater tightness of the surface. If there is a desire to even more carefully close the cracks that could have formed during the work, you can perform additional processing with silicone sealant. It goes on sale in bottles convenient for finishing work.
All these steps are necessary to neatly and beautifully tile the bathroom. Thanks to this method of decoration, the room will acquire a beautiful appearance and become more attractive.
In addition, the exterior finish will help to remove communication systems located under the subject of plumbing from the eyes of a person.

- How to choose a vacuum cleaner taking into account the characteristics of the house and coatings?
- What to look for when choosing a water delivery
- How to quickly create comfort at home - tips for housewives
- How to choose the perfect TV - useful tips
- What to look for when choosing blinds
- What should be running shoes?
- What useful things can you buy in a hardware store
- Iphone 11 pro max review
- Than iPhone is better than Android smartphones