

Do-it-yourself fireplace with a water circuit
It was simply impossible to imagine a cozy, hatched house where there would not be a full-fledged source for heating. Today, fireplaces are back in fashion. At the same time, they are considered not only an excellent heater for the home, but also serve as an element of decor. A fireplace with a water circuit with your own hands is not an easy task, but for those craftsmen who previously worked with a brick, this should not be difficult. Such fireplaces are nothing more than solid fuel boiler models that combine a beautiful fireplace design and the possibility of heating the room.
to contents ↑Potential open fireplace
Fireplaces of this type can be used both as the main type of heating, and as a backup heat source. In cases where a wood-burning fireplace is the main source of heating for housing, a special connection scheme should be drawn.
It provides not only heating the building (about 400 squares), but providing hot water to residents for household needs, as well as the operability of the underfloor heating system.
Important! Fireplaces can be connected to an existing heating system as an alternative heating source or as a backup option. Moreover, during its operation, the main heating system will be turned off automatically, because the automation, which is present in modern boilers, controls the heating of water, and turns off at too high temperatures.
Also, the fireplace can be used without connecting to the main heating system. This is especially good in the warm season for elementary heating of water. Such designs can solve several problems, including the following:
- Outstanding appearance.
- Energy Saving.
- Room heating and water heating as needed.
Benefits
A fireplace with a water heating circuit with its own hands is endowed with a number of advantages, among which the following can be distinguished:
- Relatively low construction cost in comparison with traditional types of boilers.
- Full compatibility with already commissioned heating systems.
- Fuel for the boiler is affordable and relatively inexpensive.
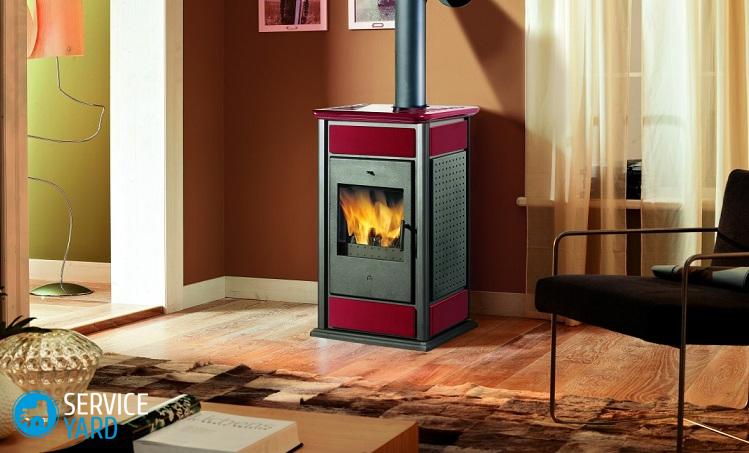
- A built oven is not only heating a large area, but also a stylish solution in the design of the room.
- Installation of a fireplace with a water circuit can be carried out almost anywhere, with the only requirement for installation is compliance with fire safety rules.
- The fireplace does not require any additional energy consumption - the energy carrier is circulated using simple physics.
- Water fireplace is very easy to use and completely autonomous.
- If the owner of such a design shows a desire, then the fireplace can be equipped with a grill or other additional devices on which it will be possible to prepare delicious dishes.
to contents ↑Important! The design can be faced at your discretion, so there is the opportunity to harmoniously fit it into any design decision.
disadvantages
Like any other design, there are both positive and negative sides. Unfortunately, fireplaces with a water circuit were no exception, and among their shortcomings, the following can be noted:
- Due to the fact that heating circuits of this design have a relatively low efficiency, it makes no sense to install them in too cold regions. In this case, it must be combined with several heating systems.
Important! If it will be used as the main heating source of heating, then the efficiency will reach about 40%.
- Another minor minus of the fireplace with a water heating circuit is the lack of automation. That is, it is necessary to set fire to it yourself. But if you use it as an additional source of heat, then this factor ceases to be significant.
Fireplace Connection Diagrams
To make the installation of a similar design in a two-story house with a usable area of 250 square meters. meters, you must adhere to the following rules:
- The design should be installed below, that is, on the ground floor.
- The water tank should be located in technical rooms - this is where the heat from the coolant should come.
- In the tank, the water is heated by a coil to the desired temperature.
- Heated water is supplied from the water tank to the radiators.
- With sufficient structural power, part of the heated liquid can be used for household needs.
- The cooled liquid through the treatment returns to the tank again, heats up and enters the batteries again. Water circulates through the pipeline, which is intended for personal use by residents of the house. That is, it also periodically heats up.
Important! The scheme for arranging a fireplace with a water heating circuit with your own hands in a house with one floor does not differ significantly. The difference lies in the layout of pipelines, radiators and hot water. Although there are no special differences in the installation of such furnaces, some nuances are still worth considering. This is mainly due to the location and type of location of the expansion tank. Because of it, this design is divided into an open connection method and a closed one.
Open connection method
In such a system, the tank is installed at the highest point of the monastery (in the attic), and, in fact, water enters there. Then it flows by gravity into the batteries.
Important! Such a fireplace with a water circuit is characterized by ease of installation, as well as the complete absence of additional electrical appliances.
Closed Connection Method
In this embodiment, the liquid does not move into the tank by gravity, but using a pump. It can be installed anywhere - distance and height do not matter. This method has several advantages over the above:
- There are no restrictions on the area for heating. That is, you can heat a house with an area of more than 100 squares.
- The number of radiators can be increased, while the efficiency will not decrease.
- The system does not overheat.
Fireplace Design Preparation
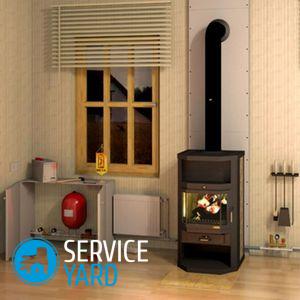
It is extremely important to place the fireplace in the right place, to determine its dimensions. As a rule, a fireplace with a water circuit is placed closer to the outer wall of the room or in the corner, since the back of the structure can overheat during operation. If it is placed opposite windows or doors, the formation of drafts is inevitable.
Important calculations:
- With regard to dimensions, it is necessary to correctly calculate the value. It should be 1/70 of the total area of the room. For example, with a room size of 80 square meters. m the opening of the furnace will be approximately 36 by 52 cm. Important parameters are the depth of the furnace and the size of the chimney. For example, with a furnace opening area of 0.4 square meters. m, the depth will be somewhere around 35 cm.
Important! With a shallow depth of the furnace, smoke will pour into the room. If too large, heat will be lost.
- The chimney footage is at least 4 m, its area is an order of magnitude (10 times) smaller. In our case, it is 0.04 square meters.
- The main material of construction is a typical brick. In certain places, you can also use double silicate brand M150.It is economical and sturdy, and also gives a beautiful appearance and neat design.
Important! It is necessary to calculate how much it will be needed, taking into account marriage, halves and quarters.
- For calculation, there is an order - a detailed masonry diagram of each of the series separately. It is necessary to lay a brick over the firebox, gradually narrowing the smoke chamber. In between, they make a pass - a ledge that prevents sparks and smoke from entering the chimney into the room.
- The rear wall of the structure must be insulated, following the fire safety requirements. For this, you can use a regular sheet of metal.
Preparation and construction
To make a fireplace with a water circuit yourself, you will need:
- Cement mortar, which includes: sifted sand, clay, cement grade M300 (not lower). Before use, sand must be sieved from dust, excess debris.
Important! For an inexperienced stove-maker, it is better to use Cambrian clay in work, because it is very easy to work with it. The ordinary can safely be used by those who have experience working with it, in particular in the preparation of solutions.
- Half-bricks should be considered as solid, and 5% of the total amount will surely go into spoiled.
- A metal shutter and reinforcing rods will also be required.
Foundation filling:
- The basis of the fireplace with the foundation of the house is not connected. Moreover, a gap must be left between the fireplace base and the wall surface. The gap between the house and the base of the fireplace is covered with sand. The width of the base, in contrast to the width of the base, increases by about 10 cm.
- In order to lay the foundation, dig a hole to a depth of 60 cm. A layer of gravel is laid at the bottom, and then compacted tightly. Before pouring concrete, there is a formwork (it should rise at least 15 cm above the floor surface), lined with roofing material (for waterproofing). Only after that the foundation can be poured with concrete mortar mixed in the proportions: 1 part cement and 3 parts sand.
- The solution is poured gradually in several stages, carefully smoothing each layer. The top layer should be approximately 7 cm and below the floor surface. After that, it is left for a week alone until completely dry.
DIY bricklaying of a fireplace
After the base has completely dried, a waterproofing layer is not laid on it. This can be done using roofing material in two layers. Next, prepare a solution of the following components: clay, sifted sand and water. First, they moisten the clay with water, then completely knead all the lumps.
Important! If the clay turns out to be oily, then gradually pour the cleaned sand into it and stir the solution so that it ceases to stick to the shovel.
For the construction of arched channels in the fireplace with a water circuit, do-it-yourself halves of bricks are used on the outside. To make them look smooth and tidy, they need to be sanded.
Important! Do not forget: the brick does not fit on the inside of the chimney with a polished surface, because this will further interfere with the free passage of smoke through it.
Here's how step-by-step how to design a fireplace with a water circuit do it yourself:
- Before you start laying, you need to carefully calibrate the brick by weight and size. Then it is cleaned and immersed in water for a while. This is done so that the brick is saturated with moisture, and not pulled from the solution.
- Then the first row of the fireplace is laid, after which the evenness of the masonry is measured using a level (this is very important).
- After the first row, lay out all the other rows in accordance with the order. In addition, each of them should be checked with a plumb line and a building level for evenness. The uniformity of the whole structure along the diagonals is checked with a rope. When laying solid next to each other, a trowel is used, and on the inside of the chimney, this is done by hand so that any pebble that gets into the solution can be detected and immediately removed.
- The firebox, as well as the walls on the inside after masonry, are thoroughly wiped, while removing excess solution. You can plaster it from the inside.
- To give a beautiful appearance to the vault of the fireplace, it is processed by the method of gradual "inlet". For temporary jumpers make circular formwork. The masonry itself begins from the central zone and continues on one and the other side. After several rows are completely laid, the jumpers can be removed. This must be done.
- The chimney is laid out in a strict vertical. Therefore, each of the rows should be checked for evenness.
- In the upper part of the building, where the chimney will be led outside, you should think about fire safety. For this, an obstructive layer is installed between the chimney and the roof using non-combustible materials.
Important! The entire masonry process is a long and painstaking work front. And not only the appearance of the structure, but also its functionality will depend on how correctly all the work has been carried out.
Finishing work
You can clad the finished fireplace with any material you like:
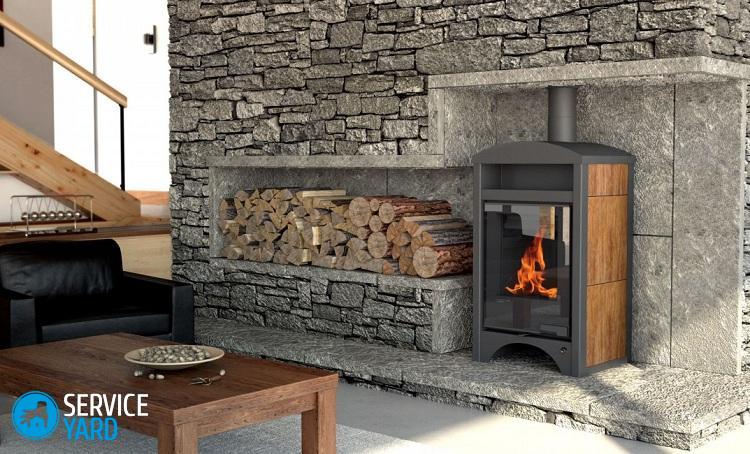
- The most popular finishes are natural stone and marble. They create a truly beautiful look complementing any interior.
- It will look good on the fireplace and ordinary stucco, which is painted in the tone of the floor or wall.
- The fireplace stove can not be finished at all, if you tried your best, and the masonry itself looks beautiful.
Stock footage
Do-it-yourself fireplace with a water circuit - This is a very serious and responsible matter. Before you start work, think carefully: if you doubt your abilities and are not sure that you can do everything right, then it is better to entrust this matter to professionals.
- How to choose a vacuum cleaner taking into account the characteristics of the house and coatings?
- What to look for when choosing a water delivery
- How to quickly create comfort at home - tips for housewives
- How to choose the perfect TV - useful tips
- What to look for when choosing blinds
- What should be running shoes?
- What useful things can you buy in a hardware store
- Iphone 11 pro max review
- Than iPhone is better than Android smartphones
 (No ratings yet)