

Stairs to the second floor in a private house
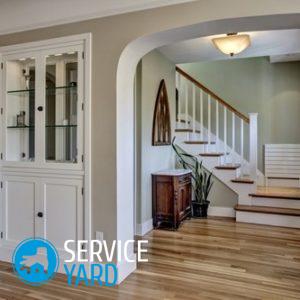
Private houses and country cottages, which are being built in our time, are mostly multi-storey. The upper floor can act as a residential and non-residential premises. But be that as it may, here you need a ladder. It is, of course, difficult to make a quality attic or interfloor staircase of metal structures or concrete, but if you use wood, then everything is possible. Even a novice master will be able to master and understand how the stairs to the second floor in a private house are created. We will talk about this in our article. In addition, you will learn a lot of useful information about what kind of stairs are, how they differ, from what materials are made.
to contents ↑Popular types and types of staircases
Before you make a staircase to the second floor with your own hands, you will have to decide on the most suitable option. To do this, of course, you will have to study all kinds of their types and varieties, the features they possess, the main differences.
Types of wooden stairs:
- Marching. These designs are quite convenient and simple in terms of manufacturing and operation, but to equip them, a large area will be required. You can position such a staircase directly in the center of the room or along the wall.
- Screw. As a rule, they are selected in conditions of limited free space. The fact is that their throughput is quite small, you have to move one at a time. But such a design will cost the least, will last longer than its counterparts.
- Combined. Use them only in cases where the layout allows. Basically they have the appearance of marching stairs with spiral elements.
Types of wood structures:
- On the bolets. In such stairs, steps are attached to large hinged balusters.
- On the bowstrings. The main span in them is mounted end-to-end to the beam with cutouts on the inside.
- On the skewers. Simply put, these structures are an inclined beam, on top of which steps are attached.
What materials are used to make interfloor stairs?
When choosing what a wooden staircase will be made of with your own hands, be guided by your own preferences, cost, and basic characteristics of suitable tree species. Each of them has its advantages and disadvantages, which you should be aware of.
Popular materials for the manufacture of stairs:
- Maple. Designs from this breed are incredibly durable, durable, stylish. The color they have is light brown. The only minus of maple is its high cost.
- Oak. The main feature of this material is that over time it only gets darker. In terms of quality, this is one of the best materials, but also expensive.
- Larch. Stairs made from it are dark yellow or golden yellow with brown streaks. This material perfectly tolerates the effects of all external factors. Products obtained from larch are solid and durable.
- Spruce. This material is considered the most popular, in particular due to its availability. Spruce wood has a homogeneous structure, a light shade.
- Pine. The low density of this wood makes it easy to cope with its processing.An additional advantage of pine is its low cost. Its disadvantage can be called a short life. That is why stairs are often built from it in the country, since they are used exclusively seasonally.
Advantages and disadvantages of wooden stairs
Just like all similar structures, a self-made staircase made of wood will have certain advantages and disadvantages, so it is better to consider them in more detail before the start of construction.
Positive traits:
- Low cost of building materials.
- Ease of processing.
- Environmental friendliness of tree species.
- Possibility of self-assembly.
- Low weight.
- Aesthetically attractive appearance.
Negative qualities:
- Insufficient strength compared to metal and concrete structures. Wood is a natural material and over time it begins to change and deteriorate.
- Low fire safety of the material.
DIY wooden staircase construction
Now we will describe in detail the manufacture of wooden stairs to the second floor with our own hands. We will tell you how the preparation for work takes place, how all the necessary calculations are made, and how construction is carried out at each stage.
Preparation of materials
To make the stairs to the second floor, prepare the following materials:
- Whetstones for steps.
- Beams for risers.
- Beams 3-4 cm wide.
- Boards.
- Bar for kosour 50 to 240 mm.
- Self-tapping screws.
- Wood screws.
- Building level.
- Joiner's glue.
- Roulette.
- The square.
- Railings and handrails.
Calculation of the stairs
At this stage, it is necessary to create a drawing of the stairs, determine its dimensions, the number of supports and steps. That is, you must first determine what specific function it will perform - lead to the top of the attic or connect the floors. It is very easy to draw a diagram yourself. As a rule, the choice falls on direct marching structures connecting two floors and reaching a height of several meters. The angle of inclination should be 30-40 degrees.
Important! All wooden houses in the first two years after completion of construction give a slight shrinkage, in connection with which the angle of inclination often changes.
All necessary calculations are carried out according to the following scheme:
- Determination of the height of the stairs. Since the average ceiling height is 2.5 m, it is necessary to add to this figure the thickness of the flooring of 35 cm, and we will get 2.85 m as a result.
- We calculate the number of steps. Divide the height of the structure by the height of the steps - this is approximately 17 cm. We get a total of 16.76 cm. Now we round this value, it turns out that the steps will need to be made 17.
- Determine the width of the steps. The permissible tread width is from 22 to 40 cm. To calculate the width of the steps, we use the following formula: riser height (17 cm) plus the width of the steps (30 cm), minus the number of steps (16.76 cm). Round this figure and get a width of 30 cm.
- The width of the march. It should be a multiple of the width of the step. In this case, it can be 60, 90 or 120 cm.
- Determine the length of the stairs. It is necessary to multiply the number of steps by their width, we get 480 cm.
- We calculate the length of the kosour. We carry out calculations according to all the known Pythagorean theorems, that is, to double the height of the kosour we add the doubled length of the flight of stairs, we get the doubled height of the kosour. We calculate the root of this number, we get 560 cm.
Important! If it is difficult for you to perform similar geometrical calculations, then draw the design on paper at the desired scale, measure the length and angle of the base.

Assembly assembly
Before you install a wooden staircase to the second floor, determine the location of the kosour.
Complete the installation by following the instructions:
- The first stage is the installation of kosour. Attach the bottom of the kosour with a support beam. From above, cut the kosour into a beam on the ceiling. Install the steps, attach them with screws to the braids.
- The second stage is the installation of railings and balusters, with the calculation of one baluster per step. Saw the grooves at the bottom of each step, insert the balusters into them, and install the railing on top.
- The third stage - grinding the structure, coating with a special protective compound.
- The fourth stage is varnishing and staining. Use a brush or roller for this. Paint the stairs in several layers, then varnish.
Stock footage
Do-it-yourself staircase for a private house is ready! The main thing is to do all the calculations correctly so that then each detail is in its place, clearly falls into the groove, and is docked with other structural elements. It is up to you to make it yourself or buy it, of course. Yes, to build a staircase yourself, you will need to make a lot of effort, but this method has many advantages.
- How to choose a vacuum cleaner taking into account the characteristics of the house and coatings?
- What to look for when choosing a water delivery
- How to quickly create comfort at home - tips for housewives
- How to choose the perfect TV - useful tips
- What to look for when choosing blinds
- What should be running shoes?
- What useful things can you buy in a hardware store
- Iphone 11 pro max review
- Than iPhone is better than Android smartphones
 (No ratings yet)