

Installation of ceiling lights
Correct installation of ceiling lights allows you to bring an atmosphere of comfort and coziness into your home. In addition, well-placed lighting can visually increase the space and raise the ceilings. Unfortunately, the installation process of lighting devices is rather complicated and it is preceded by several stages of preparatory work, such as the organization of power supply to each device, as well as the arrangement of places for their further fastening. Therefore, so that you do not have difficulties during this process, in this article we will reveal to you all the nuances and subtleties of installing ceiling lights.
to contents ↑Types of Ceiling Lights
Before proceeding with the installation of lighting fixtures, it is very important to choose a design that suits your taste preferences, which will evenly distribute light throughout the room and will be convenient to use. To date, the following types of ceiling lights are distinguished in the lighting market.
Recessed
They are small in size, which makes it possible to fully illuminate the room without the slightest loss of space. Such devices are installed in suspended and suspended ceilings, and also, if necessary, in niches.
Recessed luminaires due to the possibility of choosing from a wide variety of designs are very easy to fit into absolutely any interior. In addition, such designs are protected from dust and moisture, so they do not require additional maintenance. Their only drawback is the inability to use high-power bulbs, since there is a risk of overheating of the case, respectively - the risk of fire.
Important! Recessed fixtures are an ideal option not only for general lighting of the room, but also for its functional zoning.
Point
They are used to create local lighting, as well as directing light rays. This design provides for the direct rotation of the diffuser along with the lamp. Thanks to this structure of a spotlight, it becomes possible to illuminate the area you need and increase the angle of illumination.
As for the installation method, such designs can be either suspended or built-in.
Overhead
They are a structure that is mounted directly on the ceiling surface. Overhead lights can have a completely different design and, depending on the model, be used with any kind of light bulb, including high power.
to contents ↑How to make the correct calculation of the required number of fixtures?
Choosing the power of lighting devices, first of all, one should proceed from the area of the room where they will be placed, its functional purpose, as well as the color scheme in the decorative surface finish. In addition, choosing lighting, you must focus on your taste preferences, as some like a brighter stream of light, while others like dim and diffused lighting.
Important! Pay attention to the fact that it is not always possible to use spotlights as a non-alternative light source. If you wish, you can use wall lamps or table lamps, and reduce the power of ceiling lamps.As for the built-in options, they can be easily replaced with an LED strip.
In addition to the fixtures, it is very important to choose the right wire for wiring. An ideal option for installing ceiling lights is a triple stranded copper wire. The cross section in this case is absolutely not important, since the maximum current will not exceed 0.1 A.
to contents ↑Selection and installation of recessed fixtures
The range of built-in lighting technology in stores today is just off scale. However, when choosing one or another option, it is necessary to take into account the fact that all lighting fixtures have the same design, and the difference between them is only in the decorative finish of the case and the presence of any additional accessories. The design of recessed luminaires consists of a housing, which has the form of a ring with special places for fastening springs with ears.
Important! Depending on the type of lamps used and the power of the housing of recessed fixtures, they can have different diameters. As for the electric cartridge, it can either be present in the configuration, or be absent.
Separately, we will clarify at the expense of LED lamps, in which diodes are mounted directly in the housing located on the printed circuit board. In such a device, the bulb cannot be replaced, respectively - if it burns out, be prepared for the fact that you will have to replace the entire lamp.
Preparatory work
Before you install ceiling lights, you have to make a series of preparatory work, such as laying electrical wiring. The procedure is as follows:
- Decide on the required number of fixtures, as well as their future location.
Important! Please note that the recommended lighting area is 35 watts per square meter or a pair of lamps with a combined power of 50 watts for every 3 square meters.
- Prepare all the tools and materials necessary for the job. You will need:
- Screwdriver;
- Mounting knife;
- Pliers;
- Terminal blocks;
- Electric drill;
- Junction boxes;
- Wires of required length.
- Install junction boxes on all groups of lighting fixtures.
Important! Junction boxes should be located in easily accessible places, since during operation, you may need access to them.
- Take the wires from the boxes to the places where the fixtures themselves will be installed.
Important! In order to avoid damage to the wires and in order to exclude their accidental contact with the metal elements of the ceiling, it is necessary to stretch them through corrugated pipes.
- Install a 12 V power supply.
Important! A step-down transformer is best placed close to the first lighting fixture. Thus, access to the power supply will be through the installation hole.
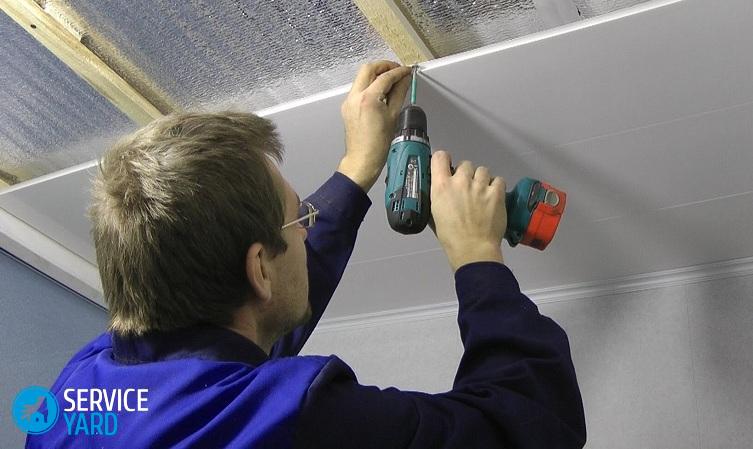
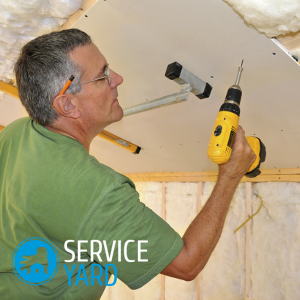
Installation holes in the ceiling
Before installing spotlights in a stretch ceiling or plasterboard, it is imperative to pre-cut holes for them. To do this, you will need the following tools:
- For materials from drywall or wood, it is better to choose crowns with a center drill, as well as an electric drill. If they are not, you can use a regular knife to work with drywall or a jigsaw to work with wood.
- To install crystal lighting fixtures in a suspended ceiling, you will need ring saws for metal and scissors.
Important! If your chosen lamp has a square shape, it is necessary to cut corners on the holes using an electric jigsaw or a hand saw with a removable blade.
To make holes in the ceiling from drywall should be after its installation, but even before the start of the finish. This is due to the fact that in this way you can avoid any damage to the frame.As for the rack suspended ceiling, you need to make holes directly in the process of its assembly.
Important! In order for the lighting fixtures to be placed evenly, before starting their installation and carrying out preparatory work, you need to build an accurate plan where the future location of the fixtures will be detailed.
Also, making holes for the lighting device, pay attention to the fact that it must have such a diameter that the lamp fits tightly into it. Even a slight effort is allowed during installation. The front part of the lamp should completely cover the edges of the hole.
Installation of spotlights in a stretch ceiling
When installing spotlights yourself, you do not need to make holes in the ceiling cover. Entrust this matter to specialists. However, for a solid fixture, you will need to think through and choose a fixture for lighting, which will be placed on the base ceiling. This is due to the fact that the film used for such structures is not always able to withstand the total weight of lighting devices.
Important! To date, special mounting acrylic boxes that are mounted on the base ceiling are widely represented in stores. Mounting rings are also provided for them, which are fixed with a screw. Such rings can be installed using direct suspensions designed to work with plasterboard sheets or perforated metal tape.

After a hole has been made on the surface of the ceiling, you need to pull the end of the wire outward. The further process is completely dependent on the design of your chosen lighting fixture:
- Crystal lighting fixtures very often have a cartridge that is rigidly fixed in the housing. In this case, the wires of the appliance should be connected to the cable through the terminal strip, which must be installed directly in the hole. In order to do this, the springs must be taken to the top and lower them directly in the inter-ceiling space. Installation of fixtures ends at the time of screwing in the bulbs.
- Some models of luminaires involve attaching a cartridge directly to the wiring housing from a pair of wiring. To install such lighting fixtures, as in the previous version, you have to stretch the wires through the terminal strip, and then fix the ceiling immediately with a bulb, helping yourself with a fixing expanding spring. At the end, the bulb is installed in the ceiling and the finished lamp is mounted in the hole.
- The easiest installation process for a luminaire that is already equipped with a bulb on the base. In such designs, the cartridges have screw clamps, so you just have to strip the wires, then connect the lamp and install it in its place.
Important! Please pay attention to the fact that the installation of halogen lamps should be carried out exclusively with the help of a special device, since this is not recommended to be done with bare hands.
Installation of spotlights in wooden, plasterboard or suspended ceiling:
- After you have made all the necessary holes, you need to pull out the ends of the electrical wiring through them and strip them by 5-7 millimeters.
- Insert the stripped ends of the wires into the terminal blocks and tighten them with screws.
- After - the springs of the lamp must be compressed, carefully inserted into the hole and released. Thus unclenching, they will abut against the ceiling and attract the lighting device to its outer part.
- Next, you just need to screw in the bulb or insert it into the cartridge.
Installation of shades and chandeliers
Installation of chandeliers and shades is carried out on absolutely any ceilings, except stretch ones, and is carried out by attaching this type of fixtures to the ceiling surface of the body itself:
- Fastening is done using self-tapping screws or dowels, which are screwed into the ceiling.
- In order to attach the case, it is necessary to withdraw and attach the ends of the wires to the terminal strip, screw in the lamp and close the shade with a transparent diffuser.
- As for the chandeliers, they are mounted on the ceiling surface with the help of special hooks placed in the ceiling.
Important! If the ceiling is reinforced concrete, in this case anchor hooks are mounted and fixed in special drilled holes.
- The chandelier is hung on this hook, and the wires are connected to the terminal strip, which will later be hidden behind the lid of the chandelier itself.
- If fastening is done using a special fastening plate, it is fixed, like the body of the lampshade, after which the chandelier itself is already screwed onto it.
Stock footage
Despite all the complexity and phasing of the installation of lamps on the ceiling, this process can be done even by a novice. The most important thing during operation is to adhere to all safety precautions, so as not to get an electric shock. We hope that our article will help you in all your endeavors, especially in the process of replacing and installing new lighting fixtures.
- How to choose a vacuum cleaner taking into account the characteristics of the house and coatings?
- What to look for when choosing a water delivery
- How to quickly create comfort at home - tips for housewives
- How to choose the perfect TV - useful tips
- What to look for when choosing blinds
- What should be running shoes?
- What useful things can you buy in a hardware store
- Iphone 11 pro max review
- Than iPhone is better than Android smartphones
 (No ratings yet)