

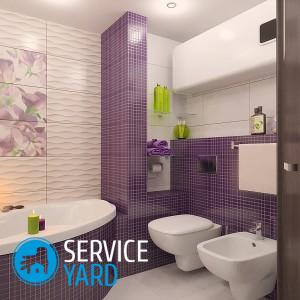
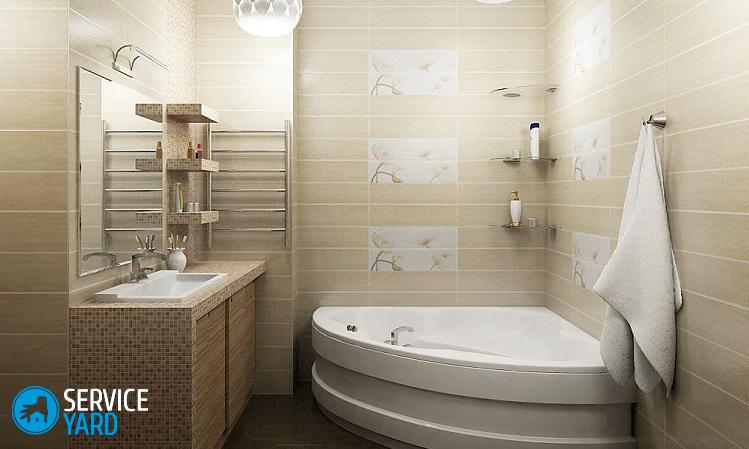
Tiled bathroom
Each owner or mistress of the house wants to save money, while making repairs so that later he does not have to redo it. Repair in the bathroom, and more specifically - tiling the bathroom, costs a lot of money, of course, if you call the master at home. But you can do without it, having completed this work yourself. If you have a little doubt in your own abilities and think that you cannot correctly lay the tile, then you should carefully read the information presented in our article.
to contents ↑Tile selection
Before proceeding with the lining of the bathroom, you must choose the most suitable material for this. At present, the choice of tiles is so huge that it is not always easy to understand which of the collections is best suited.
But since ceramic tile is difficult to classify as cheap building materials, its choice must be taken with all responsibility in order to prevent a mistake. Let's figure out what you need to pay attention to when choosing a tile:
- Destination If the tile is designed for the bathroom, then it must be moisture resistant. Next, you need to distinguish the type of material that is intended for facing the floor and walls. If almost any material can be used for walls, then only a wear-resistant type of tile should be selected for the floor.
- Most manufacturers offer tiles to consumers in whole collections. As a rule, wall and floor tiles, as well as decor for them, are included in the collection. All samples of the collection share a common design. Moreover, the photo in the catalogs presents different layout options. Of course, it is not necessary to use examples that are presented in the catalog to design your bathroom - you can think over your design.
Important! When repairing in the bathroom, it is best to choose collections that have a classic design. Fashionable directions look impressive, but in fact they quickly lose their relevance, and hardly anyone wants to redo repairs every couple of years.
- The size. Tiles are made in different sizes. Choosing the best option, it is necessary to consider the features of the bathroom. On the one hand, bathtub lining with large tiles makes it possible to reduce the number of tile joints, namely these places, as a rule, are most often affected by fungus and mold. On the other hand, in smaller rooms it is easier to lay smaller tiles, since they do not have to be constantly cut.
Important! The size of the tile also affects the overall design of the room - this must be taken into account when designing a repair project.
- Texture. It can be either matte or glossy. In addition, today on sale you can find samples of material with a pronounced surface roughness. A tile with a glossy surface is perfectly even, it is easier to wash, however, dirt on it is more noticeable than on a matte one.
Important! Glossy tiles are undesirable to lay on the floor, because when splashed with water, the pier can become slippery, which can lead to injury.
- Color. Choosing the color of the tile, you need to focus on your personal taste, but also do not ignore the advice of experts, especially if your bathroom is small. If you design a small bathroom with a dark tile, then it will seem even closer.Currently, owners are rarely limited to using the same color for cladding all surfaces - more often a multicolor version of the design is used.
to contents ↑Important! When designing a bathroom, its features must be taken into account. For example, with a low ceiling, it is better to use the option with the laying out of vertical stripes.
Cladding technology
So, let's take a look at how the process of tiling a bathroom occurs when doing DIY.
Preparatory work:
- Begin finishing with a thorough preparation of the surface you are about to clad.
- Clean walls and floors from old coatings. If this is a tile, then knock it off, clean off the paint, and just remove the wallpaper and linoleum.
- Now evaluate how smooth these surfaces are, take measures to level them. For walls, use putties or mortar, and for the floor, make a new screed.
- On the leveled and completely dried surfaces apply soil and a waterproofing waterproofing.
Where to start facing?
What needs to be faced first of all - walls or a floor? The answer to this question depends on the characteristics of the bathroom and the repair project. However, in most cases, it is recommended to trim the floor first. Then its flat surface will serve as a “base” for laying tiles on the walls.
Important! It is recommended to start facing from the farthest (from the entrance) corner. On the walls, you first need to lay out the bottom row, which will serve as a support for the second and all subsequent rows. In that case, if you need to start from the middle of the wall, then first you need to fix wooden slats on the wall, which will become a support for the first row. After the tile adhesive dries, the slats can be removed.
Getting started:
- First lay out the first row of tiles without applying glue. This will make it possible to clarify the layout of the layout and understand in what places the cut pieces will be installed.
Important! Try not to allow the laying of very narrow (up to 3 cm) pieces of tile, since it is very difficult to cut them off, the tile can often crack.
- There is no one correct way to apply the adhesive when laying tiles. Most professionals prefer to apply glue to the wall, but some craftsmen glue each tile with glue.
- After the glue is applied, allow 5-10 minutes for exposure, and then attach the tile to the place of its installation. Press it firmly against the wall and level it, checking the correctness of the vertical and horizontal seam with the help of a level. Use rubber hammers to “upset”.
- When laying the second and subsequent rows, install mounting crosses between the tiles. This will help to form seams of the same thickness.
- After all the tiles have been laid, allow the adhesive to dry thoroughly, and then proceed to grout the seams. For this purpose, use special compounds - fugues, which can be either color or white.
- Grout with a rubber spatula, holding it at an angle to the wall surface. Move with a spatula diagonally on the wall.
- After the grout has completely dried, wash off the excess with a damp sponge. Additionally cover the seams with a transparent protective compound using a thin brush.
Stock footage
Thus, tiling the bathroom is a work that can be done independently, without involving a master. The main components of success are the use of a material that has the correct geometric shapes, high-quality surface preparation, the accuracy of the craftsman and precisely sustained dimensions.
- How to choose a vacuum cleaner taking into account the characteristics of the house and coatings?
- What to look for when choosing a water delivery
- How to quickly create comfort at home - tips for housewives
- How to choose the perfect TV - useful tips
- What to look for when choosing blinds
- What should be running shoes?
- What useful things can you buy in a hardware store
- Iphone 11 pro max review
- Than iPhone is better than Android smartphones
 (No ratings yet)