

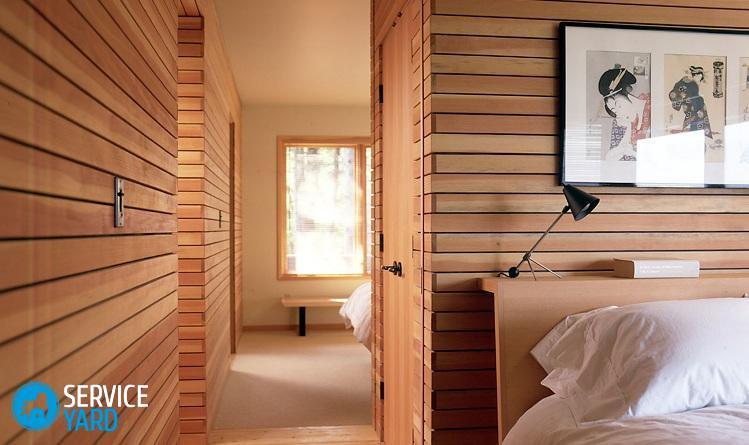
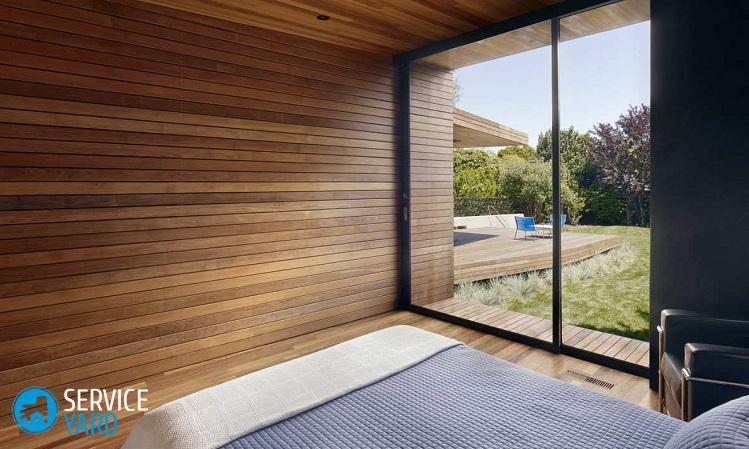
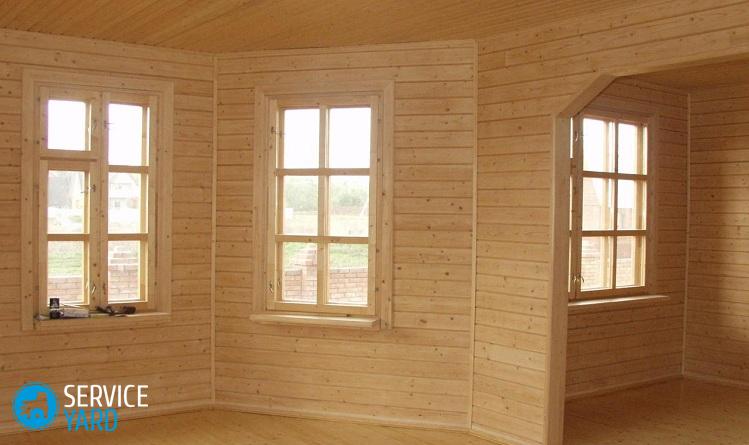
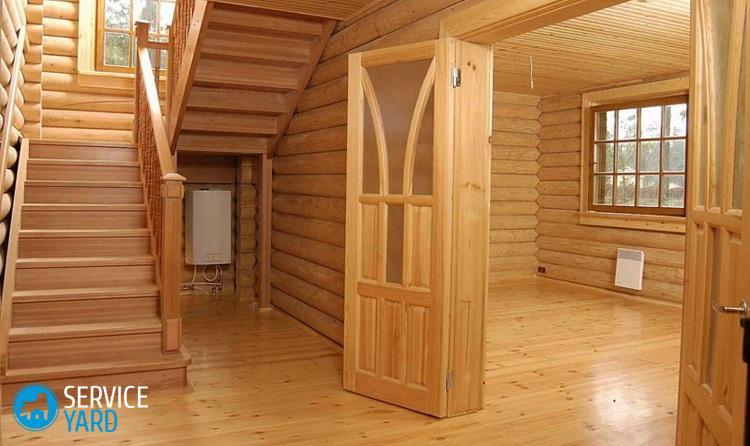
Cladding walls
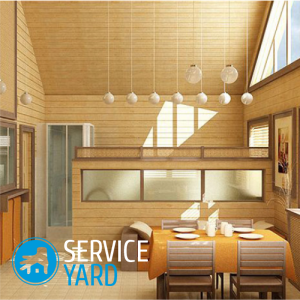
To date, the most commonly used materials for interior repairs are concrete, plastic or metal. Unfortunately, they are not always useful for the human body, and sometimes they also have a very negative effect. Therefore, they are best used for industrial premises, but in residential apartments and houses, environmentally friendly and natural materials should be used, for example, an excellent solution is wall cladding. It can be used for decorative decoration of absolutely all surfaces, and due to the wide selection of colors and textures, such a coating is ideal for absolutely any interior. Our experts will tell you how to do it right, with minimal financial costs.
to contents ↑Varieties of wall paneling
Lining sheets are mainly made from edged boards. Such a workpiece is planed on both sides, after which all the protrusions and recesses are milled on the ends. Do this in the form of a thorn groove for subsequent connection with other boards. Sheet processing ends as soon as the workpiece acquires the desired geometric shape.
Important! Due to the unique design of the connecting surfaces, further installation work becomes significantly cheaper, while the wall looks solid.
As for the scope of lining sheets, it is quite voluminous. With its help, it is possible to produce both internal wall cladding and the external of residential houses, arbors and balconies.
When choosing a lining, it is necessary to take into account the fact that, depending on the profile of the canvas and its dimensions, as well as the type of wood from which it was made, this material is divided into several types. Next, we will describe in more detail about each of them.
Classification of wall paneling by type of profile
Based on this parameter, the lining can be divided into domestic and euro. This is due to the fact that in the manufacture of this material, domestic and foreign manufacturers adhere to different quality standards, respectively - boards have even visual differences.
Important! Lining sheets of domestic production are made according to GOST 8242-88. Following this standard, the material should have a thickness of 12-25 millimeters, a width of 150 millimeters, a length of 6000 millimeters, and a spike length of 4-6 millimeters.
Domestic products are produced with completely different profiles, which differ in the dimensions of the spikes and grooves, as well as the sections of the boards:
- The base sheet of the lining is the “Standard” profile. The section of the board is somewhat reminiscent of the shape of a trapezoid, in which the edges are cut off at an angle of 30 degrees.
- Spire profile litas have more rounded edges.
- Europrofile has a thicker spike that increases the density of the joint.
- American. Its cross section has a complex geometry, the wood is impregnated with a special composition. Such a profile is intended exclusively for external cladding.
Important! The main difference between American-made lining of domestic production from others is that it is mounted only horizontally and with an overlap.
- Block house. Such a profile is made in the form of a round tree, which has a convex side, while the joints are the same as for standard profiles.
As for foreign manufacturers, they produce products based on the DIN 68126 standard. In this case, the requirements are more stringent:
- Boards should be produced exclusively in certain sizes: up to 6,000 millimeters long, 13, 16 and 19 millimeters thick, and 80, 100, 110 and 120 millimeters wide.
- In the manufacture of products, the moisture content of wood should be 14-16%.
- There should be a complete absence of various chips of deformations and nicks.
- The length of the groove should be about 8 millimeters. Thus, the increased clearance does not allow the skin to crack in the event of deformation of the product.
- Air ducts are provided on the back of the lining, which do not allow condensation to form, and also ventilate the space that is behind the casing.
Classification of lining sheets by type of wood
Before you do the wall cladding with the lining yourself, it is very important to choose a quality material. Depending on the properties of the lining sheets you have chosen and the presence of various defects, the boards are divided into 4 classes:
- Extra. It is made of wood without any flaws. In the structure of the boards there are completely no core elements.
- Class A. Such sheets are also made from lumber without a core. On already finished boards, slight defects may be present, such as a knot or two resin pockets.
- Class B and C allow for various web defects.
Important! Pay attention to the fact that most cracks and nicks can be masked with putty or special putty. Therefore, when choosing, always objectively evaluate the quality of the material you have chosen.
Classification of lining sheets, depending on the type of wood:
- Pine. This is the most purchased material used for interior wall decoration. She gained her popularity due to the low price, as well as a peculiar pattern that relaxes her eyes. Lining sheets made of pine, it is recommended to use at temperatures from -5 to +30 degrees. Humidity should be low.
Important! The most valuable are sheets made from Scandinavian pine. Such products have a slightly pinkish tint, a complete lack of knots, and annual rings have the same thickness.
- Larch. It is no less popular than a lining made of pine. Due to its special strength, such a finishing material is considered to be elite. This is due to the fact that wood under the influence of various factors is not susceptible to decay and does not warp, it is not afraid of pests, while it retains an attractive appearance for a long time. In addition, in relation to other elite materials, larch lining costs several positions cheaper.
- Oak. This is another example of an elite finishing material. Such wall cladding is very expensive and not everyone can afford it. However, in addition to its attractive appearance, this material is characterized by high strength and a long service life.
- Linden. This material is quite soft, easy to process. Lining sheets are durable and characterized by an almost complete absence of knots. Such a lining will be an excellent option for the interior decoration of a bathroom or sauna, since this material does not swell under the influence of moisture, and the wood, in turn, gives off a pleasant aroma.
- Black alder. Such lumber is quite soft, has a low density and is easy to handle. Due to the peculiar color of the alder panel, it gives the wall and the interior as a whole a certain sophistication. Such a coating does not deteriorate over time, it does not warp and does not change color.
to contents ↑Important! The main advantage of lining sheets made of alder is that this material can be used in unheated rooms with a high level of air humidity.
The main advantages and disadvantages of lining
Lining, due to its attractive appearance, operational characteristics and environmental friendliness, wins in relation to other finishing materials, including synthetic ones. In addition, the lining has other positive qualities:
- This is the most budget finishing material based on natural raw materials.
- The presence of special connecting elements significantly reduces the process of cladding walls with lining.
- At the end of all work, the wall has the appearance of a monolithic wooden structure without visible cracks.
- Due to the special tongue-and-groove connection, a barrier is created to prevent the ingress of dust and dirt.
- Lining sheets are able to visually align the walls.
- Wood has the ability to absorb and give away moisture, thereby creating a special atmosphere in the room.
- The total cost of work is reduced. This is due to the fact that the cladding of the walls with lining does not provide for the preliminary leveling of the surfaces. All defects will be hidden during the installation of panels.
- The long service life of this material allows it to serve for a long time without repair or replacement.
- Between the wall and the panels of the lining can be placed heat and sound insulating materials.
- The color palette and texture of the lining allows you to easily fit into any interior visit.
In addition, when purchasing sheets of wall paneling for wall sheathing, one should take into account the weaknesses of this material:
- Due to the fact that the base of the lining is wood, it burns well.
- It requires preliminary treatment with a special water-repellent.
- Lining is unstable to insects and fungi, therefore this material requires special care and protection.
How to sheathe a wall with a clapboard?
Despite the ease of the process, wall cladding lining occurs in several stages. Next, we will consider each of them in more detail.
Stage 1. Preparatory work
At this stage, the lining needs to be prepared for further work. Depending on the type of wood from which it was made, the processing method itself is selected. But the main list of works is the same for everyone:
- Boards made of coniferous species must be degreased and tar spots removed from them. To do this, their surface is watered with 25% acetone solution, after which they are wiped with a clean rag previously moistened with warm water. At the end of the procedure, the boards need to dry well.
- In order for the shade of the boards to be the same, they must be bleached. For these purposes, a solution of hydrogen peroxide and oxalic acid is used. The concentration of the solution in this case directly depends on the type of wood from which the lining was made.
- Various cracks and chips can be removed using special putty or putty.
Important! In construction stores special mixtures are presented that imitate the shades and texture of different types of wood.
- If necessary, untreated surfaces should be tinted with paint.
Important! Paint for processing lining can be made independently. To do this, mix titanium or zinc white with the watercolor of the desired shade.
- In order not to change the color of the board, but rather to emphasize its natural wooden structure, the surface can be treated with stain.
Stage 2. Production of lathing for fastening lining
The technology of wall cladding with lining depends entirely on the condition of the rough wall:
- If the surface is without any flaws and is located in a vertical plane, you can safely glue the lining sheets.
- If the rough surface is flawed, in this case it is advisable to level it using special rails. For the frame, it is better to use slats with a cross section of at least 20x40 millimeters.
Important! Experts recommend using slats with a cross section of 30x60 millimeters. They are quite easy to fasten with a bar to the wall, but there are difficulties with the subsequent alignment.Therefore, instead of rails, you can use metal profiles used to work with drywall.
When making a crate for wall cladding with a lining, one must adhere to the following recommendations:
- Reiki should always be perpendicular to the boards.
- The distance between the profiles of the base should be no more than 50-60 centimeters.
- If the house is wooden, between the vertical slats of the frame, the ceiling and the floor, you should always leave a margin of 2-3 centimeters. This is due to the fact that wooden buildings are constantly sagging.
- The crate is fixed to the wooden wall with self-tapping screws, and to the concrete wall - with dowels.
- The outer surfaces of the frame should be located in the same plane.
- After alignment, the gaps behind the profiles must be filled with special wooden gaskets.
Important! Between the profiles of the crate, you can install a heater. To do this, after filling the cells of the crate, a waterproofing film is laid on top. And in order to prevent fungus from forming inside, make forced ventilation of the gaps.
Step 3. Choosing a mounting method
After the frame has been made, you can proceed to wall cladding lining. Fastening sheets to the wall can occur in several ways:
- With nails. It must be done very carefully. The nail head should go all the way into the wood. For these purposes, it is best to use a dobnik. In this case, you must constantly monitor so as not to chop the groove, otherwise - the mount may loosen.
- Metal clamps. They are made of galvanized sheet, and they can have a wide variety of sizes and shapes. They are selected, focusing on the type of lining, as well as the size of the grooves. On the one hand, the kleimers are inserted into the boards with teeth, and on the other, they are screwed to the crate.
- Staples. In this case, you need to be able to use a gun for the stapler, so as not to damage the surface of the lining.
- Decorative screws. Such fastening plays mainly a decorative role.
Stage 4. Wall Cladding
Depending on what goal you set in shaping the interior design, wall paneling with lining can be done in two ways:
- vertical
- horizontal.
Important! For example, if you are visually striving to increase ceilings and create the impression of a high room, it is best to use vertical installation. If on the contrary - expand the room, it will be more appropriate to apply horizontal cladding.
Next, we will describe in more detail about each type of skin.
Horizontal wall cladding:
- The fastening of the lining begins in the direction from the ceiling to the floor, while directing the grooves down.
- If metal clamps are used for fastening, the fasteners must be inserted into the recess of the previous sheet of the lining, while attaching to the crate with self-tapping screws. In this case, there should be no obstacles to the spike and the next board.
Important! In order for the skin to be of high quality, it is necessary to check its evenness during operation. You need to do this every 10 boards, using the building level for these purposes.
- Before fixing the last sheet of the lining, it must be adjusted in width with a circular saw. After this, the lining is nailed, and the gap is closed with a plinth.
- If the walls are sheathed with a block-type lining, installation must begin with the groove up, while hiding the joints. And so that there are no gaps between the sheets, they are adjusted to each other with a hammer. The block house is attached to the battens of the crate with self-tapping screws, and the sheets, in turn, must be located at an angle of 45 degrees. In this case, hats should be hidden under the subsequent boards.
Important! In order to avoid drafts in the opening, a processed beam is inserted between the panels.
Vertical wall cladding
Vertical cladding always starts from the corner. On the back wall of the lining sheet, klymers are installed in the groove, which is then nailed to the battens lath.
Important! The first board in the corner must be secured with nails, while closing the hats with a decorative corner.If such corners are not available, you can bite off the nail heads with side cutters.
Next, the installation of the vertical sheathing is carried out in the same way as the horizontal one. All joints and corners need to be closed with decorative corners, battens and baseboards.
to contents ↑Stock footage
Walls lined with clapboard bring into the interior not only aesthetic beauty, but also fill the atmosphere with warmth and coziness. We hope that our article will help you in your endeavors, and the finished result will exceed all your expectations.
- How to choose a vacuum cleaner taking into account the characteristics of the house and coatings?
- What to look for when choosing a water delivery
- How to quickly create comfort at home - tips for housewives
- How to choose the perfect TV - useful tips
- What to look for when choosing blinds
- What should be running shoes?
- What useful things can you buy in a hardware store
- Iphone 11 pro max review
- Than iPhone is better than Android smartphones
 (No ratings yet)