

DIY bath lighting
No bathhouse can function without quality lighting. It is also necessary to create a comfortable environment, which is so important at the time of complete relaxation. Agree, a gloomy room will not set you up for wellness treatments. We suggest you do the lighting in the bath yourself. Proper connection of electrical appliances requires special care, compliance with certain rules and safety precautions. That is why working in the steam room is a difficult but feasible task. We will help you understand the solution to this issue by sorting the system of lighting installation in the bathhouse on the “shelves”. And our recommendations will help to carry out work with minimal risks.
to contents ↑Requirements for electrical wiring in the bath
Before you make lighting in the steam room, you need to familiarize yourself with certain requirements for the smooth and safe operation of the electrical system in the sauna. So, let's get acquainted with the requirements for a quality installation of working lighting elements:
- The protection class of lighting elements and built-in switches should be higher than IP 44, but not lower than this indicator.
- It is advisable to lay direct wiring, but if it is absolutely necessary to make turns, keep an angle of 90 degrees.
- The distance of the wire from the ceiling surface, floor and sewer system should be at least 10-15 cm.
- Observe the minimum location of sockets from the floor - 50 cm, and from the switches - 200 cm.
- Enter wires to sockets and switches at the bottom of the steam room - this way you will protect the system from condensate and accidental liquid.
- You must first tighten the joints of the wiring, and then fix it by welding or soldering. For this, you can use clamping terminals, which must be checked for the degree of contact patency, and then finally tightened.
- Follow one of the most important rules - you can only install lighting with adjacent elements in those saunas that are equipped with safe walls. They must be made of non-combustible materials with appropriate protective treatment.
to contents ↑Important! Only a closed wiring system can be used in the bathhouse. That is why we recommend that you start installing the lighting immediately after building the box of the room or during the overhaul period to hide all the wires under the casing.
Lighting elements for a steam room and a choice of lamps
Let's talk about what auxiliary devices need to be installed in order to protect the sauna from possible power surges and the ingress of unwanted moisture into the fixtures. We will help you choose the lamps for organizing lighting in the bathhouse with your own hands. You just have to choose a more suitable option. So, let's start a detailed consideration of the issue.
Devices and devices for lighting in the bath
For a quality installation of lighting in the sauna, you need to make the right selection of elements of the system for lighting, namely:
- Cable. The cross section of the wire must be calculated according to the table of the ratio of current strength. The current power can be found out as follows: divide the total wiring power by the rated voltage of the mains.
- Machine. This device is essential to prevent accidental shorting and fire of the entire wiring system.The technical indicator of the device should be no more than 16 A.
- RCD This unit monitors the monitoring of current indicators of phase and neutral wires. At the slightest violation of indicators, the device instantly disables the flow of current into the network.
- Switch. The main rule for all switches in the bath is increased resistance to moisture and high temperature.
- Grounding To ensure complete safety of the room, it is extremely important to install a third wire, that is, grounding.
What bulbs are better to use in the steam room?
Since we are considering lighting for a specific room with high humidity, the list of options for lighting lamps will be small. The most suitable options for a bath are considered such lamps:
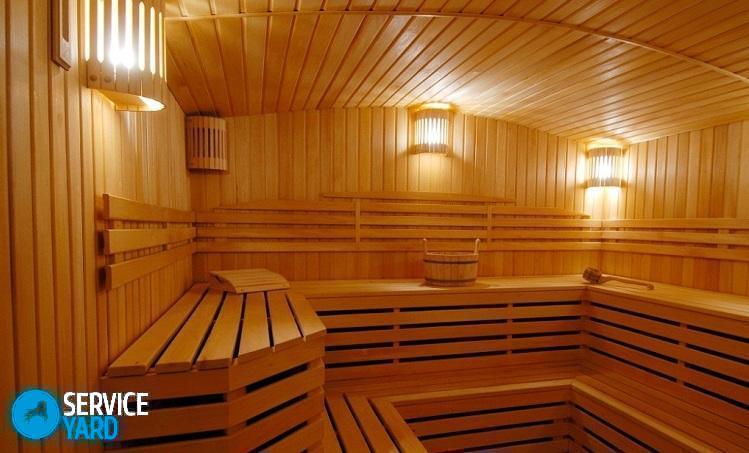
- Incandescent lamps. Yes, you heard right. The incandescent lamps that are familiar to us are also relevant as lighting for a bath. In a room it is better to install several low-power bulbs at once to get a pleasant dim light. The maximum power of an incandescent lamp should be no more than 60 watts.
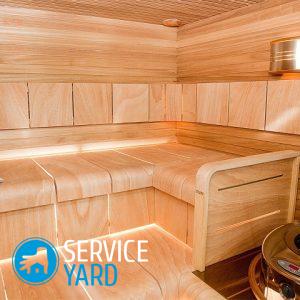
- Fiber optic lamps. They are considered the safest and most durable of all lighting devices. They are not afraid of an aggressive environment, resistant to moisture, high temperature effects and do not deform at all after a long service life. Such a fiber can easily be placed on the ceiling and even in the corners of the sauna, which is extremely unacceptable for other types of lamps.
- LEDs It is a popular lighting option. LEDs attract users with efficiency and functional abilities - lamps consume little energy, providing bright lighting. We want to highlight another important advantage - the ability to create original lighting combinations. When installing LEDs, do not forget to take care of protecting the llamas from overheating by closing them with heat-resistant shades.
to contents ↑Important! Do not use fluorescent lamps for a bath, as their base consists of mercury. They are extremely unstable to high temperatures, so they quickly deteriorate in difficult conditions, which will lead to a circuit or breakdown of the device, and this is extremely dangerous for human life.
DIY lighting in the sauna
So, after mastering all the rules and choosing the lighting devices for the steam room, we come to the most important thing - lighting wiring. A step-by-step instruction will help to complete the work:
- We evaluate the situation in the sauna and determine the location of the light sources and the path of the wires.
- We prepare a corrugated pipe (you can take a metal hose), put it in the wires, which will serve to connect the fixtures.
- We lay the cable from the electrical box to the places where the installation of lamps is planned.
- We fix ceramic cartridges at the ends of the wires, and then carefully isolate them.
- We install the switch and lay the electric wire to it from the box.
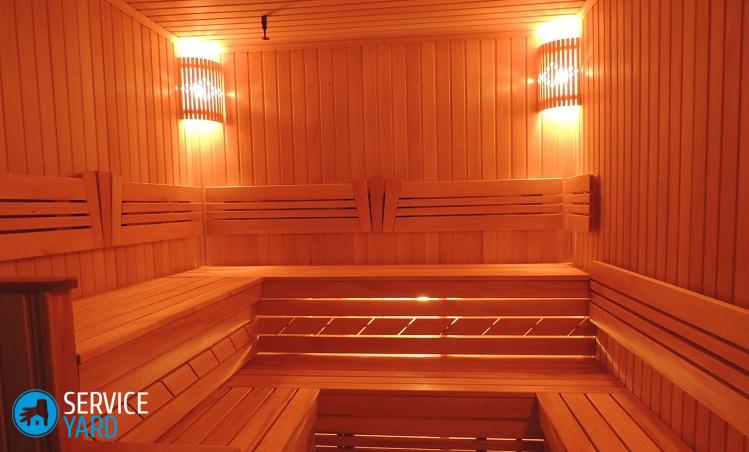
- Now we screw the selected lamps into the cartridges and close them tightly with the help of protective caps. For this, we used opaque tempered glass shades.
- We install decorative wooden lattices on the lamps, which will protect against burns in case of contact with the light bulb.
to contents ↑Important! It is advisable to position the switch on the outside of the sauna entrance.
Where to install the socket and switch in the steam room?
We figured out the question of which lamp to choose for a steam room and with instructions for installing it, but everything can be done only with the correct location of sockets and switches in a room with high humidity. Now we will consider some useful recommendations for resolving this issue. They sound like that.
Tip 1
With closed wiring in the bath, the installation of electrical points must begin simultaneously with the laying of the wire. So, when marking the lines for the cable, the location of future lighting is also noted.
Tip 2
The whole process of marking the outlet for installation in the sauna consists of the following actions:
- Mark the central point of the outlet on the wall.
- We circle the outline with a pencil for the socket, placing the mounted lid with the bottom toward you.
- We make a hole in the wall for the box along the boundaries of the contour. If you have a concrete wall, then you need to knock the material from the inner area with a hammer or drill on concrete.
- Trim the bottom with a small chisel.
Important! Most often, round-shaped installation boards are used for the bath, but square and rectangular can be used. Such holes are cut out with a grinder or drilled with a perforator.
Tip 3
Usually all the wiring in the bathhouse is hidden behind the wall cladding. If you plan to paste the room with wallpaper, then in this case you will need to make a stroba to the hole and deepen to allow the cable to exit freely.
Important! Before installing the box in the holes, it must be cleaned of dirt and put a layer of primer. For this, plaster, building gypsum or gypsum adhesive of instant hardening are well suited. Start your further actions only after the plaster has completely dried.
Tip 4
Mount the block according to strict instructions, which is as follows:
- We hold the wire next to the installation shield with a bracket or clamp.
- We have 2 contacts on the block of our outlet (with grounding).
- We connect the zero and phase wires to the two contacts, and the grounding cable to the third. If the wires go up and the contacts are located below, then the socket is correctly installed.
- We twist the extra length of wire into a spiral and hide it on the bottom of the internal socket, so that the cable does not interfere with the further installation of the device.
- We connect the wires of the outlet to the source of electric power, and then hide them behind the outer skin of the room.
- Close the base of the socket with a plastic cover.
to contents ↑Important! The block can be fixed in two known ways: sliding brackets and screws. In the first case, the block is inserted into the box and screwed with two screws. In the second, screws are inserted into special holes along the edges of the socket. In these ways, you can fix the block in the box.
Stock footage
Yes, lighting in the steam room with your own hands is not so easy to do. But considering all the features and safety at every stage (starting from the selection of materials and ending with the installation of shades on fixtures), it is quite possible!
- How to choose a vacuum cleaner taking into account the characteristics of the house and coatings?
- What to look for when choosing a water delivery
- How to quickly create comfort at home - tips for housewives
- How to choose the perfect TV - useful tips
- What to look for when choosing blinds
- What should be running shoes?
- What useful things can you buy in a hardware store
- Iphone 11 pro max review
- Than iPhone is better than Android smartphones
 (No ratings yet)