

DIY wallpapering
Wall decoration with wallpaper canvases is an interesting, fascinating and creative process, because gluing wallpaper with your own hands makes it possible to highlight color accents, make the interior unique and even visually increase the room. However, to do this in a truly high-quality way, you need to be well prepared. All the subtleties of the process we will step by step in this article.
to contents ↑Training
The essence of the preparation of wall surfaces is their perfect leveling, puttying and coating with a primer. First of all, the walls are cleaned of old impurities, degreased. To putty kept high quality, the walls are covered with a layer of soil composition. The putty of the walls includes 2 stages - preliminary and finishing:
- The purpose of the starting putty is to align the wall with an uneven surface, significant differences, holes and cracks after cutting grooves. The thickness of the layer applied at a time is a maximum of 1.5 cm.
Important! If you need to apply the starting putty in several layers, use a special grid for plastering. Putty lays on the walls with an even and smooth layer.
- After a perfectly smooth surface is obtained, a finishing putty is applied to it with a thin layer. The purpose of finishing puttying the walls is to eliminate the smallest defects. The use of special lighting allows you to perform this work with maximum efficiency.
Secrets of proper putty application
- To apply the starting putty, a large spatula is used.
- The composition is applied in small portions, holding the spatula somewhat at an angle.
- Overlapping makes it possible to avoid bumps and bumps.
- When processing corners, it is most convenient to work with an angular spatula. First, a small amount of the composition is applied to the entire height of the angle or slope, and then leveled with an angular spatula.
- This putty dries up within about a day.
- It is possible to start finishing puttying only after you have made sure that the starting layer is completely dry. When finishing, two spatulas are used at once - large and small. The mixture is applied to the walls with an even thin layer, not more than 2 mm.
to contents ↑Important! Each subsequent layer of putty is preferably covered with a primer layer. After the final layer has dried completely, it is ground using sandpaper using a hand-held skater.
How to prime the walls?
Unfortunately, many not very experienced masters ignore this stage. It is undesirable to neglect the primer, because after the puttying of the walls there is dust on them, and this affects the quality of gluing wallpaper paintings. In addition to dust removal, the primer performs the following functions:
- Promotes economical use of glue.
- Improves moisture resistance of walls.
- Provides normal ventilation (walls “breathe”).
- Prevents the development of mold and mildew.
The primer application algorithm is as follows:
- Preparation of the primer, in accordance with the instructions. You can mix the composition using a construction mixer or a drill with a nozzle.
- Application of the composition to the walls with a wide brush. It is desirable that the layer be uniform, without gaps and sagging. If the walls are perfectly aligned, it is advisable to use a paint roller.
to contents ↑Important! Be sure to observe the drying time of the soil indicated in the instructions.Applying a primer mixture in several layers allows you to evenly impregnate the walls and makes subsequent wallpapering better.
Material calculation
Before you stick the wallpaper with your own hands, you need to correctly calculate their number. You do not have to additionally purchase wallpaper, especially since there is a risk of buying paintings that do not match the shade. If on the contrary - too many rolls were bought, you will not know what to do with the surplus.
The calculation procedure is as follows:
- In order not to make mistakes in the calculation, determine the perimeter of the room. For example, the length of one wall is 5 m, the other 3 m. The total perimeter of the walls is (5 + 3) x 2 = 16 m.
- Measure the height of the room from floor to ceiling. When calculating, keep in mind that the length of the wallpaper roll is 10 m and the width is 0.53 m. The number of rolls that need to be purchased is considered by the number of strips.
For example, with a room height of 2.5 m, 30 lanes are required. 4 strips are obtained from one roll. Therefore - 30/4 = 7.5 rolls will be required. Rounding the resulting number up, we get 8 rolls. If we are talking about tapestries with a pattern (the roll must be removed during gluing), then additional rolls are bought (for example, for a room with a perimeter of up to 22 m, 2 spare rolls are purchased). On rolls of wallpaper with a pattern, the offset step is indicated, so that all the necessary calculations can be done without difficulty.
Important! The given example concerns only gluing the walls with canvases of the same texture and pattern. If several varieties are used, it is necessary to make calculations by type of trellis.
The length of the wallpaper in a standard roll is 10 m. As for the materials for painting, the length of the canvas can be different:
- Textile, linen - from 10 to 50 m.
- Felt - from 32 to 50 m.
- Jute - 7.7 m.
- Fiberglass - 10, 30 or 50 m.
Proper gluing
The high-quality design of the walls depends on how correctly the first strip is glued. It must be perpendicular to the floor.
Important! It is undesirable to use a corner as a guide, because rooms with ideal angles can be found infrequently. Window and door openings are always oriented vertically, so they are suitable as the original vertical much better. It is necessary to begin work in parallel with one of these openings.
The statement that the panels need to be glued without fail from the window has long been outdated. Unlike cheap paper wallpapers that had to be overlapped, most modern paintings are glued back to back, so you can start decorating walls from the doorway. In this case, you can move clockwise and counterclockwise.
Important! It is very convenient to work with vinyl wallpapers that have a small drawing. Such a finishing material well hides the unevenness of the walls, it is not too demanding on strict verticality. Such panels can begin to stick from the corner. The only exception is if the corners are very curved.
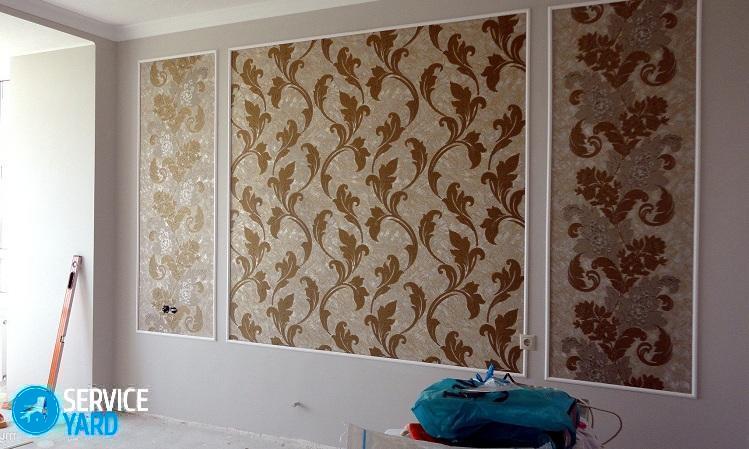
Wall paper decoration
The gluing of walls depends on what kind of material is used. Paper is the most budget wallpaper material. There are such varieties of it:
- Simplex This is one or two layers of paper. Moreover, in the latter case, the layers are not glued. The quality of simplex paper wallpapers leaves much to be desired, they are torn, quickly fade under the sun, are afraid of moisture. Cheapness is their only advantage.
- Duplex. Compared to simplex, they are relatively durable, resistant to moisture and UV radiation.
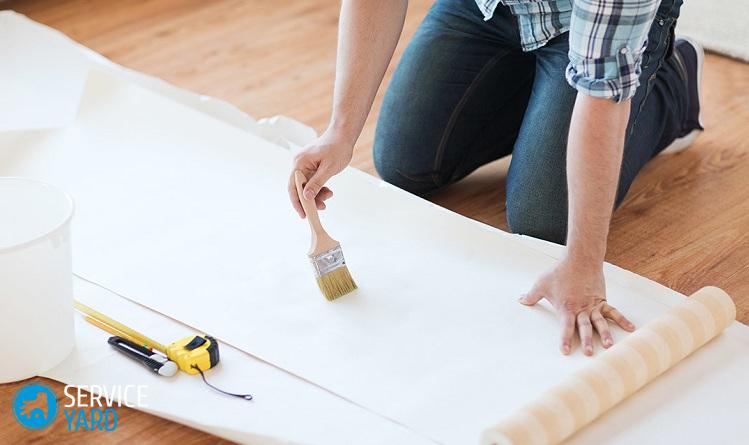
DIY wallpaper gluing algorithm:
- Preparation: trimming edges, cutting rolls into strips of the required length.
- Fit the picture. When cutting the roll, the height of the room plus the margin for fitting the picture is taken into account. If the pattern is small, 100 mm is enough, for a large picture the margin is 20 cm.
Important! A reserve is necessary if the room near the walls has a different height, due to the uneven floor or ceiling.When gluing, the excess is trimmed at the baseboard. In the upper part, the surplus is masked by curbs.
- The edge of thick wallpaper is cut from 2 sides, for thin - from one side (the side overlapping the joint).
- Thin paper wallpapers are smeared with liquid cold glue in the direction from the center to the edges, and then the wallpaper strip is glued to the wall. After that, the fabric is smoothed with soft clean textiles to get rid of air bubbles.
- Wallpaper of a light shade is smoothed out by placing white paper under a rag. To remove excess glue, slightly moistened foam rubber is used.
- Dense and duplex wallpapers are smeared with glue twice. Wallpaper is given to soak.
- When gluing corners, they make an inlet of 30-40 mm per angle. The following canvas is made directly from the corner.
Important! When decorating walls with sockets and switches, they first turn off the electricity, then remove the protective cover. Next - cut the corresponding hole. Then again put on and fasten the protective casing.
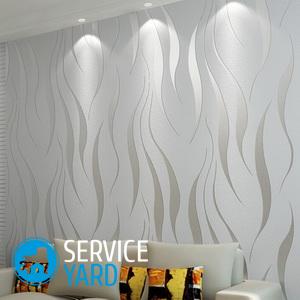
Vinyl wallpapers
They are distinguished by increased strength. Cloths with vinyl coating are convenient for use in new buildings, because they tolerate wall shrinkage very well.
Sticking the walls with wallpaper with your own hands is done in this way:
- When cutting a roll, the presence of a pattern must be taken into account. The minimum size of the allowance is 100 mm - this will avoid problems even with differences in room height.
- Stick vinyl back-to-back because of the considerable thickness. If you overlap, the seam becomes too noticeable.
- The method of applying glue is indicated in the instructions for the finishing material. As a rule, applying glue to the wall is enough. However, sometimes it is necessary to apply an adhesive composition to the canvas itself.
- After attaching the cut strip to the wall, it is smoothed with a roller in the direction from the center to the edges. This avoids air bubbles. Excess glue is removed with a soft, clean textile.
- Particular attention is paid to the junction line. If the wallpaper is separated at the joints, they are again smeared around the edges with a brush and tightly connected.
- Wallpaper near the baseboard is cut with a sharp clerical knife. Another best option is to remove the skirting boards, and at the end of the design of the room, return them to their place.
- When gluing corners, the panel is adjusted so that it enters the adjacent wall by 30-40 mm.
- The area behind the heating radiator is preferably painted.
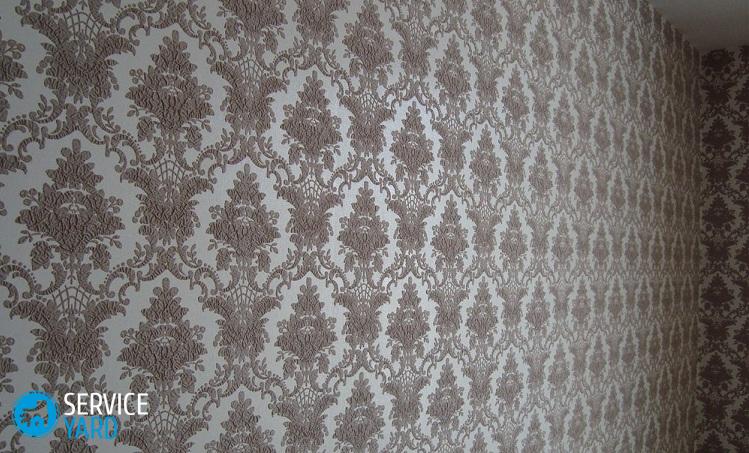
Glue do-it-yourself non-woven wallpaper
This type of wall covering is considered one of the best. The specificity is that it is desirable to glue them from the corner, and not from the window opening.
Now about how to glue wallpaper on the walls with your own hands:
- Before wallpapering, they are cut in the required quantity, not forgetting to fit the picture (if any).
- When preparing the adhesive, it is necessary to strictly follow the instructions of the manufacturer.
- Glue is applied not to the wallpaper, but to the wall, spreading it with a special roller. Saving should not be. Wallpaper should slide freely on the surface. However, strong streaks are also not needed. Ugly wrinkles may appear on the surface of the canvas.
- The sheet is rolled up and down. After the panel is placed on the wall, it is smoothed from the center to the edges until the wrinkles completely disappear.
- After the strip is pasted, the allowances at the top and bottom are cut off. Excess glue is removed with a slightly damp sponge.
Important! Work with non-woven wallpaper does not allow even the smallest overlaps, since they are noticeable even from afar. If the walls could not be perfectly aligned, it is better to allow a slight divergence of the panels than their whipping.
Wallpaper for coloring
The secret to the success of painting wallpapers is that they give you the opportunity to change the interior for the shortest time with minimal expense.
Important! According to the characteristics, they can withstand up to 15 stains. The actual number of stains is about 10.
There are 3 varieties of trellis for staining:
- Non-woven.
- Fiberglass.
- Paper.
Consider the types of paints used in more detail, their advantages and disadvantages.
Water based
There are 2 types of paints on water:
- Water emulsion.
- Water-dispersible (latex and acrylic).
Water-based paints are easy to apply, look good and hold on the surface. Their only negative is the lack of water resistance. For this reason, they can be used in dry rooms.
The characteristics of water-dispersion compositions depend on the type of binder polymer that was used during their release:
- Dyes on acrylic resins are distinguished by high moisture and wear resistance. After applying acrylic paint, the wall can be washed, the surface does not fade in the sun. At the same time, micropores allow the surface to “breathe”.
- Paint based on PVA glue has less moisture resistance.
Important! Both dyes are environmentally friendly, do not contain toxic substances. They can be used in the children's room. An important point - the colors are almost odorless.
Alkyd
Alkyd paint creates a glossy film on the surface of the wallpaper that protects the walls from moisture and dirt. Walls can be washed with various detergents. But there are also disadvantages:
- Toxic substances in the dye.
- Poor air permeability of the walls (natural ventilation is much worse).
- Strong persistent odor that persists for a long time after staining.
In this regard, you can not use alkyd paints for residential premises.
Color tinting
As a rule, water dispersion formulations produce a basic white color, and aqueous emulsion paints are sold ready-made. To obtain the desired shade, dyes are tinted. This can be done in various ways:
- Mixing base paint with pigment. However, when dried, the color is lighter than what was in the bucket. In addition, if there was not enough paint, it is quite difficult to get the initial shade.
- Computer tinting using special equipment. If the store has a special apparatus, you can order any amount of dye of the desired shade.
As for the choice of this or that option, do not neglect the paper wallpaper - for a child this is the best option. They are environmentally friendly. A short work resource is in this case, rather a virtue than a disadvantage. There will be a reason to change the design of the walls, as the child grows older.
to contents ↑Stock footage
Now you have an idea about the most different types of wallpapers and the features of their gluing. We hope you can successfully complete the repair yourself!
- How to choose a vacuum cleaner taking into account the characteristics of the house and coatings?
- What to look for when choosing a water delivery
- How to quickly create comfort at home - tips for housewives
- How to choose the perfect TV - useful tips
- What to look for when choosing blinds
- What should be running shoes?
- What useful things can you buy in a hardware store
- Iphone 11 pro max review
- Than iPhone is better than Android smartphones
 (No ratings yet)