

Do-it-yourself wardrobe in the hallway
Sliding wardrobe is very popular due to its versatility and the ability to save space. In such furniture, you can store things both in the folded and free position on the shoulders. This thing can be made not only useful, but also beautiful. Of course, you can buy it for a lot of money. We offer a profitable option - to make a wardrobe in the hallway with your own hands. So you kill two birds with one stone - free up space and make exactly the dressing room that you have dreamed about for so long. Before you make a built-in wardrobe in the hall with your own hands, you need to decide on some nuances: determine the location, choose the configuration and material, and then make the wardrobe according to our instructions. Let's begin to understand.
to contents ↑Installation method
Depending on the principle of installation of such furniture, such varieties of it are distinguished.
Installation in a niche room
It is considered the most economical option, requiring you a little free time and effort. In this case, the niche serves as the finished basis of the wardrobe, in which it is necessary to integrate shelves, doors and fittings. The most important thing here - the cover, bottom, back and side walls will be already in your possession.
Important! Such a cabinet will fit perfectly into the interior of the bedroom or hallway, which have a technological niche in their space.
Installation along a blank wall
This option has similarities, but differs in that the wide blank wall replaces the niche. A cabinet installed along the wall has the right to exist in small apartments, where part of the living room needs to be made into a miniature dressing room, thereby saving space for other interior items.
Corner installation
Such an arrangement implies the manufacture of a design according to a specific sketch that is fully consistent with the installation location of the product. It contains elements of cabinet furniture: top cover, walls and bottom.
Important! Most often, a corner cabinet is installed in the hallway or in the living room with a blank wall adjacent to the doorway.
Storage room installation
Often this building can be found in an apartment building. This is a very profitable option for one reason: the entire cabinet filling is hidden from prying eyes and does not occupy the useful area of the entire room at all. To make such a design, you will need to build shelves and a retractable door.
to contents ↑Location
One of the advantages of the wardrobe is that it can be installed in any part of the apartment. Here are the most popular options.
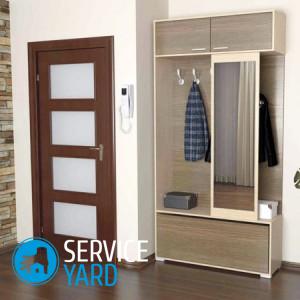
Hallway
Most often in corridor cabinets it is advisable to store outer clothing. That is why in the manufacture of the structure it is necessary to take into account the location of at least one section with a horizontal pipe.
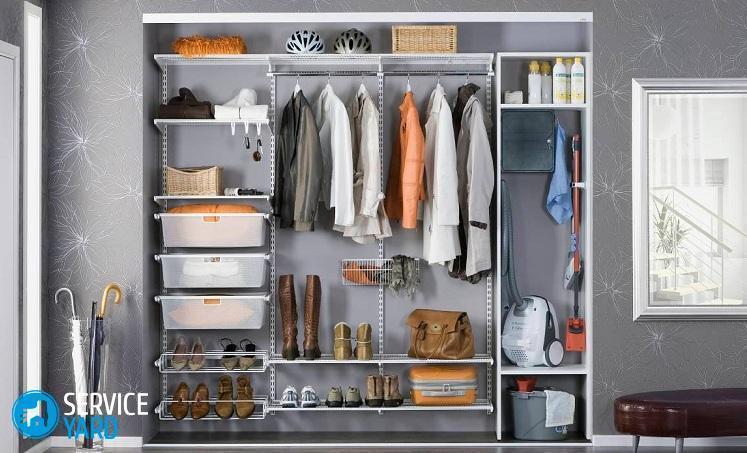
Here you can give recommendations here:
- It is better to make a wardrobe with two main sections - for seasonal clothes and clothes of other seasons.
- The next compartment should be designed for small items - gloves, bags and umbrellas.
- But in the lower compartment of the cabinet should be stored shoes.
Important! It is advisable to make all compartments closed in order to hide the contents from prying eyes. At least one part of the structure must be equipped with a large external mirror, allowing you to see yourself in full growth.
Living room
The purpose of the wardrobe in the living room is the storage of light clothing, utensils, household appliances, documents. That is why it is necessary to build a structure with a diverse configuration of niches and shelves. Accessories for such a cabinet should be made with the function of easy access to everything you need.
Important! Sometimes the central part of such a structure is left open, and the side shelves serve as a stand for a TV and other multimedia equipment. In this case, it remains relevant to install the full-length mirror on the front panel of the wardrobe.
Children's room
A sliding wardrobe for a children's room should be multifunctional - it should store not only clothes, but also books, toys, other necessary things for the child. For such a design, it will be advisable to make a large number of open sections, which will be at an affordable level for taking a particular object.
Materials Based
To make a wardrobe in the hallway or another room with your own hands, use different materials. It all depends on the goals and financial capabilities, the design of the room.
Laminated chipboard, fiberboard, MDF
These materials are suitable for the manufacture of any cabinet furniture:
- They are considered universal, practical, durable, resistant to external factors (sun, heat, moisture), easy to handle.
- They are produced in the form of shields of various sizes, which can significantly save material.
- The modern market presents a variety of colors and a variety of imitations, with which you can build a wardrobe with your own hands under the interior of any room.
Important! The most suitable laminated particleboard are 16 mm thick slabs of different densities.
Wood
Such raw materials are not very suitable for the manufacture of sliding wardrobes due to the fact that this material is more difficult to process, it easily absorbs moisture. The situation can be corrected by applying a special protective solution and stain. So you can increase several times the moisture resistance and appearance of your new product.
Drywall
Of course, it can be used as raw material for built-in cabinets, but it should be noted that this material is fragile. That is why drywall is usually combined with wide metal profiles.
Plastic
It is quite easy to work with it: it is easy to process, you can assemble the structure using self-tapping screws. The only negative is low resistance to external damage and short product life.
to contents ↑Internal organization
The placement process is a rather responsible but solvable task. The internal contents of the wardrobe determines its content. The main thing here is to adhere to three rules:
- Fold dry clothes along the central and side shelves.
- Necessary and small things - to place before your eyes.
- Valuable documents - hide in the topmost drawers.
- Damp outer clothing - set aside for construction.
to contents ↑Important! As you already understood, the period of cabinet durability depends on the competent installation of the internal sections. So, for example, it is not advisable to place the compartment for outerwear for everyday use in the center of the wardrobe, as dampness and moisture from it will spread across all shelves. It is advisable to hang recreational clothing on the side of the structure, where moisture will gradually come out.
Door device
Doors can be put on different fasteners. Here are the most popular options to make a wardrobe in the hallway or bedroom with your own hands:
- Top rail. Not too common for the production of sliding wardrobes, despite the fact that the ceiling takes on the bulk of the canvas. This is due to the fact that the door can easily fall into the cabinet, so the bottom of the structure must be supplemented with one guide.
- Monorail. In this case, all guides with rollers are installed on each door.Such a mechanism is attached to the ceiling with several guides, and the bottom of the structure can not do without one long guide in the center of the cabinet.
- Lower rail. This option is very popular at present due to ease of use and affordable pricing. The cabinet doors will not fall out of the installed rails and collide when in contact with each other.
to contents ↑Important! Pay attention to the choice of rollers for guides, since it is precisely on them that the load of the whole structure will fall.
How to make a wardrobe in the bedroom?
The whole procedure for making a wardrobe with your own hands looks like this:
- Determination of the place, nature and degree of filling.
- Designing doors with a certain way of suspension.
- Preparation of the room (niche) for the installation of the structure.
- Measuring work.
- Drawing up a drawing.
- Purchase of material and accessories.
- Cut the blanks.
- Assembly of the product.
- Installation of internal lighting (if any).
- External design.
Tools and materials
In order to make a built-in wardrobe with your own hands, you need to prepare in advance the following list of tools and materials:
- Building level.
- Building corner.
- Hammer of two types (regular and rubber).
- A screwdriver with a set of various screwdrivers.
- Hex wrench.
- Hammer or electric drill
- Roulette.
- Emery paper of different grit.
- A simple pencil.
- Hacksaw for metal.
- Electric jigsaw.
- Construction stapler.
- Finishing material for the manufacture of cabinet walls and compartments.
- Dowels.
- Confirmants.
- The lubers
- Melamine edge.
- Self-tapping screws.
- Clothes rail on a coat hanger.
- Holders for the bar.
- Hardboard (for a separate structure).
- Nails
- Building braces.
- Furniture corners.
- Guide profiles (upper and lower).
- Interior filling for sliding doors.
- Horizontal and vertical profiles for corners of sliding doors.
- High quality casters.
- Buffer tape.
- Stoppers.
Important! Before you buy the necessary materials and tools, look at the sketch of the finished wardrobe, again, so as not to forget anything.
Preparatory work:
- We collect all the blanks. We cut the metal that we took for the body of the wardrobe. Of course, this work can be done with your own hands using an electric jigsaw, but this option should be chosen only by experienced builders. It is better to contact the furniture workshop, provide your blanks and a diagram of the future cabinet, so that specialists can make samples according to an individual sketch.
- We cut profiles, doors and guides with the help of a face saw or a hacksaw for metal.
- We grind the ends with a large, and then fine grain sandpaper, to make the surface of the material as smooth as possible.
- We put the melamine edge on the ends of the shelves and walls of our design. This work will not take you much time using a conventional iron and a construction knife.
- We apply the edge to the end and iron it with an iron. Under the influence of high temperature, the adhesive quickly melts and then hardens. It is this interaction that provides a good grip of elements.
- We trim the protruding edges with a construction knife. We grind the places of cuts with sandpaper.
- Since we are constructing a built-in wardrobe, we also put in order the walls of this room to install it. We clean them from the old coating (wallpaper, paint, etc.), and then cover the surface with an aqueous-polymer solution of PVA in 3 layers. Do not forget the fact that each layer needs at least 24 hours to dry. After all the procedures done, we cover the walls with paint or glue the wallpaper of your choice.
Assembly:
- We assemble the horizontal walls of our future construction in a horizontal position. We fasten them to the lid and the bottom using corners or confirmations.
Important! To carry out such work, we use clamps and a square so that the walls of the steel are appendicular to each other.But dowels, deepened in PVA glue, will give reliability of fastening.
- We attach the legs to the bottom of the product with screws. We install the back wall (if any) with a stapler, self-tapping screws or nails.
- Now we check the size of the wardrobe in the location of the niche. We carry out this procedure with a building level that will show the correct installation of the product relative to the vertical and horizontal axes.
- We assemble partitions, compartments and shelves with already installed corners. If the cabinet does not have side walls, we fasten the shelves to the walls of the existing niche using metal corners. We perform similar manipulations with vertical partitions, only now we fasten the parts to the ceiling and floor.
- We install accessories with self-tapping screws.
- We install the guides (upper and lower) for fastening the sliding doors, which we hang after their installation.
- If you purchased the mirrors separately, then before installing the guides, we glue them on the door leaf with the help of “liquid nails”.
Stock footage
So you learned how to make a wardrobe with your own hands. Yes, it is not very easy to do, but it is quite possible. Most importantly, you received a new multifunctional furniture, the design of which includes all the wishes of its happy owner!
- How to choose a vacuum cleaner taking into account the characteristics of the house and coatings?
- What to look for when choosing a water delivery
- How to quickly create comfort at home - tips for housewives
- How to choose the perfect TV - useful tips
- What to look for when choosing blinds
- What should be running shoes?
- What useful things can you buy in a hardware store
- Iphone 11 pro max review
- Than iPhone is better than Android smartphones
 (No ratings yet)