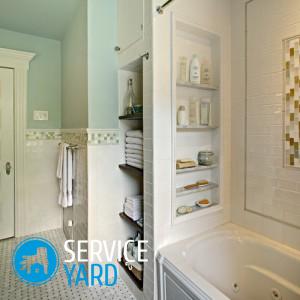
Do-it-yourself drywall rack

Do-it-yourself drywall rack is a pre-fabricated structure, which many can do. This design makes it possible to replace a large number of furniture purchased for storage. First of all - linen and wardrobes, the most dimensional pieces of furniture. You can also save on the purchase of kitchen furniture - bedside tables for storing kitchen utensils, tables, containers for storing vegetables, etc. Let us consider in this article in detail how to make a rack with your own hands.
to contents ↑What are the racks?
Depending on the functional purpose, drywall racks can be:
- Wall - made in the form of niches or shelves, the rear of which is adjacent to one of the walls of the room. This is the strongest and most stable design, which makes it possible to place home appliances on it: audio systems, televisions, power tools, vacuum cleaners, computer equipment, or use as shelves for books.
- Free-standing - products that act as screens or interior walls. With their help, you can zoning the room, while maintaining its monovolume. As a rule, drywall racks are made in the form of through lattice structures, the cells of which serve to accommodate some decorative elements of the interior: indoor plants, photographs, vases, collections.
- Closed - serve as cabinets or cabinets. They are very convenient for arranging kitchen bar counters or, for example, food storage containers.
to contents ↑Important! The main element of any of these structures is a frame made of galvanized metal profile, sheathed with plasterboard sheets and decorated in accordance with the design concept. In some cases, a wooden block can be used to erect the frame.
What will be needed to make the frame of the rack?
To make a frame, you need the following:
- Metallic profile.
- Perforated Corner.
- Sealing (damper) tape.
- Fasteners.
- Screws or rivets.
Also, to work with a profile and drywall, you will definitely need the following tool:
- Cordless screwdriver or electric drill.
- Hammer drill.
- Scissors for metal.
- Cutter or riveter - the choice of the installer.
- Sets of drills for metal and drywall.
- Planer for processing the edges of drywall sheets.
- Nippers.
- Hammer.
- Screwdrivers.
- Pliers.
- Locksmith Corner.
- Building level.
- Plumb line.
- Locksmith Corner.
- Roulette.
- Pencil or construction marker.
- Retractable construction knife with interchangeable blades.
To finish the finish of a drywall rack with your own hands, also prepare:
- Spatulas - narrow and wide.
- Rubber spatulas.
- Paint rollers and brushes for applying paint and primer.
- Sanding block for sandpaper (mesh).
- Mixer for preparing putty.
Frame mounting
To make a drywall rack, proceed as follows:
- Get started with wall marking. At the same time, check the evenness of the intended shelves using the building level.
- After that, at the points where it is necessary to make fastenings, drill holes with a screwdriver and install the profiles. Attach the guide rails to the profiles.
Important! It will not be superfluous to fix the battens to the floor and ceiling - this will give the construction additional reliability.
- Now the frame is ready, which means that you can begin to cover the shelving directly with drywall. It is not difficult to fix the sheets: to do this, screw the self-tapping screw into both the drywall sheet and the mounting hole. After that, cut openings for the shelves (you can, of course, cut the sheet to the required size before starting the installation, but then joints form).
- At the point of the cut, sand the material with sandpaper or a plane. However, it will not work completely anyway - at least between the inside of the shelf and the surface of the rack.
- Treat these joints with putty, place a reinforcing tape on top, and then apply a layer of putty again, but completely on the entire surface of the rack.
- In addition, strengthen the corners of the structure using perforated corners that are attached to the primer.
Work with bends
To achieve original shapes and smooth bends, when installing the rack, you can use arched profiles. Due to the fact that they bend, they can be given a variety of forms. In this case, it is necessary to choose thin varieties of this material.
to contents ↑Important! Before installation, the drywall is wetted and worked out with needle rollers over the entire surface of the sheet.
Stock footage
Even a person without special knowledge and experience in the manufacture of such structures can make a rack from a profile for drywall with his own hands. As a result, you can get a beautiful and comfortable piece of furniture that will be very useful in any home.
- How to choose a vacuum cleaner taking into account the characteristics of the house and coatings?
- What to look for when choosing a water delivery
- How to quickly create comfort at home - tips for housewives
- How to choose the perfect TV - useful tips
- What to look for when choosing blinds
- What should be running shoes?
- What useful things can you buy in a hardware store
- Iphone 11 pro max review
- Than iPhone is better than Android smartphones


