

Do-it-yourself floor heating on the balcony
The balcony or loggia in the city high-rise building can be used in different ways. For example, to equip an office there, a greenhouse or even a guest bedroom. But immediately the question arises: what to do with heating? Installing additional radiators from central heating is a troublesome, time-consuming, expensive and not always possible business. But you can make a warm floor on the balcony with your own hands, since manufacturers offer several options for such floors. The features of this type of heating will be discussed in the article.
to contents ↑Where to begin?
Regardless of which warm floor you choose, laying will require some preparatory work. You need to provide two things:
- heat the balcony as much as possible;
- reduce heat loss to a minimum.
That is, your gender should be extremely effective. But how it will heat your balcony depends not only on its power, but also on the condition of the balcony itself. Of course, there is no point in heating an open loggia. Therefore, you need to do the following:
- Close the heat circuit completely.
- Refresh the screed and level it.
- Make good thermal insulation of the floor due to a special coating.
- Make high-quality waterproofing.
This is an additional cost, but without them laying a warm floor on the balcony becomes simply meaningless. In addition to the heating system and topcoat, you will need:
- heat reflecting foil;
- mineralized cotton wool;
- dry mix for the preparation of cement mortar (or components for its preparation with your own hands).
to contents ↑Important! It is necessary to protect well from the cold not only the inner surfaces of your balcony, but also the outer ones.
Which gender to choose?
Solving the problem of how to make a warm floor on the balcony, soberly assess your capabilities. In modern apartments, several types of underfloor heating are used:
- water;
- electric;
- infrared.
Strictly speaking, infrared systems are also electric, but they have their own characteristics, so they are distinguished into a separate type. Before you make a warm floor on the balcony, think about the advantages and disadvantages of each of them, as well as about the features of the balcony itself.
to contents ↑Water floor heating
Despite the fact that now the water floor is extremely popular, you must treat it with great care. It has advantages:
- heat is distributed evenly over the entire surface;
- if done correctly, it will serve as much as all central heating systems in the house;
- after it is laid, your intervention will become unnecessary for a rather long time.
The disadvantages include the following:
- water warm floor - the pleasure is quite expensive;
- Repair will also cost a lot if you suddenly need to - because you have to dismantle a lot;
- the most important thing is that not all houses can connect additional pipes to the central heating system, and for this step, coordination with utilities and local authorities is necessary.
to contents ↑Important! If we talk about how warm the water floor is needed on the balcony, then you should consider the features of the room itself.As a rule, a balcony has a small area, which will inevitably cause additional difficulties when installing such a floor.
Battery underfloor heating
This is a rather costly and difficult option, but sometimes it is also used. Pipes must be securely walled up with concrete screed. There is a second option - installation under the floor. This is a simpler and cheaper way. The finish is laid on a polystyrene-aluminum gasket. If the floor is wooden, pipes are placed between the lags.
The main element in this system is, of course, pipes, usually polymer. In addition, you need:
- circulation pump;
- collector system with all fittings and fasteners.
Important! In this case, it is important to choose a scheme that does not harm the neighbors and does not have a noticeable negative impact on the overall operation of the heating system in your home. It is best to contact a licensed design organization, whose specialists will help not only develop the project, but also go through all the approvals. Not all connections are contrary to the law - for example, if there is only one connection point and the floor is installed in the entire apartment, there should be no problems with coordination.
If we talk about the process itself, then there are only two ways to insert:
- parallel connection;
- serial connection.
The second option is more effective - the cross section of the watercourse does not change, the flow remains stable. Unfortunately, the temperature of the coolant decreases markedly, including among neighbors.
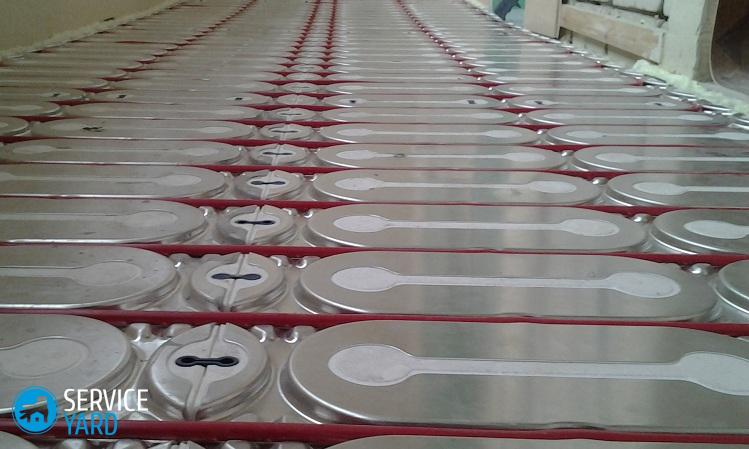
to contents ↑Screed mounted floor
You will have to install such a system in several steps:
- Divide the floor into equal sections.
- Make a layer of thermal insulation.
- Install reinforcing mesh along the contours of the pipes.
- Mount the pipes.
- Connect them to the heating system.
- Check the system for performance.
- Make a screed.
- Put on the finish.
to contents ↑Important! A water floor is better in cases where the house has an individual heating system.
Electric underfloor heating
Having decided to make a warm floor on the loggia with your own hands, be sure to pay attention to the electrical systems. In such cramped rooms they are simply irreplaceable. There are several options for electric flooring:
- cable systems;
- mats.
Cable floor
Such a system is laid on a prepared screed under the finish coating. The cables are terminated, but the thermostat remains outside. This fact can be very useful, since it is possible to set the most comfortable temperature on your loggia.
The advantages include the following parameters:
- comparative ease of installation - in any case, it is much easier to carry out the plan than to connect water pipes;
- relatively low cost - this is the cheapest floor of all;
- the possibility of laying under any coating;
- the ability to rationally use electricity;
- the main heater is carefully covered with insulation, the wires are not oxidized;
- concrete screed reliably protects against mechanical stress;
- the cable may be in a metal assembly.
But what about the flaws? Alas, they are:
- the base can only be a concrete screed;
- repair will cost quite expensive, besides, great effort will be required;
to contents ↑Important! With proper installation and initially good quality of the system itself, it can serve up to 15 years.
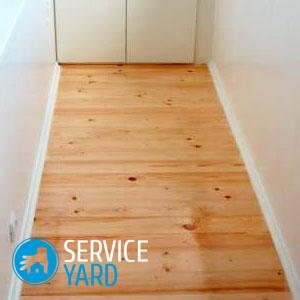
Making cable floor on the balcony
To begin with, as it should be, we put in order the balcony itself, that is, we make a screed, we lay a layer of insulation and waterproofing. There are several considerations to consider:
- The insulation must be thick enough - at least half a meter, there is absolutely no need to heat the street or neighbors.
- There should not be any air gaps in the screed; ensure its uniform thickness of the order of 5 cm.
- The cable is laid in a zigzag, the distance between the branches should be about 2.5 cm, and between the paired wires is 10 cm.
- A thin layer of cement is laid on top of the system.
- The temperature controller is displayed at a point that is easy to reach.
- It is only possible to connect the floor to the network three weeks after the screed has completely hardened.
to contents ↑Important! The temperature controller should not be under a cabinet or sofa.
Heating mats
Recently, the question of how to make a warm floor on the loggia often comes up with the answer - use heating mats. This option made a worthy competition to traditional cable floors, not to mention aquatic. What is such a system? It consists of several nodes:
- base meshes;
- single or two-core cables laid on a grid.
The heating elements are cables. Such systems have gained popularity thanks to unique properties:
- high efficiency;
- simplicity of installation;
- the relative cheapness of the work;
- reliability;
- insignificant thickness - such a floor practically does not affect the height of the room, the surface rises less than 2 cm;
- fitting to any coating configuration, the mesh can be cut, leaving the cable intact.
We lay mats
High efficiency is due to the fact that in the manufacture of heating mats using materials with high resistance. The distance between the cables is less than with a traditional floor - 5 cm. The procedure will be as follows:
- Lay the net directly on the concrete screed, which must be cleaned of dust before starting work.
- It is very useful to primer the screed - this will improve grip.
- You need to check the system, for which you will need a tester.
- Drill a groove in the wall and floor for the wires.
- The temperature controller, as in the case of cable floors, must be placed in an accessible place and not under furniture.
- Place the sensor in a channel intended for it, which is located far enough from the heaters.
- Fix the mesh with adhesive mastic.
- After installation, you need to inspect what happened, and check the system.
to contents ↑Important! When laying, sharp breaks should not form.
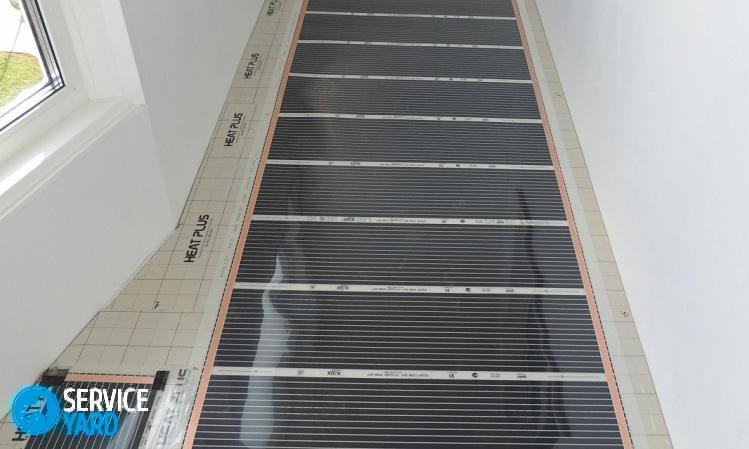
Infrared floor
The most universal option - it can be laid under any coating.
Important! The system works thanks to the long-wave radiation emitted by the heating elements. At the same time, objects in the room begin to give off secondary heat at some point, which only increases the efficiency of the equipment. The air on the balcony will warm evenly.
This is possible thanks to the design, which consists of:
- from carbon strips;
- layers polyesterin which the carbon paste is sealed.
For a balcony, an infrared warm floor is just perfect:
- absolutely safe;
- one hundred percent reliable;
- does not require extra heating costs;
- warms up quickly:
- elementary mounted;
- almost does not form an electromagnetic field;
- does not conceal the volume at all.
Mount the infrared floor
Before making a warm floor on the loggia with your own hands, if you chose infrared, do exactly the same as in any other case, that is, prepare the base and make thermal insulation. Then the order will be like this:
- Open the infrared coating.
- Lay it over the entire area of your balcony.
- Install the thermostat.
- Plug it in.
- Isolate the wire connection points - this requires bitumen mastic.
to contents ↑Important! When working with such a coating, it makes sense to take into account several considerations:
- The strips are attached to the heat-reflecting layer with tape so that the layers do not move relative to each other.
- You can paste the walls and ceiling with the same film - this will ensure the optimum temperature.
Tile and laminate floors
Laminate and tile are the leaders among finishing materials, and it is not at all excluded that for the final coating you will choose one of them. In this case, it is necessary to take into account some points that can affect the quality of the warm floor:
- The material must be resistant to temperature extremes - this is especially true for laminate flooring, so be sure to pay attention to the thermal characteristics when buying - class not lower than 31, thickness 8-10 mm.
- Pay attention to the presence of the inscriptions Warmwasser and Underflowheating, if you plan to arrange water heating.
- The marking should also contain the recommended temperature, one that is not lower than 25 ° C is suitable for you.
Stock footage
Thus, make a warm floor on the balcony with your own hands infully possible, and coordination is not always needed for this. But you need to be very careful about the thermal systems themselves and the finish.
- How to choose a vacuum cleaner taking into account the characteristics of the house and coatings?
- What to look for when choosing a water delivery
- How to quickly create comfort at home - tips for housewives
- How to choose the perfect TV - useful tips
- What to look for when choosing blinds
- What should be running shoes?
- What useful things can you buy in a hardware store
- Iphone 11 pro max review
- Than iPhone is better than Android smartphones
 (No ratings yet)