

Do-it-yourself floor heating on a wooden floor

Warm floor can be both an additional source of heating, and the main one. It all depends on specific conditions - for example, on the base on which to lay pipes or cable. Owners of wooden houses often refuse such decisions simply because they consider the wooden base not too suitable for such systems. It is not always so. You can mount a warm floor on a wooden floor with your own hands in many cases. Read about how and when to do this in our article.
to contents ↑What is a wooden floor like?
To make floor heating in a wooden house with your own hands, you need to understand what constitutes the foundation on which you intend to lay pipes. It consists of several layers:
- rough laying;
- thermal insulation;
- waterproofing;
- fine base;
- floor covering.
Yes, but the concrete floor consists of the same layers! So why not give it a try? Heaters are placed between the layers, that's all. As in any other home.
to contents ↑Features of underfloor heating
Before you make a warm floor on a wooden floor, you need to imagine what it is necessary to deal with. The principle of the system is as follows:
- Thermal energy from the coolant is transferred to the floor covering - this happens through those layers that lie on top of the pipes.
- The flooring heats up.
- Energy is transferred to all other parts of the room.
In this sense, concrete screed is certainly better - the materials from which it is made perfectly conduct heat. But the thermal conductivity of wood, to put it mildly, leaves much to be desired. The tree is simply in no hurry to give off heat. However, heat does not enter the rooms located below. The idea immediately arises to place the screed directly on the wooden floor, then heat will enter the room, but not the basement. What stops? Only one thing is increasing weight. Will the wood withstand a load of about 300 kg per 1 sq. Km. m? There are serious and very reasonable doubts about this.
The second obstacle - when installing underfloor heating on a concrete base, a substrate is usually made. It allows you to direct heat to where you want, that is, into the room, and prevents its penetration into the basement. That is, in fact, it does everything the same as a wooden coating. So what is to abandon the idea? Not worth it. Modern technology can circumvent these problems. And most importantly - the use of wood can dramatically reduce the weight of the intermediate layers.
to contents ↑Let's talk about the design
Since the tree has special properties, then a warm floor with its own hands water on the wooden floor will have a number of design features. The main plus is that wooden houses are mostly private buildings with a small number of floors. As a rule, heat is supplied from a private boiler room, which often stands right in the house. So with those problems that residents of urban high-rise buildings have to deal with, it will be much easier to sort out.
Important! If your house is not connected to the central heating system - coordination is not necessary, and if connected, then it is much easier to get it than a resident of the urban district.
The laying technology is intended for suburban homes that have beam ceilings. She has features:
- the heating system is a flooring;
- it is mounted on top of a rough wooden floor;
- pipes are laid in specially cut channels;
- special heat distribution plates are placed in the channels;
- channels simultaneously increase rigidity, and this allows you to abandon the substrate, that is, to reduce the weight of the structure;
- instead of plates that are quite expensive, you can use foil, which will be much cheaper;
- in some houses you can’t do without a substrate, but as such you can use modern lightweight materials - gypsum fiber or cement-bonded particleboards.
Some more important points
Before you make a warm water floor in a wooden house, you need to take into account the features of the structure itself. The application of this or that technology depends on this:
- In a new wooden house, it is necessary to take into account the shrinkage of the walls, which can be serious - up to 5%.
- Both walls and floors and floors in a wooden building react to changes in temperature and humidity. Significant differences should not be - from this house dry up or begin to rot.
- The purpose of the room also plays an important role - in greenhouses or conservatories, as well as in rooms under which an unheated basement is located, more powerful systems are needed than in living rooms.
Which gender will you make?
In general, underfloor heating can be of two types:
- water;
- electric.
The choice depends on whether it will be the main means of heating or additional. It is advisable to install an electric one as an additional one, water - it can be both. The electric floor consists of heating elements and wires, water - from tubes, coolant circulates inside them, most often they use water. Water comes from a central heating system or from its own boiler.
Two words about electric floors
Electric floors can also be different:
- heat cable;
- heating mats;
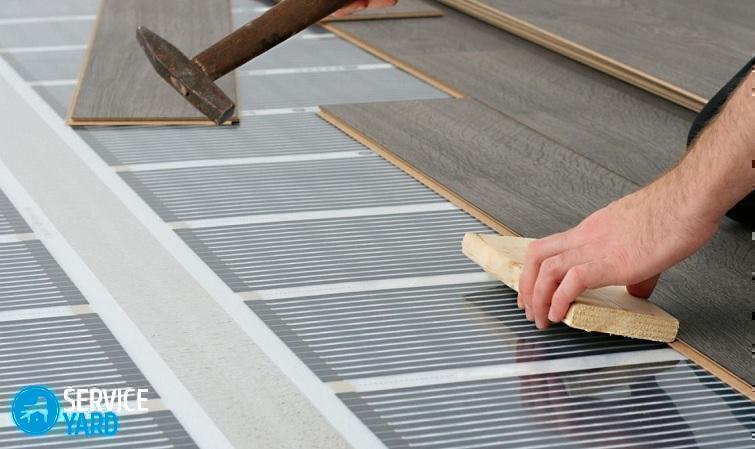
- infrared floor.
Thermal cable is sold in skeins, on sale you can find models of different capacities. It is laid out by a snake or spiral, then connected to the network. Mats are an improved version of the cable system; heat elements are laid on the base, which significantly reduces installation labor. The infrared floor is the most accessible for installation, it is easy to build, which is why owners of rooms with complex geometry love it.
to contents ↑Important! Electric underfloor heating is lighter than water, it is easier to install, and in addition, it is usually not necessary to disassemble the old coating, but they should not be used in a wooden house, because it can cause a fire.
What is needed for installation?
So, the water floor for a wooden house is better, because it allows you to ensure maximum safety of residents and property. Before you make a water heated floor on a wooden floor, it makes sense to think about what you need for this, in addition to the pipes themselves. Not so little:
- apparatus for hot welding;
- building level;
- adjustable spanners and wrenches;
- screwdriver (can be replaced with a set of screwdrivers, but, of course, the process will be longer);
- scissors capable of cutting metal;
- roulette.
For materials, the following will be required:
- pipes;
- film for waterproofing;
- fasteners - staples, straps, retainers and the rest
- units for connecting to the heating system - mixers, collectors, couplings, adapters.
What pipes to take?
The main element of a water heated floor is pipes. They can be from different materials:
- plastic;
- from metal plastic;
- metal.
The most popular material is metal-plastic, it is affordable and, at the same time, ensures the proper quality of the system. And it is much easier to work with it than with metal ones. In addition, pipes can be sutured and seamless.
to contents ↑Important! For a water floor with your own hands in a wooden house, it is better to choose a seamless structure made of metal-plastic. As a rule, a pipe with a diameter of 16 mm is used - this is sufficient for good heat dissipation and for the coolant to move freely through the pipeline.
What will we put on?
Water underfloor heating is a rather heavy thing, even if you manage to do without additional concrete layers. Nevertheless, before laying it, you must do the following:
- Appreciate the quality of the wood flooring.
- If there are gaps, seal them tightly with some kind of heat insulator (you can use the same wood, but you can use grout as well).
- If the floor is completely ancient and cannot be repaired qualitatively, remove the coating.
When do I need to dismantle the old floor?
Removing an old wooden coating is not a very time-consuming process, but there must be good reasons for dismantling. These may be:
- poor insulation or lack of insulation in general - the floor is blown through;
- the distance between the lags should not be too large - if it is more than 60 cm, it is better to redo the floor;
- rotten or broken boards that cannot be replaced without disassembling the entire structure.
Have you checked? Then start
After you have estimated the quality of the floor and, perhaps, even disassembled the old floor, you can start installing water floors in a wooden house with your own hands.
Installation is carried out in the following sequence:
- A raised floor is mounted - plywood sheets, wooden boards or boards are firmly attached to the logs.
- A film is laid that provides protection against moisture and steam.
- A layer of insulation is laid - for example, tiled mineral wool, the layer is 10 cm.
- The flooring is made of boards - they can not be laid closely, there should be 2 cm gaps.
- Grooves are made at the ends so that the pipes can be turned.
- A foil is laid out above the grooves.
- A pipe is placed on the foil in increments of 10-30 cm.
- The system is being crimped.
- All this is connected to the heating system and kept under pressure - with a mixer, a collector group and other components.
- Check is carried out - coolant leaks are carefully monitored.
- After it turned out that all the pipes are in order and there are no leaks, the final coating is laid.
Mounting options
You already know about the general principles of laying a warm floor in a wooden house, now you can consider several options, depending on specific conditions.
Option 1:
- Logs 5x15 cm through 60 cm are installed on an existing wooden floor.
- In the lags, recesses are made for pipes.
- The space between them is filled with mineral wool, pipes are placed on it.
- If there are empty spaces between the lags and mineral wool, they are filled with foam.
- The system is closed by sheets of plywood, on which the finish coating is laid.
Important! This is the easiest way, which, however, has a drawback - an air cushion remains between the pipes and the plywood substrate.
Option 2:
- As in the first case, lags are attached, the spaces are filled with insulation.
- A base is laid - most often from plywood sheets, but you can also use chipboard.
- Chipboard plates are screwed onto the base, their corners are rounded off under the bends of the pipeline. The thickness is 2 cm, and the width is equal to the distance between the pipes.
- The spaces between the plates are filled with foil.
Important! If polystyrene is used instead of mineral wool, you can lay pipes directly on the insulation, without any plywood or chipboard.
- The whole pipe is laid on the whole structure, which is closed with steel or aluminum sheets, on which the finish coating is laid. In this quality, which is usually used tile or laminate.
Important! Such a system is not suitable for parquet or plank floors.
Option 3:
- On logs, the distances between which are filled with insulation, they are laid closely on boards, 5 cm thick, polished from all sides. Its width is the same as the pipe pitch.
- A groove is cut in the corner - it is filled with foil. The strips should extend to the edges of the board.
- On the foil, a pipe is placed, on them - the final floor.
to contents ↑Important! In stores you can find ready-made elements for different layers - wooden plates with already cut grooves filled with foil, and much more, the layers can only be fixed.
Some tips
One of the requirements for a base under a warm floor is that it should be almost perfectly even so that there are no distortions. To do this, under the lags, you can put the supports and adjust their position according to the level. There are several more subtleties that can greatly simplify the process of laying a warm water floor on a wooden base:
- Plywood must be moisture resistant - this is indicated on the marking, any other will get wet and deformed.
- Between the sheets of plywood is left a space that is better to fill with sealant.
- The rough floor is laid after the logs are fixed.
- Boards or strips of chipboard insulation are placed first along the walls, then on the entire surface of the floor.
- Sections are made for bends - you can just file the corners.
- As a heat reflector, you can use not foil, but aluminum sheets, in which recesses have already been made for the pipe - in many construction stores they are, or galvanized iron (but it is heavier).
- If you use galvanized iron, these strips are fastened with ordinary nails.
- The depth of the grooves for the pipe should be such that the line does not protrude above the floor, that is, the thickness of the boards or chipboards that are located between the pipes should be larger than the diameter of the line.
Stock footage
In a word, installation of a water heated floor in a wooden house is quite possible, and even more so, in some cases this is the only option to heat the suburban housing well. But, of course, it is better to arrange such a system if you live in a wooden house all the time or at least visit it several times a week.
- How to choose a vacuum cleaner taking into account the characteristics of the house and coatings?
- What to look for when choosing a water delivery
- How to quickly create comfort at home - tips for housewives
- How to choose the perfect TV - useful tips
- What to look for when choosing blinds
- What should be running shoes?
- What useful things can you buy in a hardware store
- Iphone 11 pro max review
- Than iPhone is better than Android smartphones
 (No ratings yet)