

DIY laminate laying step by step
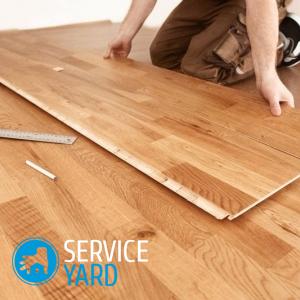
Laminate has become very popular nowadays. It is increasingly used as flooring in the office, apartment, in the private sector due to the positive technical characteristics of this material. The laminate looks beautiful, but it costs a lot. This is a great alternative to expensive parquet, which requires careful care under certain operating conditions. Of course, it is easiest to install a laminate by contacting qualified specialists for help. But why overpay? Such work can be done independently, observing certain rules and caution. Do-it-yourself laying of the laminate, step-by-step instructions are exactly what you will find in our article.
to contents ↑Classification
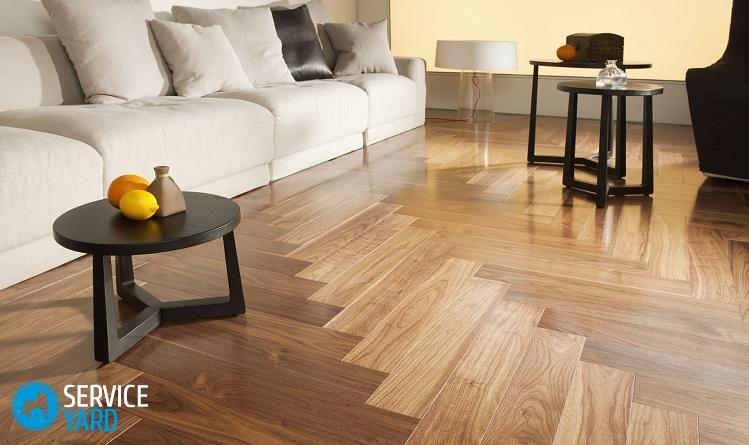
The choice of flooring must be approached with particular responsibility. So, the laminate is considered a fairly strong and wear-resistant material, but it also requires the right selection and careful care. Especially popular are boards with imitation of natural wood or expensive stone. Now we will consider the main options for joining and the method of laying the laminate.
By connection type:
- Glue. This do-it-yourself installation method involves the use of a tenon groove system. This happens as follows: glue is applied to the edge of one board, and then the second board is glued to it. This method of laying a laminate is rarely used due to the complexity and complexity of the installation process.
- Installation of the laminate using the modern Click system. It is considered the most popular option for joining laminate boards. First, the material is mounted using a tenon groove at an angle of 30 degrees, and then the glued board is fixed with a Click lock.
- Installation of a laminate using Lock locks. This option is suitable for laying material on a perfectly flat floor. Such work is best done by a specialist. If you still decide to do the installation yourself, do not forget to take into account the main rule - hammer the boards end-to-end with a hammer, evenly distributing your forces when tapping the laminate.
By location:
- Classic (regular styling). The arrangement of the plates is very simple: you install the second on the remains of the first cut board. Thus, all further material laying is carried out. Continue installing the boards until you finish laying out the entire bedroom.
Important! Classical masonry is considered to be very economical due to the fact that all residual material can be used without waste, for example, in the locations of a bed or cabinet.
- Chess Stacking. In appearance it resembles brick laying. Laminate chess installation is an expensive pleasure due to the fact that after the end of the work you will have about 15% of the waste left, and that is a lot to agree. By beauty - chess panels are considered the best, but such a floor arrangement cannot be called profitable.
- Layout of the laminate diagonally. It is considered to be a classic styling, made at an angle of 45 degrees. Most often, this method is chosen when arranging a long and narrow room with a corner door. It will not work to avoid waste, they will make up about 15% if you install the laminate on the floor of a small room.
How to lay a laminate with your own hands? Step-by-step instruction
As we said earlier, the laminate laying technique is quite simple. For its high-quality implementation, you only need to purchase the boards themselves of the right amount and the missing tools that are not in your home. By the way, the latter is not necessary to buy at all, you can rent it - such a service also exists.
The list of necessary materials and tools:
- Laminate (choice of texture).
- Electric jigsaw.
- Hacksaw
- A set of dies (wedges) 15 mm thick. You can buy ready-made or do it yourself.
- Lath for a laminate.
- Building corner.
- Rubber mallet.
- Sharp knife.
- Roulette.
- Bar.
- Wax pencil on a laminate or a special marker.
For reasons of economy, replace the bars with small pieces of drywall. The most important thing is to make the size of the wedges no more than 15 mm thick.
Important! It is best to take the material with a margin in order to protect yourself from a repeated trip to the store. When buying a laminate, do not forget to independently verify the correspondence of the written information on the package with reality. So, for example, on the marking the number of boards with which it is possible to lay a floor of 2 meters can be indicated, but this applies to simple classic laying. With a checkerboard and diagonal arrangement of the laminate, 2 packages should be taken, since the material will be cut many times.
Calculations
Before installing the laminate, you will need to correctly calculate the necessary material, taking into account the selected type of installation. So, with a classic (rectangular) installation, the calculation is as follows:
- Multiply the length of the room by its width.
- We add 10% to the resulting figure.
Interest will be a certain margin and compensation for the consumption of material when it is trimmed.
To visually enlarge the room, we recommend applying a diagonal installation of the laminate with the following calculation of the required material:
- Multiply the length of the room by its width (as in the first case).
- We add to the resulting figure 20%.
As you can see, diagonal styling will require more supplies.
Important! Laminate should be mounted on a special substrate that acts as a waterproofing - it absorbs steam, noise and is a kind of shock absorber. When laying boards on a concrete floor, the thickness of the substrate should be at least 3 mm.
Preparatory work:
- We remove the old coating (linoleum, tile, and so on).
- Level the surface with a concrete screed (in case of uneven floors).
- We clean the floor of debris, and then vacuum it.
- We spread the substrate along the longest wall of the room.
- We fix the adjacent stripes butt to butt with adhesive tape.
DIY laminate laying technique:
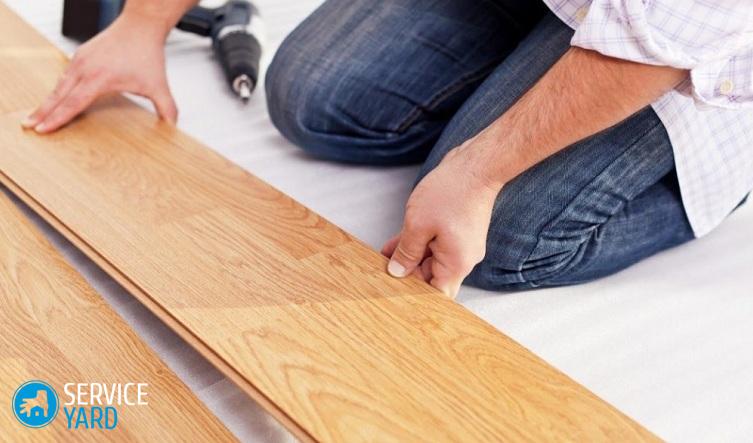
- We spread the first row of boards on the installed substrate. To do this, we take a laminate of this size - 1380x195 mm, 12 mm thick with special locks, with which we will fasten the panels together.
- After installing the first board, we install wedges between the wall and floor material. So we leave a gap of 15 mm, which is needed to compensate for the expansion of the laminate.
- We insert the second board into the end face of the locking system, we carefully fix everything.
- We lay the last board of our first row, slightly cutting it to the size we need. To do this, turn the plate face down, then apply the butt to the adjacent wall and draw a line, focusing on the penultimate board. We perform actions using a building corner and a wax pencil or marker.
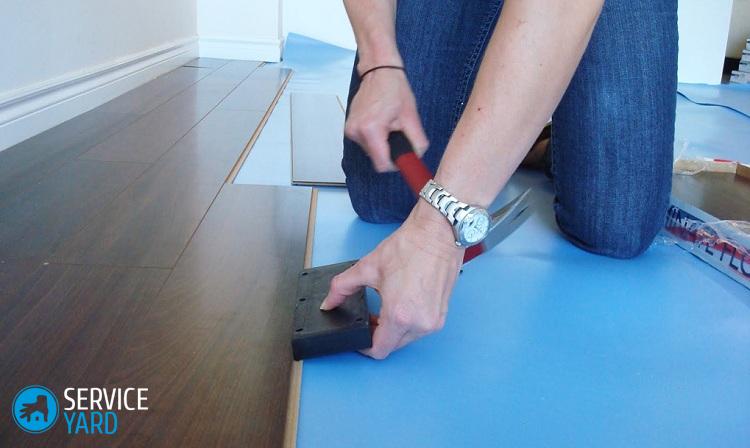
- Now install the next row, starting the installation of the material from the rest of the last panel of the first row. So we laid the flooring like brickwork to reliably fasten the rows of laminate to increase the life of the products.
- After mounting the second row we start it in the side lock system of the first row. We lift the second row at an angle of 30 degrees, and then insert the panel into the lock.As soon as you hear a characteristic click, this indicates the correctness of the work (the plate is firmly seated at the junction).
- We lay the next rows of the laminate according to the installation instructions of the first two rows, not forgetting to insert wedges around the perimeter of the entire room between the wall and the incomplete material.
- We put the laminate at the bottom of the doorway, making a small gap between the board and the door frame, which is closed by the door platband. But we will close the gap near the walls with the help of a plinth.
Docking:
- We dock the floor material with special metal sills. We drill holes at the joint of the laminate in the cement screed with an interval of 100 mm. We hammer in them plastic expansion bolt shields.
- Insert the nail caps into the groove of the installed nut. Press the threshold to the floor, and then lightly tap the laminate with a hammer through a thick wooden board so as not to damage the structure of the base material.
Important! We work extremely carefully so that the door sits well in place and firmly pressed the laminate to the floor. Such a device will prevent you from tripping due to its rounded surface. You can buy metal sills in any hardware store.
- Now, after installing the coating, we perform the next step - we install the baseboard with a drill with a drill on concrete 5-6 mm.
Now you can evaluate the quality of the work done!
Users often find various minor defects on an already used laminate. Do not be upset, everything is fixable. They can be hidden with a special grout, which well hides large gaps and high-altitude differences at the joints of paintings. Such a grout can also be applied immediately after the installation of a new material, in order to extend the period of its use.
to contents ↑Important! Do not forget that the laminate is not entirely suitable for the bathroom or the bathroom, as this product is afraid of water, which can freely enter the cracks and violate the integrity of the floor covering. If there is a very great desire to design the floor with this material, we select more expensive moisture-resistant models.
General recommendations for installing laminate and skirting:
- The room where you plan to lay the laminate with your own hands should be well heated, without temperature changes, with an allowable humidity of 40%, the air temperature should not drop below 15 degrees.
- The material can be mounted on both concrete and wooden floors, the most important thing is that it should be as even as possible.
- Place the panels two days after they are stored in a warm room. So the material will be able to adapt to the existing temperature regime and subsequently will not change in size.
- When buying, carefully inspect the product - it must be intact, without cracks and chips.
- To extend the life of the floor, we recommend that you lay a layer of a thin film under it, which will protect the laminate from moisture and prevent it from deteriorating.
- When installing boards, various types of skirting boards are used - plastic or made of MDF material. The first is installed at the end of the entire assembly of the coating, and the MDF skirting board is fixed to the wall using special clips that are attached with self-tapping screws. For uniformly pressing the laminate to the floor, it is best to fix the skirting boards with construction clamps. Skirting boards need to be laid from the corner of the room, moving clockwise. After their installation, they are installed connecting parts and plugs.
to contents ↑Important! Skirting boards are not attached to the floor or laminate, but are fixed directly to the wall. This is the main feature of the installation of the plinth in combination with this floor covering.
Stock footage
We told you how to lay laminate and skirting with your own hands. By following our instructions and recommendations, you will achieve the best result. And one more little advice - take boards with a margin, one pack more than the area of your room. So you protect yourself from an urgent trip to the hardware store for the addition of material.Good luck with your repair!
- How to choose a vacuum cleaner taking into account the characteristics of the house and coatings?
- What to look for when choosing a water delivery
- How to quickly create comfort at home - tips for housewives
- How to choose the perfect TV - useful tips
- What to look for when choosing blinds
- What should be running shoes?
- What useful things can you buy in a hardware store
- Iphone 11 pro max review
- Than iPhone is better than Android smartphones
 (No ratings yet)