

DIY installation of an acrylic bathtub on the frame
The room under the bathroom must be in every apartment or private house, high-quality plumbing will achieve the convenience of its operation. If you need repair in the shower room and replacement of all equipment, then you need to take care of the competent choice of new elements and proper installation. Installing an acrylic bathtub on the frame with your own hands is not difficult. Moreover, the product is the most functional and practical, unlike other analogues.
General information
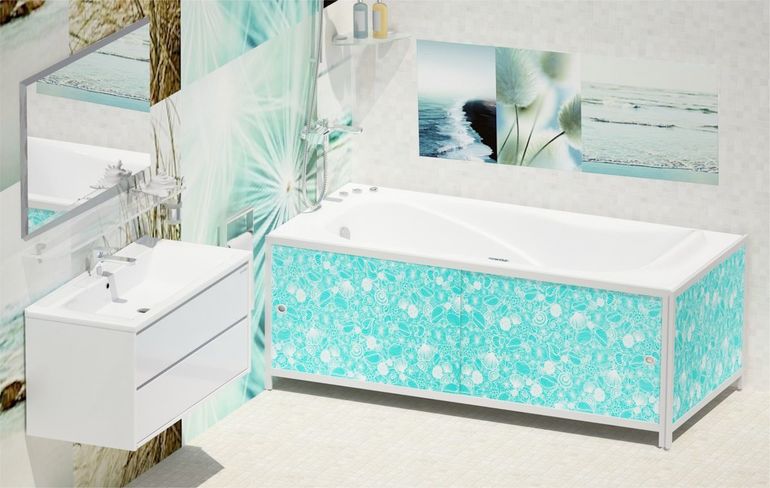
The most important element during the repair of the bathroom is not the work with the walls, but the choice of the bath, as well as its proper installation. Today there are many product options: stone, steel, cast iron and acrylic varieties. All of them have their own advantages and disadvantages, but the most popular are acrylic bathtubs. Moreover, there are many manufacturers of various models, for example, the following can be distinguished: Nerea, PoolSpa, Triton, Laura.
An acrylic product must not only be properly assembled and strengthened, but also care should be taken to ensure that the bathtub is clean, dry and not exposed to abrasive substances. Only in this case can one count on long-term operation and preservation of a beautiful view. The main advantage of acrylic is the easiest material for the manufacture of bathtubs, but it can also easily break if pressure is exerted above the permissible level. Due to the features of this product, the main step is the correct installation process.
Installing acrylic plumbing is not difficult, because it is light, so you can comfortably perform all the work on installing the drain and other manipulations. Due to the fragility of the material, you need to protect the bath, for this the ideal solution is to fix it on a special frame. Mounting the acrylic bath on the frame will reduce the risk of cracks and other surface deformations. The space under the bath in this case is clogged with mineral wool or covered with construction foam. This is only one of several patterns of how a product can be attached.
It is also quite common, but easier and cheaper to install the product on the floor using the legs, which are either in the kit or purchased separately, taking into account the weight and size of the font. If this option is not credible, then an alternative to this installation can be the installation of a bathtub on a metal rectangular or asymmetric frame, it can be ordered for a specific configuration of the product or welded with your own hands.
Whatever method is chosen, the most important thing for comfortable operation is to choose a quality bathtub and to properly care for it.
Required Tools
The process of self-assembly will require the preparation of the place where the future bath will be located, as well as tools and materials. It is necessary to organize a comfortable working environment so that during installation nothing interferes at hand, in this case the procedure will go as quickly as possible while maintaining high quality.
When working, you will need:

- directly bath;
- materials for a certain method of fastening: bricks, metal frame, legs;
- Bulgarian;
- electric drill;
- sealant;
- hammer drill;
- a set of keys;
- insulation tape;
- building level;
- brackets with which it will be possible to strengthen the fastening of the product by fixing it to the wall or floor;
- corrugated tube.
To install the acrylic do-it-yourself bathtub correctly, everything needs to be done in order. Step-by-step instruction:
- shut off the water supply valve;
- dismantling of the old product;
- installation of a new drain;
- sewage treatment;
- installation of a new corrugation into the sewer;
- coating of the junction of the corrugation;
- leveling the surface of the floor under the bath.
When all the work is done, you can begin installing a new bath.
Installation options
Installation of an acrylic bath independently can be performed in different ways, taking into account this, the required materials and design are selected.
Assemble the structure using:

- mounting on a pre-made metal frame;
- installation on the legs;
- the construction of the podium, in which the font falls;
- erection of supports made of bricks on which the bath is placed.
In addition to these methods, there are combined options. When choosing the type of installation, you need to take into account the dimensions of the product: if they are 180x80 cm, then all the described technologies are suitable, for more compact fonts it is better to choose the installation on the legs, so the weight will be evenly distributed, and for more bulky it is advisable to install a podium.
Directly, the installation procedure for all methods is different and before proceeding with the installation, it is necessary to consider separately the features of each in order to choose the most suitable option for certain conditions.
Foot fixing
The simplest installation option is foot mounting. Often they are bundled with a particular product. To fix them, as a rule, you do not need a lot of tools, but in some cases you need to make holes for fastenings. If this is the case, then the drill must be selected for woodwork, and holes must be drilled directly at low speeds of the drill.
The process of securing the supports is to firmly fix the legs and install in a specific place, which will give the required height for installing the siphon and pipes.
The work is carried out in several stages:
- The process of attaching supports that are installed in certain places that are provided by the manufacturer. As a rule, they are marked with a special symbol. In certain cases, the holes are already made as standard, but the product can be without them. It is necessary to use only the marked places and make holes where required, otherwise the mass of a person will not be evenly distributed on the surface when bathing, and the bathtub will deform.
- Feet Adjustment Almost all designs involving the fastening of the legs are adjustable relative to the floor level. This allows you to adjust the product to certain conditions.
First you need to put the bath against the wall, then proceed to fasten the supports. The next step is the horizontal alignment of the font, which requires a level that fits on board the product. Adjustment is made with an adjustable wrench.
After the bowl you need to fix it to the wall. To do this, you must first fix the plastic or metal hooks, and then screw the product to the wall with them. The final step is to seal the joints, this is done with silicone sealant.
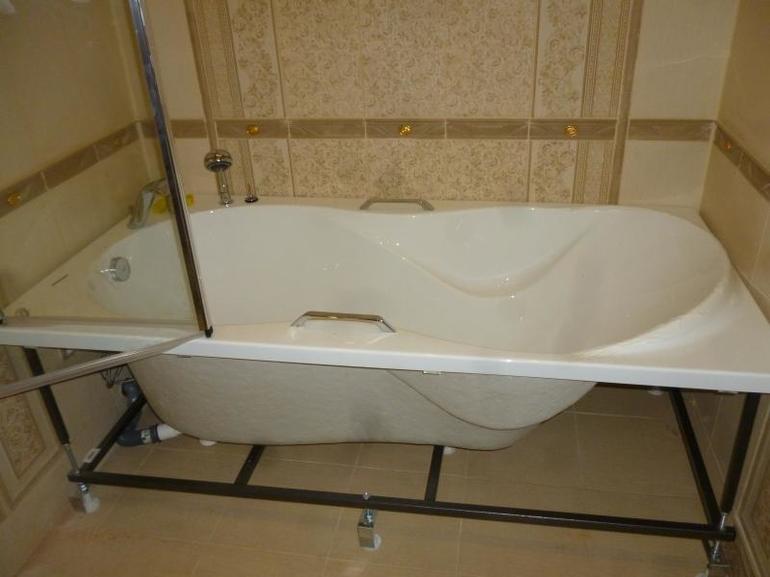
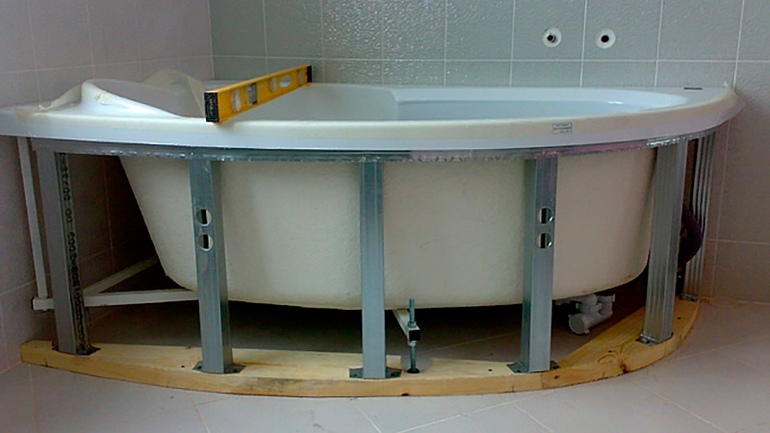
Frame assembly
If reliable fasteners are required, the most suitable is to install the bath on the frame. This procedure is not very complicated, but it will require certain skills.
Step by Step Actions:
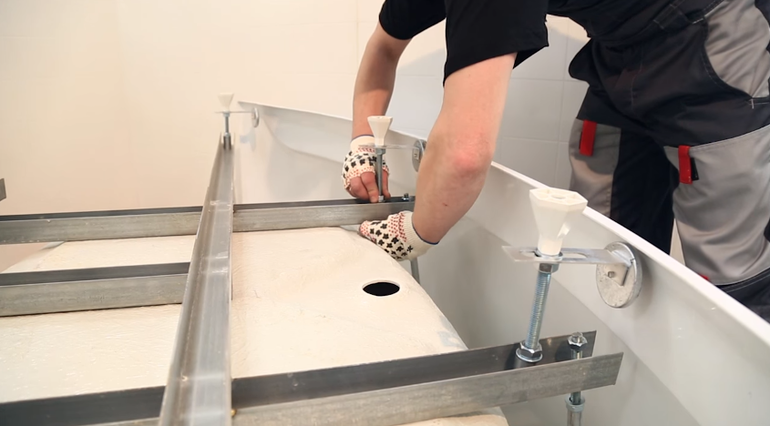
- The manufacture of the frame. This design is purchased previously, after which you need to study the attached instructions. The self-tapping screws in the kit twist all the elements.
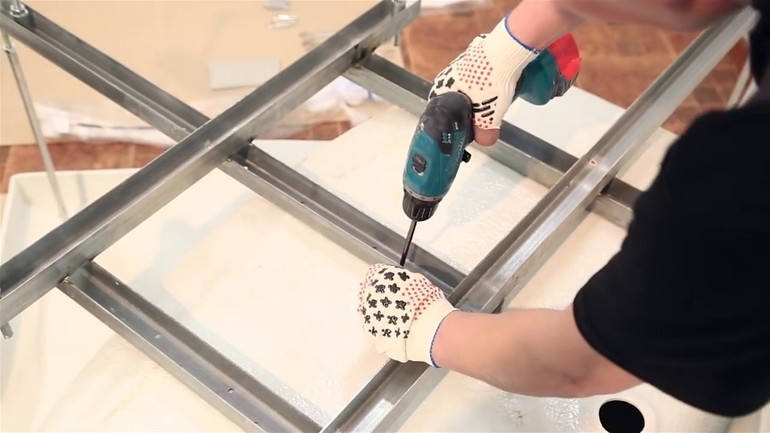
- Mounting the assembled structure to the bowl. To do this, you need to deploy it upside down, then put on the frame. Fastening is done on spiers and racks screwed to the product.
- When the frame is fixed, plastic legs with thrust bearings are attached to the prepared structure, which adjust the height of the bath, while it must be no higher than 60 cm.
- Only then can you turn the bowl over and see how correctly all the parts are installed and whether the bathtub is even.
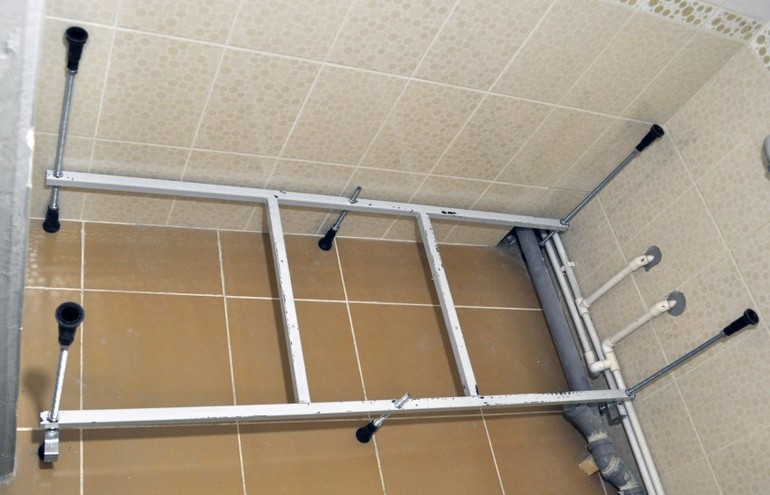
- If necessary, the product can be additionally fixed to the wall, which will require a metal corner or hook.
- The next step is to connect the siphon and pipes.
- Having received an almost complete design, they begin installing the mixer, which is selected taking into account the required functions.
- To hide the metal frame, you can use a decorative screen. It happens wooden, plastic, with decorative finishing, it depends on personal preferences.
The use of the frame will make it possible to firmly fix the bowl and not allow it to move. In addition, the weight of a person is so perfectly distributed, and the bath is not deformed during operation. To reduce the noise from the impact of water on the surface, the space under the bathtub is filled with mineral wool.
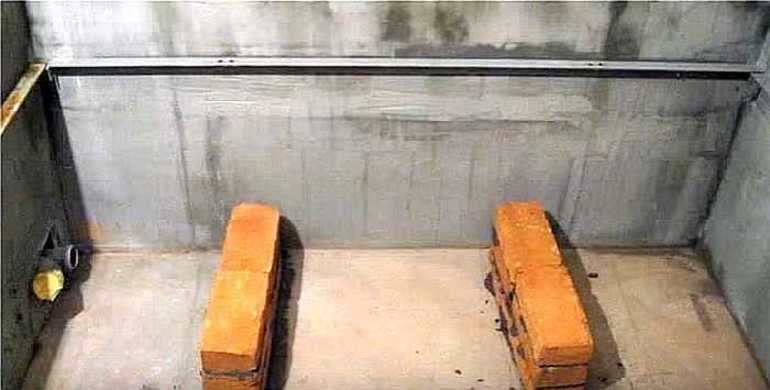
Brick supports
With just 12 bricks, you can build 4 supports, where the bowl is placed. This design is lightweight, unlike the podium, and does not create excessive pressure on the floor of the room.
To install the product on brick supports, you must follow certain steps:
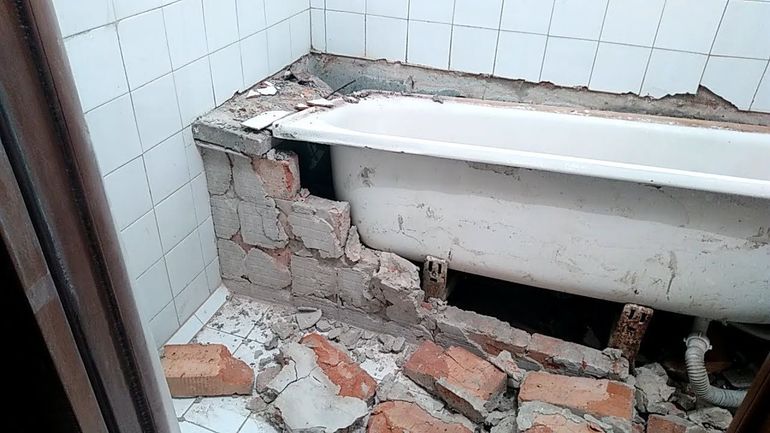
- After dismantling the old bathtub, it is necessary to bring in a new product, it is advisable not to unpack it, otherwise you can accidentally damage it, then mark for the supports.
- It is necessary to rationally distribute the columns relative to the length of the bowl. If the capacity is large, then 3 supports must be placed along the length; if small, two are enough. You need to install one under the product at the bottom and two on the perimeter of the bath.
- After marking, set the bowl aside and start laying the supports. Their height is not more than 25 cm, so that the bathtub is in height no more than 60 cm.
- The brick is laid on a cement mortar, which is then required to dry for at least a day.
- When the columns are prepared, a bowl is placed. Its connection with the brick must be sealed with a sealant.
- For safety, you need to fix metal hooks or corners where the bathtub is mounted.
Podium construction
If it was decided to build a beautiful and durable structure, then the best option is to install a podium, especially if it is an angular way to place a bath. What will require quite a lot of bricks and some additional tools.
Installation consists of the following stages:
- Dismantling the old bathroom. Skidding of a new, unpacked product and installation at the desired location. In this case, in addition to the landmark for the construction of the podium, it is required to mark the place of discharge.
- A brick podium is laid until the height of the entire structure is about 65 cm.
- Further, the frame is cut out from moisture-proof plywood, it should be a little higher than the podium in height, so you can hide the area of foam that is between the masonry and the bowl.
- The podium is covered with a layer of construction foam and plywood is applied to it.
- Installing the product on the laid out podium and determining the levelness of the bathtub.
- In order for the foam to solidify properly, it is necessary to pour water into the tank and wait at least 24 hours.
- Next, connect the bowl to the drain.
- To give an attractive look, the podium can be tiled.
Recommendations and expert advice
If it is planned to install a new acrylic bathtub in the bathroom, which can replace the old steel one, then you need to know all the nuances of working with this material and choose the installation option. After dismantling, first you need to align and putty the wall.
Putting an acrylic bath yourself is quite simple, since it is light, but it is advisable to do this with an assistant who will help with the transfer of the bowl, this will reduce the risk of deformation of a brittle surface.
When installing the bath, you need to take care of its alignment to the horizontal level so that the product stands firmly. When mounting the bowl on a brick base, it is necessary to control the level of the supports on each new layer.
If you need to make sure that the bowl does not move at all, then the best way is to build a podium. This technology is best suited for residents of the house or people who live on the ground floor. In old high-rise buildings, it is worth refraining from such a weighting of panel ceilings.
Installation of the bath must be carried out comprehensively, taking into account the height of the bottom of the bowl from the floor, so that it is convenient to install a siphon and pipes, as well as provide further comfortable operation. The average height of the bath is made in the range of 55–65 cm. The legs, frame, podium, supports should be built only after the optimal height is measured.
You can install acrylic plumbing of any shape with your own hands, if you follow all the advice of professionals and strictly follow the instructions. But if there are doubts about one's own strengths, then it is advisable to turn to specialists. Do not forget, the acrylic bathtub is quite fragile and can crack from rough handling.
- How to choose a vacuum cleaner taking into account the characteristics of the house and coatings?
- What to look for when choosing a water delivery
- How to quickly create comfort at home - tips for housewives
- How to choose the perfect TV - useful tips
- What to look for when choosing blinds
- What should be running shoes?
- What useful things can you buy in a hardware store
- Iphone 11 pro max review
- Than iPhone is better than Android smartphones
 (No ratings yet)