

Installing an infrared heater on the ceiling
Even in the warm season, the topic of climate equipment remains relevant. Today we will talk about modern infrared heaters. Heating of premises with such devices is very different from the more conventional convective heating for all of us. Of course, we could describe in detail all the advantages of these devices and slightly exaggerate their capabilities, but it is much more reasonable to pay attention to specific facts. As practice shows, this equipment is really indispensable in cases where there is no central heating in the house in winter. Below we will describe in stages how the installation of an infrared heater on the ceiling and wall occurs without professional assistance.
to contents ↑Features of infrared heaters
Heaters of this type work on a rather interesting principle. Since it is not the air itself that is heated, but objects that are located around due to infrared radiation. As a result, they heat up, give their thermal energy to the atmosphere, and the room becomes comfortable and warm.
Before installing an infrared heater at home, get acquainted with its main features:
- Uniform heat distribution. For example, if you equip a room with a traditional radiator, then the floors near it will be cool, and closer to the ceiling it will become hot. If you install an infrared heater, then the floors will also become warm due to heating by infrared radiation.
- Security. With proper installation, they do not harm human health at all, the main thing is to equip the device in a regular place so that headaches do not occur.
- Quick warm-up of the entire room. Such devices heat the room much faster than traditional radiators.
- Low noise. Only gas models can make noise, and then the sound they make is almost inaudible.
- Ability to work in rooms with a high level of humidity.
- Availability of operation on the street. With their help, you can heat outdoor areas.
- No negative impact on the environment.
to contents ↑Important! The most significant drawback of such devices can be called only high energy consumption, and this applies to all their varieties, even the most economical devices.
Varieties of infrared heaters
All devices of this kind are divided into two categories:
- Gas. These heaters are powered by liquefied gas. Their main advantage is autonomy, because they do not need access to the mains. At home, they are little in demand, since they are more often used to heat industrial buildings and street sites.
Important! Some models work thanks to built-in miniature gas canisters.
- Electric. These devices work from a household power supply, are equipped with special electric emitters. They are characterized by a simple design, due to which they are quite compact. But for their operation, of course, you have to pay with a rather serious electricity consumption.
Depending on the installation location, they are divided into two more categories:
- Wall mounted.They are mounted to the wall, which is especially important for rooms where there are small children, since they can burn their hands on the heater or knock over a conventional stationary device. Of course, there is a risk of covering the heat transfer surface, but this is prohibited. The advantages of this type of device include significant space savings and ease of use in small rooms.
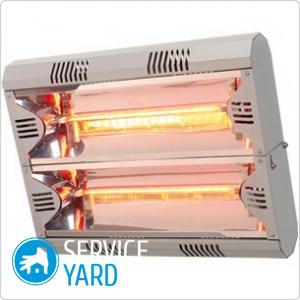
- Ceiling. Such devices are capable of heating rather large structures in a short time. You can install them even in humid rooms, due to the fact that they emit much more heat than floor and wall options. This is achieved thanks to the original form and a special rough coating of the heating surface. The fact is that the heterogeneity of the upper layer provides a large area for heat generation. Ceiling heaters can have open and closed heating elements. The first option is considered more effective, since it emits a narrowly directed hot stream of heat. They are fastened, as a rule, in houses with high ceilings, workshops, hangars, in warehouses. Indoor heater is more suitable for residential premises, where the ceilings are not too high and the heated area is small.
to contents ↑Important! You should not worry about heating the ceiling, because such devices are quite thermally insulated.
Installation of infrared electric heaters
As a rule, in the case of buying film and floor heaters, there are no questions about their operation, which is why it is more appropriate to consider how the installation of infrared heaters of a stationary type occurs.
First of all, it is necessary to prepare a minimum set of such tools:
- Screwdriver.
- Drill.
- Hammer drill.
- Screwdrivers.
- Roulette.
- Pliers.
- Vagi or electrical tape.
Installation of electric infrared devices in rooms with wooden, plasterboard and false ceilings often does not cause any problems. Hooks-holders and self-tapping screws are easily screwed into such materials. The only thing is that special dowels, which are also called butterflies, are selected only for drywall - when a self-tapping screw is screwed into them, they expand and due to this they are firmly held inside the drywall sheet.
Important! Mounting devices of the ceiling type depends directly on their configuration - they are suspended on hooks or special brackets.
Installation of infrared ceiling heaters takes place in several stages. To do the following:
- First determine the heating zones, then calculate and attach special mechanisms to the ceiling.
- Then hang the device on the mounting mechanisms.
- Connect the thermostat to the heater.
- Connect the device to the network using a pre-routed cable.
- Next, ground the device. To do this, just connect the yellow-green cable to the corresponding terminal.
- At the last stage, start the device, adjust the temperature regime, adjust its position and tilt angles.
Important! When working with such electrical devices, it is necessary to ensure that there is no voltage in the network, otherwise you can not avoid electric shock.
Thus, if you follow the instructions, you can easily connect the ceiling heater yourself.
to contents ↑Wall mounted gas infrared heaters
Gas devices are very different from the aforementioned devices by the type of their design and the method of generating energy that is converted into heat. They are powered by natural or liquefied gas. They differ in size, shape, can be portable or stationary, use them in factories, enterprises, outside the city, in cottages.
Have you decided to make your house warmer and more comfortable? An infrared gas heater will help you with this. Mounting on the wall of such devices occurs according to a well-defined pattern.
Install as follows:
- Determine the place where the device will be located.
- In the wall, make a hole for the exit of gases.
- Bring to it the main source of energy, that is, gas.
- Attach it to the wall with brackets.
- Connect the gas through the flexible gas hose.
- Hook the appliance into place.
- Perform a control run, set the optimum temperature.
Stock footage
As you can see, installing an IR heater is not feasible or difficult. Everything can be done independently, without involving outsiders. But during installation, maximum attention should be paid to safety and precautionary measures. Only under such conditions will the device serve you for a long time and with high quality.
- How to choose a vacuum cleaner taking into account the characteristics of the house and coatings?
- What to look for when choosing a water delivery
- How to quickly create comfort at home - tips for housewives
- How to choose the perfect TV - useful tips
- What to look for when choosing blinds
- What should be running shoes?
- What useful things can you buy in a hardware store
- Iphone 11 pro max review
- Than iPhone is better than Android smartphones
 (No ratings yet)