

Installation of infrared heat-insulated floors
One of the main elements of comfortable housing is a beautiful and warm floor. More recently, there was a cable and water view of the heating system, now infrared floor heating is gaining more and more popularity. He heats the room due to infrared waves. This type of floor does not need to be poured with a cement screed; it can be laid under any surface. The infrared underfloor heating is powered by electricity, but heating comes from the film, which is heated from copper conductors. Installing infrared underfloor heating with your own hands will not be any difficulties and will take several hours of your time.
to contents ↑Characteristics and principle of operation
The infrared film floor is a very thin, about half a millimeter new generation material. It is made of environmentally friendly materials, creates comfort and a favorable temperature distribution for the human body in the house. It can be used:
- In living quarters.
- In medical institutions.
- In educational institutions.
- In greenhouses and greenhouses.
Important! Such a warm floor can also be installed on walls, mirrors and ceilings.
The principle of its operation is quite simple:
- The basis of the infrared floor is carbon paste, which is embedded in a film of polyester. Carbon is a material with high thermal conductivity, it requires less electrical energy to heat it than for a heating cable. Such a system is very economical.
- Current is supplied to the emitters through copper conductors.
- The contact joints are covered with a small layer of silver - this is done to protect them from overheating.
- An infrared floor heating is connected to the mains through a thermostat. With it, you can adjust the temperature in the room.
to contents ↑Important! The residual heat does not exceed 28 degrees, which prevents the floor covering from overheating over such a floor. Due to the long-wave radiation, objects in the room are heated, and not the surface of the floor.
Floor power
Before installing an infrared warm floor, you need to calculate its power. First, measure the free space in the room. For example, if an infrared floor heating is installed on an area of 20 square meters. m, then the power should be 220 watts per m2. A specialist will help you calculate the required power and select the necessary temperature regulator.
to contents ↑Important! Such a warm floor does not fit under large appliances and furniture.
Benefits
Compared to other methods of floor heating, infrared warm floor has the following advantages:
- Heating elements are heated using infrared rays, which are compatible with the human body both biologically and environmentally.
Important! Infrared radiation is used in medical methods.
- The thickness is much less than the dimensions of other structures - about 1 mm.
- Due to the small thickness of the film it does not increase the thickness of the floor, it fits any floor covering - laminate, linoleum, tile.
- Easy to dismantle. It can be moved to any place and mounted again.
- The emitter can be installed both on the entire floor surface and in a specific place.
- The power of infrared radiation can be made the same throughout the room and different in different areas.
- Installation of infrared underfloor heating is very easy and easy for anyone to do on their own.
- When placing infrared emitters in parallel with the failure of one will not affect the work of the other.
- Electricity consumption is very low.
- IR floor heating is harmless to humans.
Installation of infrared heat-insulated floors
Installation of infrared warm floors occurs in several stages. To get started, prepare the tools and materials you need, namely:
- Drill.
- Pliers.
- Screwdriver.
- Nippers.
- Scissors.
- Knife.
- Level.
- Roulette.
- Paint brush.
- Scotch.
- Bitumen coated tape or bitumen mastic.
Preparatory work:
- To begin, prepare the channel for electrical wiring.
- Make a hole at a height convenient for you where the thermostat will be installed.
- Clean the surface of dirt and dust.
- Check the horizontal level of the surface base level.
Important! The difference can be no more than 3 mm. In case of deviation, level the surface.
- Dry the floor base before applying the film.

Insulation layer laying:
- Installation of the IR floor heating begins with laying a layer of waterproofing - it will protect the entire system from moisture.
- Apply thermal insulation - it will reduce heat loss when emitting infrared rays down, thereby reducing energy consumption.
Important! Use heat-reflecting films as thermal insulation. Basically, these films are included with an infrared warm floor. You can also use a substrate made of technical cork.
- Make holes for the wires in the insulating layer.
- Fasten the ends of the film using construction tape.
Important! The overlap of heat-insulating films is not allowed. Lay them end to end or with a small gap.
Work planning
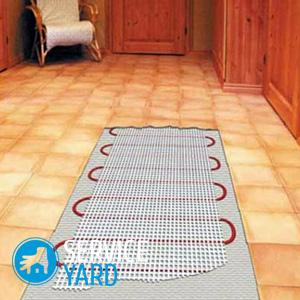
First, determine the layout of the infrared emitters. Consider these recommendations:
- Place the radiating film toward the wall where the power supply will fit.
- Install infrared floor heating at a distance of 10-40 cm from the walls.
- If there is another source of heat in the room, then the distance from it to the warm floor should be at least 1 m.
Important! If IR floor heating is the only source of heat in the room, the density of the elements should be 70-80% of the total floor surface. If it is used as an additional source, then 40-50% is enough.
- The maximum length of a piece of film is 8 m.
Important! To prevent damage to the emitting filler, cut the film only at specially marked places.
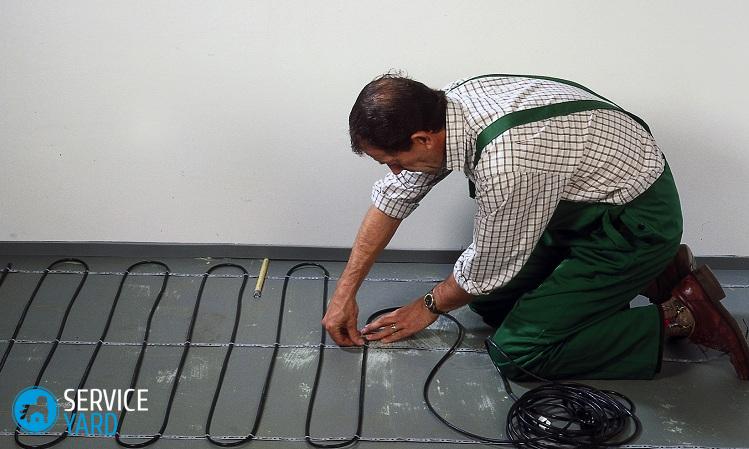
Stacking and connection
Installation of tape elements occurs according to the plan:
- Lay the film down with a copper contact strip.
- Attach the heat sensors to the bottom surface of the film and insulate the mounting location.
- Attach the contact clamps to the end of the copper strip.
- Route and secure the wires to the clamps.
Important! Insulate the copper strip, the end of the film, the ends of the wires and the clamps with tapes with bitumen coating or bitumen mastic.
- Press the heat-insulating layer of the substrate, fasten the joints of the electrically conductive parts with tape.
- Hide the wires in a heat-insulating substrate, pull it to the baseboard.
- Collect all the wires in bundles, pass under the baseboard to the channel made in the wall, through it guide them to the place where the thermostat is located. Secure them with tape.
- Install and secure the thermostat in the designated place.
- Connect the wires from the emitter to the thermostat.
Important! The connection includes two terminals for thermal sensors - summing up the general power supply and radiators.
- Test infrared underfloor heating. If there is no heating in places of electrical contacts and arcing, you did everything right.
Important! Floor heating should be at a given temperature and occur evenly.
Mounting the outer layer
Laying of the finish coating occurs after checking the operation of the entire system. The design of this layer depends on the type of flooring so that the film of the warm floor is not damaged:
- Cover the heating film with fiberboard or plywood if you plan to lay linoleum or carpet on the floor. Mark the fasteners in advance so as not to damage the film during installation.
- Install a paint net if you plan to lay on top of the tile. Fasten the grid with dowels to the concrete base, between the bands of heating elements. The tile is fixed to the grid with special glue.
- When installing wood flooring, lay a layer of plastic film over the warm film floor to protect it.
After installing the finish coating, the installation of the IR floor heating is completed.
Warm floor creates coziness and comfort in the house. Infrared warm floors make it possible to solve many problems in the house, they are economical and effective.
to contents ↑Stock footage
The answer to the question of how to install an infrared warm floor turned out to be not so difficult as it seemed at first glance. Just follow all the above instructions, and the result of the work done will please you.
- How to choose a vacuum cleaner taking into account the characteristics of the house and coatings?
- What to look for when choosing a water delivery
- How to quickly create comfort at home - tips for housewives
- How to choose the perfect TV - useful tips
- What to look for when choosing blinds
- What should be running shoes?
- What useful things can you buy in a hardware store
- Iphone 11 pro max review
- Than iPhone is better than Android smartphones
 (No ratings yet)