

Tulip shell installation
During repairs in the bathroom, you have to choose and install accessories that are needed for a comfortable and practical daily use. These include plumbing equipment such as a sink. The market offers a huge assortment of sinks of different designs, colors, shapes, and they are made of different materials. You can easily choose the necessary option for yourself. A very convenient and interesting solution would be to buy a sink called “Tulip”. In order for the sink to please you with beauty and function fully, it is necessary to correctly install it. The topic will be revealed in our article - this is the installation of a “tulip” shell with your own hands.
to contents ↑Sink Tulip
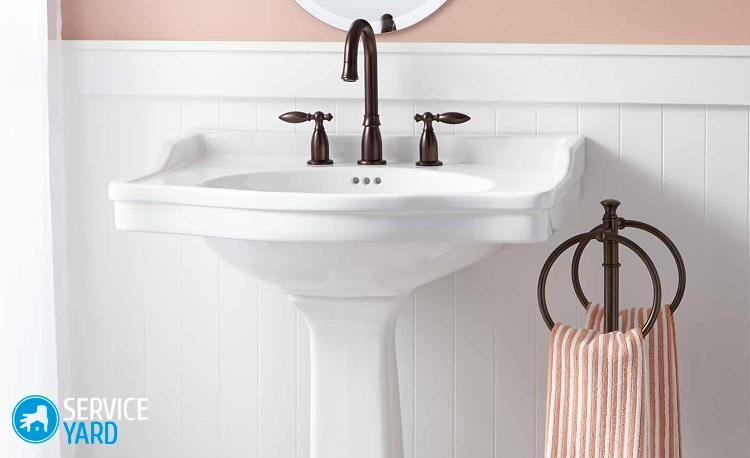
Sinks “tulip” were known in Soviet times, but then they were not so original, elegant and creative. The design has not changed much since then, but they began to use various materials and original design methods for its manufacture. Nowadays, this sink is an interesting element in the interior of the bathroom.
Before moving on to the question of how to install a “tulip” sink, we will deal with the features of this washbasin.
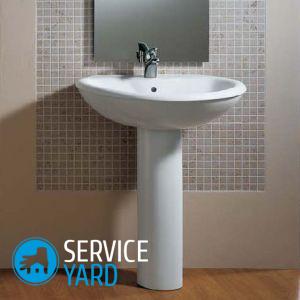
The “tulip” sink consists of two elements - a washbasin and a pedestal.
The pedestal performs the following functions:
- Provides stability and reliability of the design, as it takes all the mechanical load that the sink exerts completely.
- Hides a siphon, sewer pipes and other ugly details.
to contents ↑Important! The “tulip” sink will help make your bathtub more compact and perfectly emphasize any design decision.
The main types
During installation, you must carefully read the instructions, as the installation will depend on the type of washstand that you purchased.
I classify these shells according to several criteria.
Design
Depending on the design features, there are three types:
- Monolithic - when the pedestal and the sink itself are one. The features of such products is the lack of emphasis on the sink - this is an integral and indivisible device.
- Consisting of a separate bowl - they are convenient in that when cleaning the siphon it is not necessary to move the entire structure, it is enough to simply move the leg away.
- Modifications in which the foot does not touch the floor. The advantage is their installation at any height you need.
Location
There are two types:
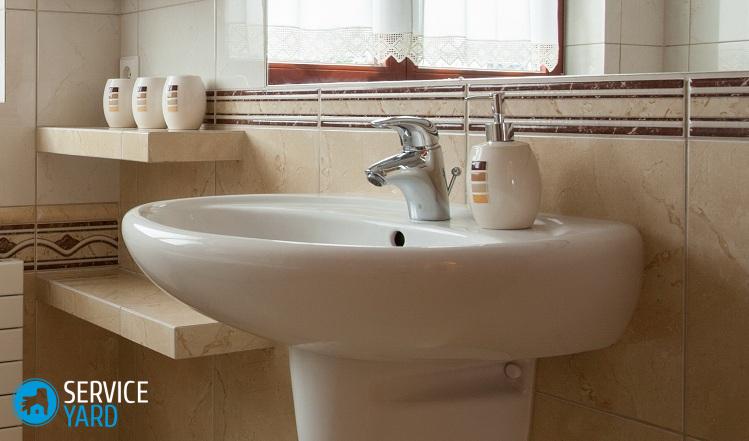
- Corner - great for small bathrooms. Installation is carried out only in the corner of the room. Basically, such shells are small in size.
- Conventional - their installation is carried out along a flat wall. This is the most popular option, since they can be installed in any bathroom.
Materials
Depending on the materials from which the models are distinguished from:
- porcelain;
- faience;
- glass;
- stone.
to contents ↑Important! A lot of brands have recently begun to produce “tulips” from acrylic. Such products are lightweight and affordable.
Advantages and disadvantages
Before installing the tulip in the bathroom, consider the main advantages of this product:
- Low price when compared with other modifications of washbasins. You can easily choose a tulip washbasin for your budget.
- A large selection of sizes, shapes and colors - you can easily choose a product that will harmoniously fit into your bathroom interior.
- Compactness - installation of such sinks can be done in rooms of any size, as well as hide all water supply and drainage communications.
- Easy installation - you can do it yourself with ease.
to contents ↑Important! There are no major flaws in this product. The only drawback is the inability to install the bedside table under the structure because of the pedestal.
Sink installation
The design of the product is simple and does not consist of complex elements. Installation will not be difficult for you.
Necessary tools and materials:
- Screwdrivers.
- Drill.
- Drill.
- Key.
- Hammer.
- Level.
- Bolts.
- Silicone sealant.
- Marker.
Mounting
Installing a washbasin “tulip” consists of the following steps:
- Bring out the feed in the right place and equip the drain in the floor.
- Mark with a marker the place where the holes in the wall will be made, to which the sink will be fastened.
Important! The holes in the wall should match the holes in the foot.
- Using a drill, make a hole in the marked spot.
- Attach a siphon and a grid with a gasket to the wrong side of the rack to the bolts, carefully seal.
- Install the “tulip” bowl bowl on the coupling bolts.
- In the center of the bowl, mount the pedestal.
Important! Be sure to drain the corrugated hose into the drain pipe through a special opening.
- Secure the entire structure with bolts and washers to the wall.
- Work through all the joints with a transparent silicone sealant to reduce leakage, to connect the product as tightly as possible to the wall.
- Connect a mixer to the sewer pipe system.
Installation will take you a little time if you clearly follow these instructions.
to contents ↑How to disassemble the sink?
It so happens that it is necessary to change pipes or some other plumbing equipment that is hidden behind a leg.
How to remove the “tulip” sink:
- Turn off the water and check by opening the mixer whether water is pouring.
- Remove the siphon carefully, then drain, only after that wash basin.
Important! Water in the siphon may remain after turning off the water, so put a bucket or basin before removing the siphon so as not to stain the walls and floor.
- Remove the pedestal and disassemble the plumbing under it.
Stock footage
The Tulip sink has several advantages, including an elegant look, practical design, durability and strength. Do-it-yourself installation of the Tulip washbasin does not require professional knowledge during installation and dismantling. You can easily choose the size and style for the design of the bathroom
- How to choose a vacuum cleaner taking into account the characteristics of the house and coatings?
- What to look for when choosing a water delivery
- How to quickly create comfort at home - tips for housewives
- How to choose the perfect TV - useful tips
- What to look for when choosing blinds
- What should be running shoes?
- What useful things can you buy in a hardware store
- Iphone 11 pro max review
- Than iPhone is better than Android smartphones
 (No ratings yet)