

Installation of a rack ceiling in the bathroom
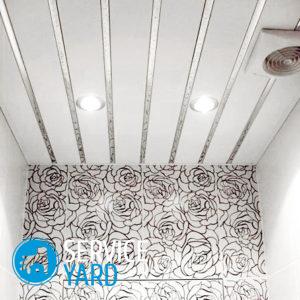
Ceilings with aluminum rails look great in bathrooms. Installing a rack ceiling in the bathroom is a rather time-consuming procedure, but the step-by-step instructions given in the article will allow you to successfully cope with the task. If the room is in a standard form, then the work is greatly simplified. To equip the ceiling structure in a room with a non-standard configuration, it is advisable to call a master.
to contents ↑pros
If everything is done neatly and correctly, the installation of a rack ceiling in the bathroom has the following advantages:
- Combination with any style decisions.
- Existence of a special antistatic covering which is not attracting dust.
- Ease of care.
- Durability. The design retains a presentable appearance for a very long time.
- Resistance to corrosion.
Calculations
First, find out what is included in the structure of the rack ceiling. These are such elements:
- Corner guide profiles.
- Universal suspensions.
- Bearing profiles or stringers.
- Decorative interlinear inserts.
- Aluminum ceiling rails.
Important! Installation of a rack ceiling in the bathroom is possible only after the tile has been laid on the walls and floor.
System Features:
- The length of the structure, as a rule, does not exceed 4 m.
- Width ranges from 100 to 150 mm.
- The dimensions of the decorative insert in length and width are 16 and 4 mm, respectively.
Important! Ceilings look more aesthetically pleasing using materials with a mirror surface.
In order to accurately calculate the required amount of materials, it is necessary to measure the dimensions of the room with maximum accuracy. Building roulette is best suited for these purposes. If there is no roulette, then an ordinary tailor's centimeter tape is well suited for measurement. Of course, the measurements will be obtained with greater errors than when using roulette, but this is not critical. Based on the calculated area of the room, you can determine the right amount of material.
There is another way to determine the number of slats and inserts to them:
- Add up 2 digits: the width of the slats and inserts.
- Divide the length of the room by the resulting figure.
Example:
- The width of the insert between the rails is 0.016 m.
- The width of the ceiling rail is 0.1 m.
- The length of the room is 3.0 m.
Payment:
- 0.016 + 0.1 = 0.116 m.
- 3.0 / 0.116 = 26 (if you get a fractional result, round it up).
to contents ↑Important! It is also necessary to take into account the standards of the interval between stringers or supporting profiles:
- The interval between adjacent profiles is 1.2 m. Smaller distances are allowed.
- The minimum distance from the parallel wall is 0.4 m.
- When calculating the wall angle profile, add a margin of about 3% to the calculated figure. In this case, the errors made in the calculations will not be critical.
Markup:
- Beat a horizontal line along the contour of the room, using a painting thread or a building level.
- Decide on the extreme lowest overlap point by performing special measurements with a tape measure. Ceiling in the bathroom without such preliminary measurements is impossible.
- Subtract the overall height of the luminaire from the distance to the lowest overlap point obtained. Transfer to the obtained value the already broken horizontal.It is this point obtained by calculation that corresponds to the front surface of the future ceiling.
Rail mounting
You can start this work immediately after the horizontal plane is repelled. This design is not bearing. It is necessary so that you can hide the places where the slats are adjacent to the walls.
Corners are preferably cut immediately along the length. Pre-drill holes in the profile and walls for the fasteners.
to contents ↑Stringers
Stringers are fixed on special suspensions or on the ceiling. It is advisable to use universal butterfly mounts or self-tapping mounts through dowels.
to contents ↑Important! The length of the stringers should be less than the width of the room by 100-150 mm.
Aluminum battens
To install a rack ceiling in a bathroom with aluminum parts, follow these instructions:
- The first stage - cutting rails. The required length is equal to the span between the walls minus 1 cm.
Important! To cut the rails, use a grinder or scissors for cutting metal. It is important not to scratch the front of the rail, otherwise it will look ugly.
- The first to mount the second and penultimate rails. This is due to the fact that the geometry of the walls, unfortunately, is far from ideal. The slats adjacent to the guide corners, you just need to trim.
- The installation process itself is not difficult. Reiki snap on the locks of the stringer. No need for any additional mounts.
You can correct the surface of the mounted ceiling until the inserts are installed. When mounting on self-tapping screws, this is easier to do. It is enough to twist and twist the parts in such a way as necessary. The last rails are installed last. The final stage of repair is the self-installation of interpanel inserts.
to contents ↑Important! Remove the protective film only after all aluminum structures are mounted.
Which option to choose?
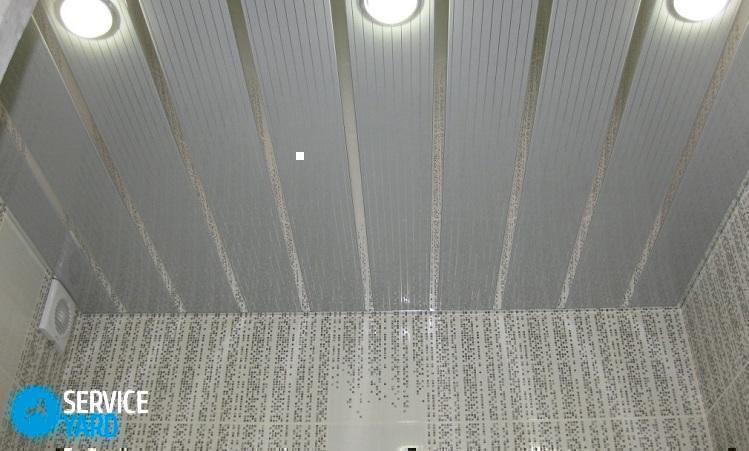
Do-it-yourself ceiling installation in the bathroom is also possible with plastic battens. The appearance of the ceiling and repair costs are the determining factors when choosing between plastic and aluminum. With proper use, both options will last a long time. In terms of performance, they are equivalent.
As a rule, rack-type ceilings are installed precisely in bathrooms, since they are moisture resistant, fungus or mold does not start on them. There is one more variety of designs - rack suspended ceilings.
Like aluminum rails, plastic elements are immune to moisture. In addition, the rack structure due to the loose fit of the rails provides good ventilation. You can arrange the elements in the length or width of the room, depending on its configuration.
to contents ↑Plastic slatted ceiling in the bathroom - do-it-yourself installation
As is the case with aluminum elements, pre-markup, but with greater accuracy. The marked border for installing the end profile is a solid line around the perimeter of the room. It is necessary to treat the markup especially carefully. If you execute it carelessly, it is unlikely that the ceiling will look beautiful.
Important! Before you install rack ceilings for the bathroom, you need to perform all other finishing work in the room.
Further work comes down to the following:
- Using a hammer drill, make several holes along the marked perimeter line. The interval between the holes is 0.5 m. Holes are used to fasten the profile.
- The next step is fixing the baseboard. Cut the material so that all its irregularities are hidden. Inside the baseboard there are special elements for fastening.
Important! The distance of the tires from the nearest walls should be from 300 mm. Failure to comply with these conditions may result in installation problems.
- The final stage of preparatory work is the cutting and installation of panels.The main thing is to precisely cut the canvas, no longer than necessary.
- After all the preparatory work is completed, begin to install the fasteners. Insert the elements into the end profile gradually and very carefully. When mounting the subsequent panel, be sure to strengthen the intermediate profile.
Stock footage
We hope that now the task of installing the ceiling structure will become fully feasible for you.
- How to choose a vacuum cleaner taking into account the characteristics of the house and coatings?
- What to look for when choosing a water delivery
- How to quickly create comfort at home - tips for housewives
- How to choose the perfect TV - useful tips
- What to look for when choosing blinds
- What should be running shoes?
- What useful things can you buy in a hardware store
- Iphone 11 pro max review
- Than iPhone is better than Android smartphones
 (No ratings yet)